
Dehancer Pro Ae Pr v7.3.1
Primary Keyphrase: film emulation plugin
Description:
Download Dehancer Pro v7.3.1 for Adobe After Effects and Premiere Pro, the definitive film emulation plugin suite that brings authentic analog color and texture to your digital footage. With over 60 real photographic and motion picture film stocks, complete analog control over every aspect of the film image, and advanced tools like Halation, Bloom, and Film Grain, Dehancer Pro transforms your video into genuine cinematic art.
Dehancer Pro is built on decades of film shooting and darkroom experience, combining scientific color science with precise image processing to capture the exact behavior of real film. Unlike simple LUTs or one-click filters, this plugin gives you true analog control over the entire film development and printing process—from selecting specific film stocks to adjusting push/pull processing, CMY color head settings, and print film emulation.
Version 7.3.1 Key Features:
- 60+ Film Profiles: Choose from iconic stocks including Kodak Vision3, Kodak Portra 400, Cinestill 800, Ilford HP5 Plus, Kodak Eastman 5222, and Kodachrome 64—both color and black & white
- Print Films: Two authentic motion picture print film emulations (Kodak 2383, Fujifilm 3513) with unique character for final color timing
- Photo Papers: Optical printing on Kodak Endura Glossy (color) and Slavich Bromportrait (warm-tone black & white)
- Film Grain: Proprietary algorithm reconstructs images with fine grain based on color and luminance detail—far superior to simple grain overlays
- Halation: Authentic red-orange halos around highlights and contrast edges that make skin tones more vibrant and appealing
- Bloom: Soft mist-like glow around bright subjects for vintage, dreamy aesthetics
- Film Damage: Realistic dust, hair/fibers, and scratches for authentic analog artifacts
- Film Breath & Gate Weave: Subtle frame-to-frame variations in exposure/contrast and mechanical gate movement for organic “film feel”
- CMY Color Head: Accurate recreation of photographic enlarger color filters with Print Toning for full subtractive color control
- Film Developer & Compression: Optimize processing for specific shots and recreate film-like highlight rolloff
- Overscan: Faithful recreation of perforations, film gate, and inter-frame spaces from real film scans
- Defringe: Remove unwanted chromatic aberration that interferes with Halation and Bloom effects
- 130+ Camera Log Profiles: Support for major video cameras and drones including Filmic Pro Log and Apple ProRes Log
- LUT Generator: Export your grades as Small (17x17x17) or Normal (33x33x33) .cube LUTs for on-set previews or sharing
- ACES Native: Full support for ACES color management pipeline
- Tool Profiles: Grain, halation, bloom, and damage profiles for 8, 16, 35, and 65mm formats
Version 7.3.1 Specific Updates (April 2025):
- Fixed ProfileActivator behavior for simultaneous license and subscription presence
- Fixed subscription check behavior when a license is active
- Plugin visibility in After Effects fixed (no need to manually copy plugin files)
Perfect For:
- Colorists seeking authentic film emulation with true analog control
- Filmmakers and video editors wanting to add cinematic texture to digital footage
- Music video and commercial producers needing vintage film aesthetics
- Content creators looking to differentiate their work with genuine film character
- Anyone tired of fake-looking film LUTs and one-click filters
System Requirements:
- Adobe After Effects 2021 and higher
- Adobe Premiere Pro 2022 and higher
- Windows 10/11 (64-bit) or macOS 11+
- 4GB RAM minimum (16GB+ recommended)
- 100MB available disk space
- GPU recommended for optimal performance
Note: License keys are application-specific—a Dehancer license for DaVinci Resolve cannot be used for the Ae/Pr version. The Studio subscription allows activation across all host applications.
Downloading and installing the plugin / macOS
1. Make sure that your computer meets the system requirements for the plugin to work correctly.
2. Download the latest version of the plugin from Dehancer.
2.1 Go to the Products → Adobe Ae, Pr plugins.
2.2 Select the desired plugin.
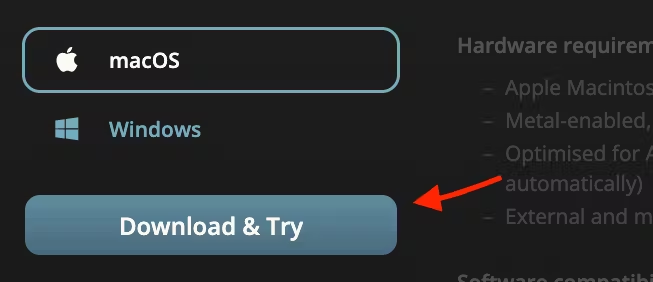
2.3 Select macOS as your operating system on the product page.
2.4 Hit Download & Try button. Your download will start automatically.
3. Unzip the downloaded zip file, if your system didn’t do it automatically.
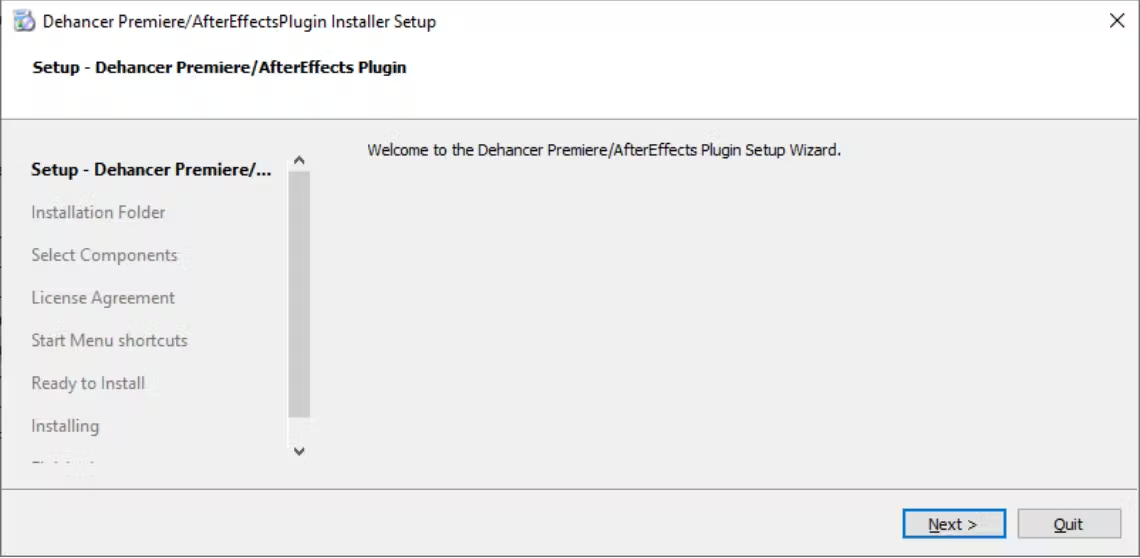
4. Run the installation file and follow the installation steps.
5. Normally, older plugin versions will be removed during the installation procedure automatically. If the update does not technically allow to maintain settings compatibility, new version will be installed as a separate, independent plugin.

Downloading and installing the plugin / Windows
1. Make sure that your computer meets the system requirements for the plugin to work correctly.
2. Download the latest version of the plugin from Dehancer.
2.1 Go to the Products → Adobe Ae, Pr plugins.
2.2 Select the desired plugin.
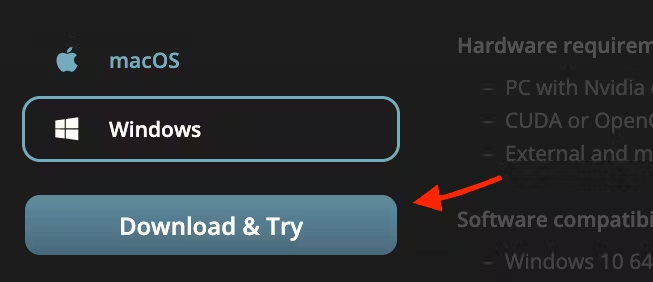
2.3 Select Windows as your operating system on the product page.
2.4 Hit Download & Try button. Your download will start automatically.
3. Unzip the downloaded zip file, if your system didn’t do it automatically.
4. Select the appropriate distributive for CUDA/OpenCL GPU frameworks.
5. Run the installation file and follow the installation steps.
6. Normally, older plugin versions will be removed during the installation procedure automatically. If the update does not technically allow to maintain settings compatibility, new version will be installed as a separate, independent plugin.
Note: After Effects and Premiere Pro share the same plugin installation, so if you are using both Adobe products, one Setup and Activation procedure is just enough.
GPU render selection [Pr] / macOS
In Adobe Premiere, you need to select the correct GPU engine when you create the New Project to make rendering and preview run at high performance. Otherwise, the system will automatically switch to software renderer, making performance extremely poor. Notice that this setting can only be changed when creating the project.
- In the New Project window go to: General → Video Rendering and Playback → Renderer
- Select the Metal rendering engine.
GPU render selection [Pr] / Windows
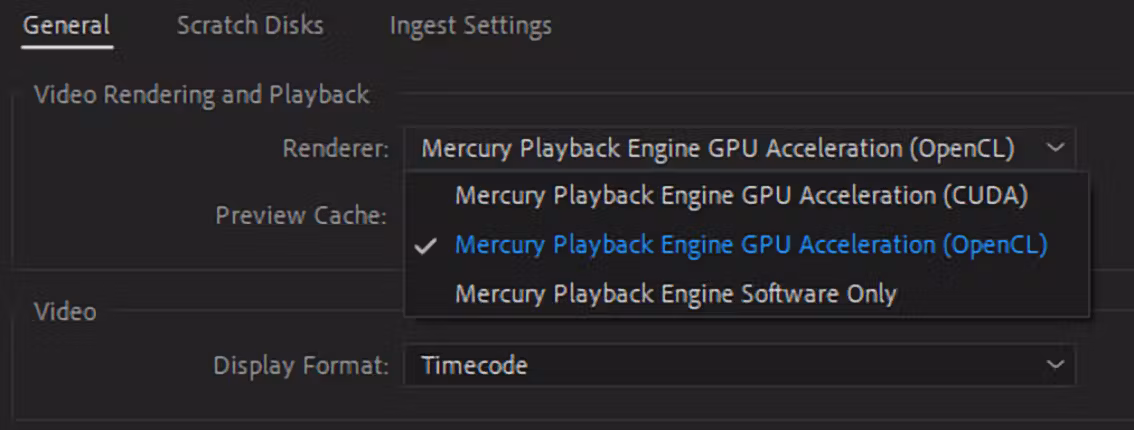
In Adobe Premiere, you need to select the correct GPU engine when you create the New Project to make rendering and preview run at high performance. Otherwise, the system will automatically switch to software renderer, making performance extremely poor. Notice that this setting can only be changed when creating the project.
- In the New Project window go to: General → Video Rendering and Playback → Renderer
- Select your GPU engine depending on the plugin distributive you used for the installation – CUDA or OpenCL.
Downloading Film and Camera Profiles
💡 Before using Dehancer you have to download film and camera profiles.

1. At the final step of the installation procedure, the Dehancer Profiles widget will open and the profiles will be downloaded and installed automatically.
2. Once the profiles update is complete, close the widget. Now Dehancer is ready to use.
3. If for some reason the profiles were not downloaded during the installation, you will need to do it manually.
3.1 Apply Dehancer Plugin to any clip or Adjustment layer.
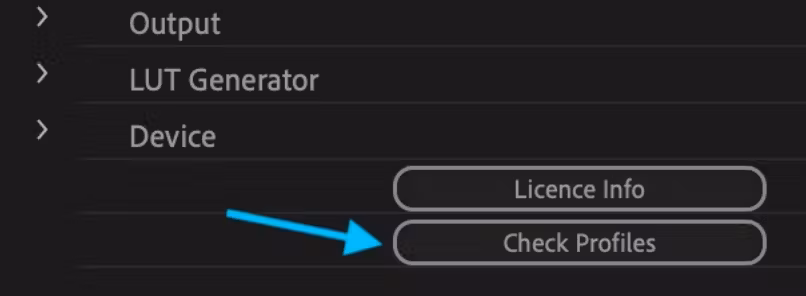
3.2 Go to Effect Controls panel → Dehancer, navigate to the bottom of the plugin settings and find the Check Profiles button. This allows you to download or update the profiles at any time.
Adding Dehancer to the Project (After Effects)
- After the plugin installation, restart After Effects if it was already running.
- Open a Project.
- Open the Effects & Presets panel (or press Ctrl+5).
- In the Effects & Presets tab, open the Film Emulation group and find Dehancer.
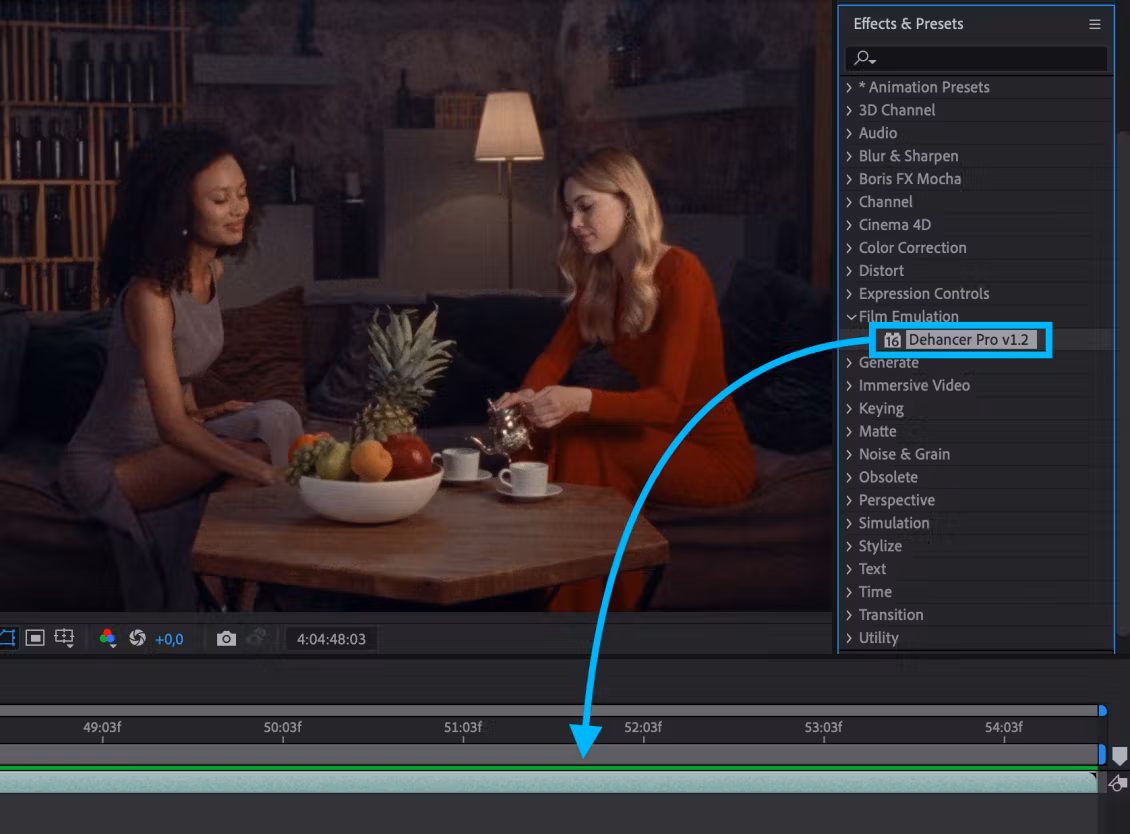
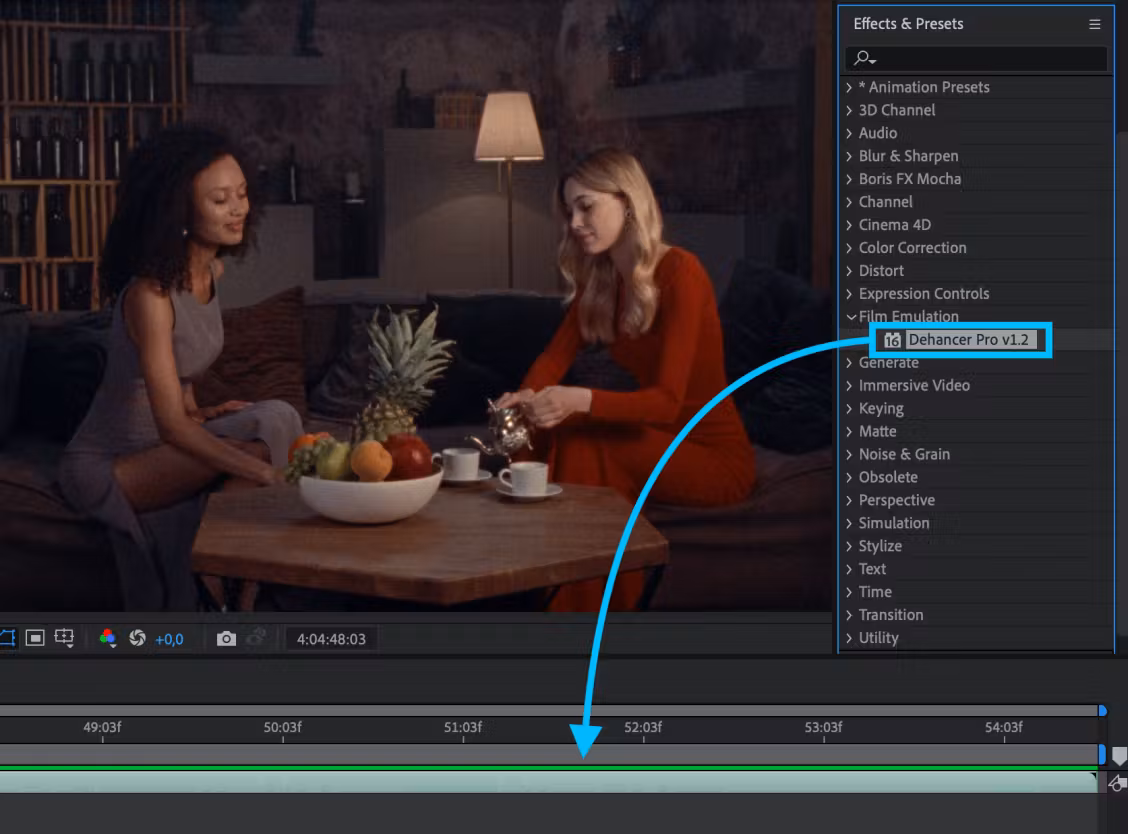
- Select a clip on the timeline, then drag and drop Dehancer to the clip. Also, you can double-click the effect to apply it to the selected clip.
💡 In the same way, Dehancer can be applied not only to the individual clips, but also to the Adjustment Layers, thus allowing to grade the entire timeline with a single Dehancer instance.
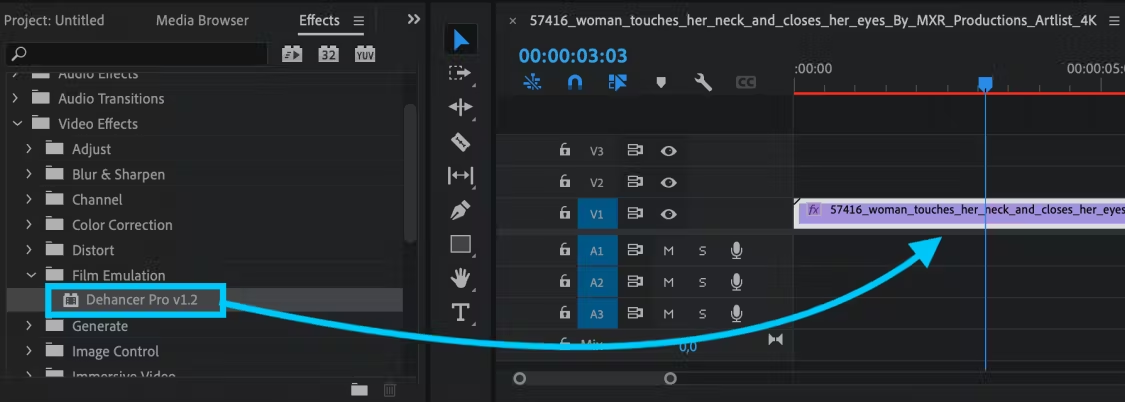
Adding Dehancer to the Project (Premiere Pro)
- After the plugin installation, restart Premiere Pro if it was already running.
- Open a Project.
- Open the Effects panel (or press Shift+7).
- In the Effects tab, open the Video Effects / Film Emulation group and find Dehancer.
- Select a clip on the timeline, then drag and drop Dehancer to the clip. Also, you can double-click the effect to apply it to the selected clip.
💡 In the same way, Dehancer can be applied not only to the individual clips, but also to the Adjustment Layers, thus allowing to grade the entire timeline with a single Dehancer instance.
Preview and Rendering quality settings (Premiere Pro)
When using Dehancer and other plugins with Adobe Premiere Pro, the Preview and the rendered footage may suffer from posterisation artifacts. This is caused by insufficient bit depth.
Maximum Preview quality:
- In the Premiere menu select Sequence → Sequence Settings.
- In the Video Previews section enable the Maximum Bit Depth checkbox.
- Optionally you can enable the Maximum Render Quality checkbox.
- Then you will get the warning alert, which in most cases can be ignored.
Maximum Render quality:

- Go to the Export tab.
- In the Video / Basic Video Settings enable the Render at Maximum Depth checkbox.
- Optionally you can enable the Use Maximum Render Quality checkbox.
Note:
These settings may significantly affect the plugin performance and memory requirements.
Elevate your motion graphics workflow with premium collection of After Effects plugins. Whether you are a seasoned professional or just starting your VFX journey, powerful tools designed to streamline complex tasks, unlock creative possibilities, and save you hours of rendering time. From stunning glitch effects and seamless transitions to advanced 3D extrusion and text animation tools, each plugin in our library is rigorously tested for compatibility with the latest versions of Adobe after Effects. Enhance your video production value today and download industry-leading plugins that help you create breathtaking visuals without the technical headaches. Browse our full range and find the perfect extension to supercharge your editing suite now.
➡️ ➡️ For more after effects Plugins 😀 😀
➡️ ➡️ System requirements AE
Reviews
There are no reviews yet.