
BlockSurfaces for Blender
BlockSurfaces v1.0.270 for Blender
The Ultimate Procedural Surface Tool
Download the BlockSurfaces v1.0.270 addon today. Therefore, you can generate unique surfaces instantly. Because complex materials require procedural variety, you need proper tools. However, manual texture painting takes many frustrating hours. Consequently, this powerful addon solves that problem completely. Furthermore, it provides a fast, node-based workflow. Thus, you can create stunning surface details in seconds.
Fast Procedural Generation
First, the core of this addon is speed. Specifically, it generates complex blocky textures instantly. Furthermore, you can adjust surface patterns easily. Additionally, the tool applies procedural noise seamlessly. Thus, you can build endless material variations quickly. Moreover, you can customize block dimensions perfectly. Consequently, your 3D models will look highly professional.
Advanced Material Management Features
Ultimately, realistic surfaces require advanced material control. Therefore, this addon includes smart shader tools. Specifically, you get easy surface variation presets. Furthermore, the algorithms preserve realistic edge wear perfectly. Additionally, the tools simulate beautiful abstract patterns. Consequently, your materials will look incredibly dynamic. Thus, the workflow reacts beautifully to your lighting.
Real-Time Optimization and Performance
However, heavy shader networks can slow down viewports. Therefore, the addon is perfectly optimized for performance. Specifically, it utilizes efficient native geometry node systems. Consequently, you can process complex material trees easily. Meanwhile, your viewport frame rate remains completely stable. Ultimately, this ensures a smooth and fast workflow.
Perfect for Material Artists
Additionally, this addon is ideal for shading artists. Furthermore, it suits texture painters and lookdev artists perfectly. Moreover, game developers will love the rapid material setup. Ultimately, it accelerates your entire 3D production pipeline.
System Requirements and Formats
Specifically, the addon requires Blender 3.6 or newer. Furthermore, it supports both Cycles and Eevee render engines. Additionally, you get regular free updates from the developer. Therefore, it works across all major operating systems. Moreover, you will need a standard workstation. Thus, 16GB of RAM is highly recommended. Consequently, a modern GPU ensures smooth viewport playback.
Installation and Usage Guide
First, download the zip file from your library. Next, open Blender and go to Edit Preferences. Then, select Add-ons and click Install. After that, enable the BlockSurfaces addon. Finally, add the node group to your material. Thus, your customized surface will be ready quickly.
What is Included Inside?
Specifically, the pack contains multiple surface presets. Furthermore, it includes smart procedural generation algorithms. Additionally, you get several block pattern variants. Moreover, there are detailed video tutorial guides. Ultimately, you receive everything for professional material creation.
Final Thoughts on the Addon
Ultimately, precise procedural materials evoke profound professional quality. Therefore, this addon provides the ultimate creative foundation. Furthermore, you can build detailed stylized environments. Alternatively, you can create complex abstract surfaces. Consequently, your shading vision becomes a stunning reality.
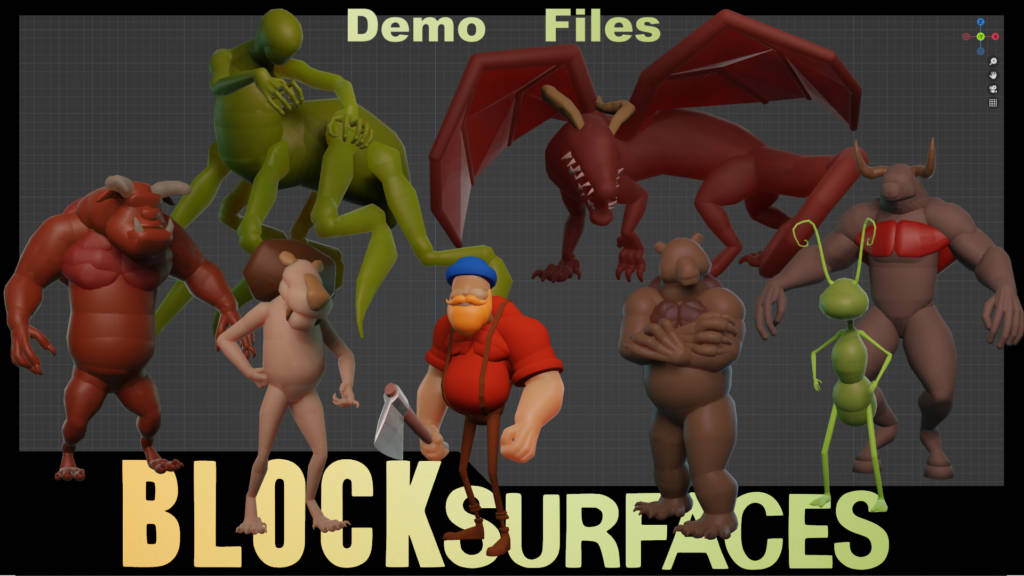
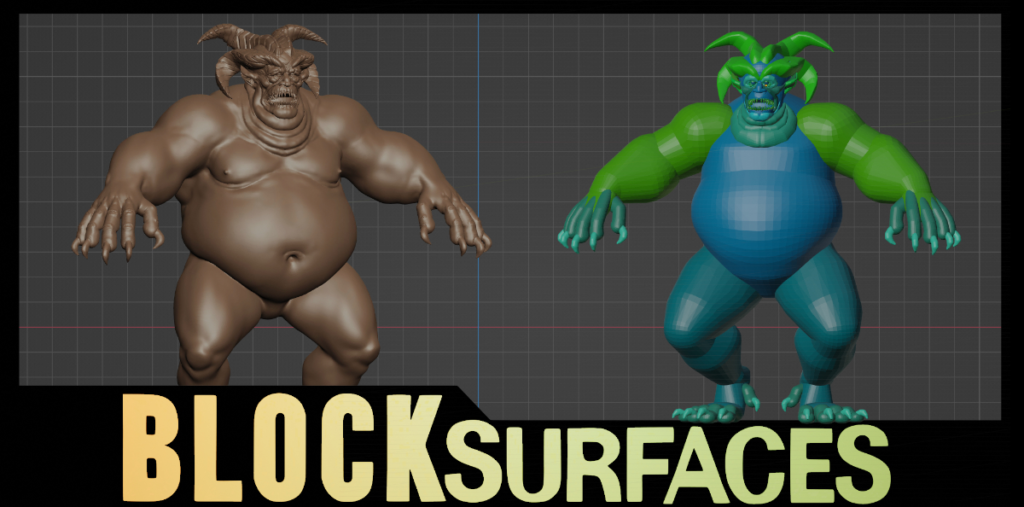
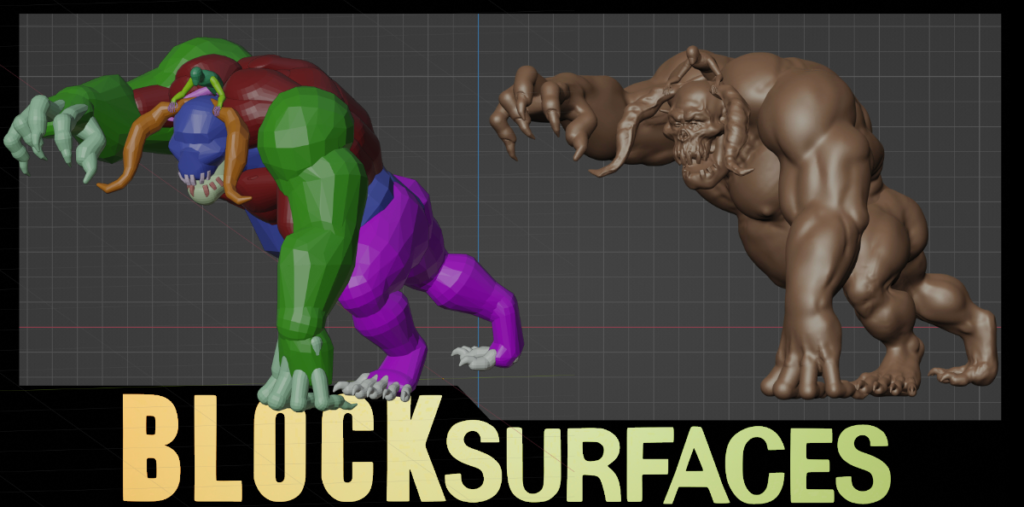
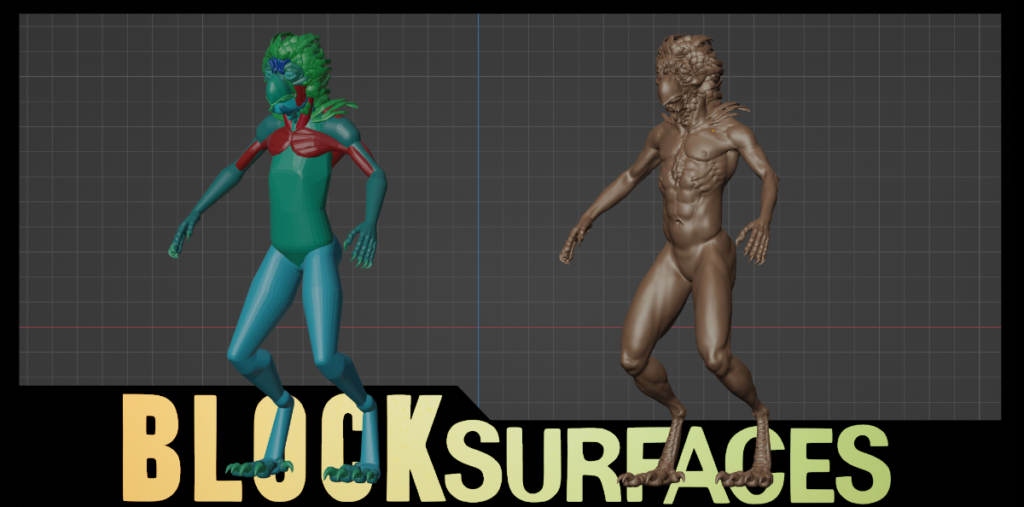
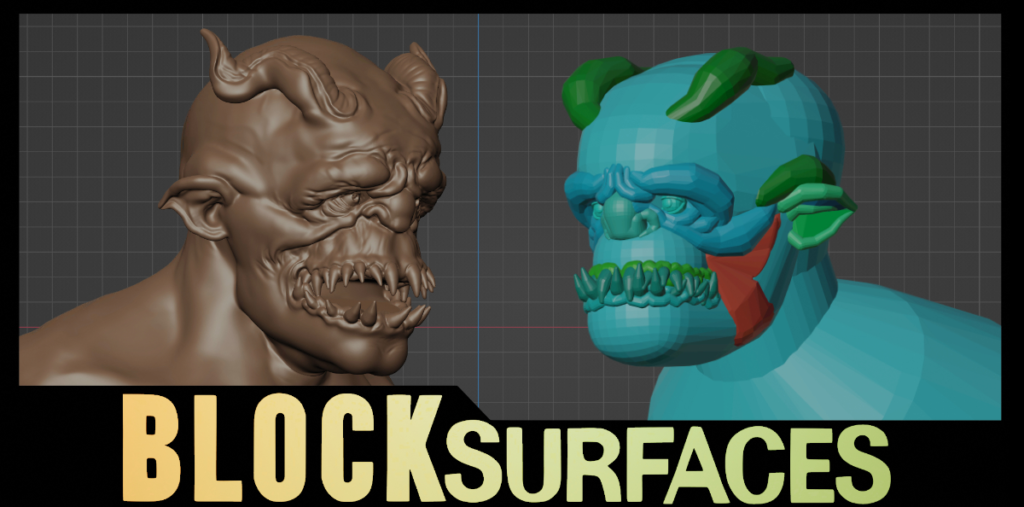
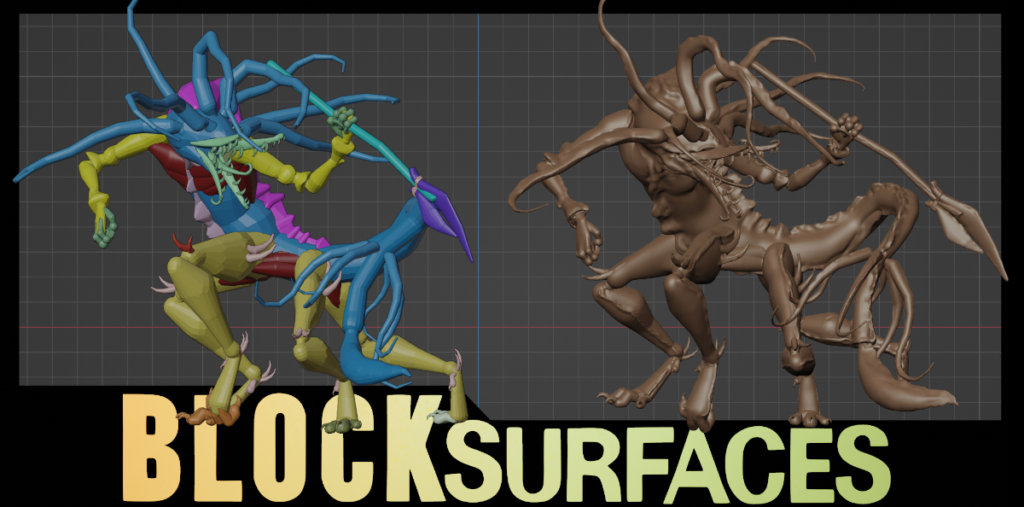
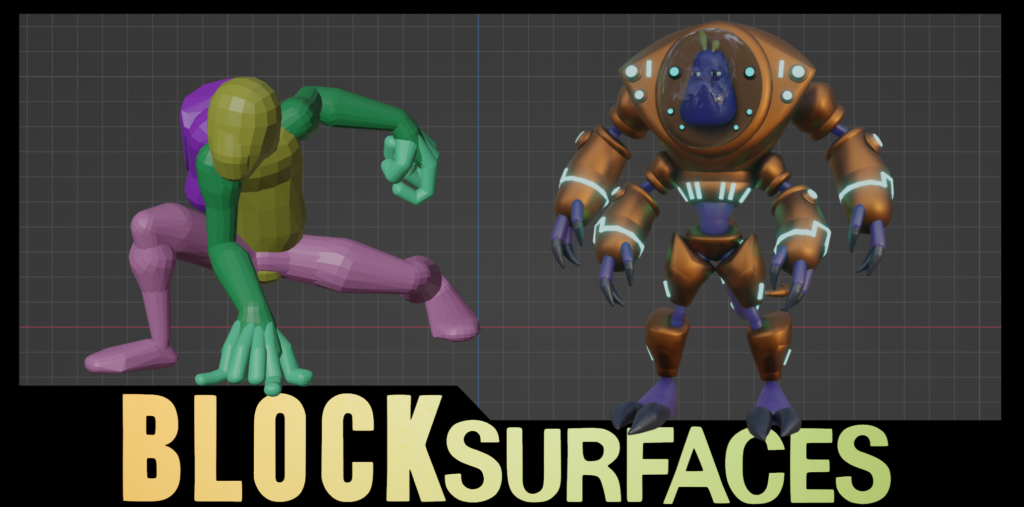
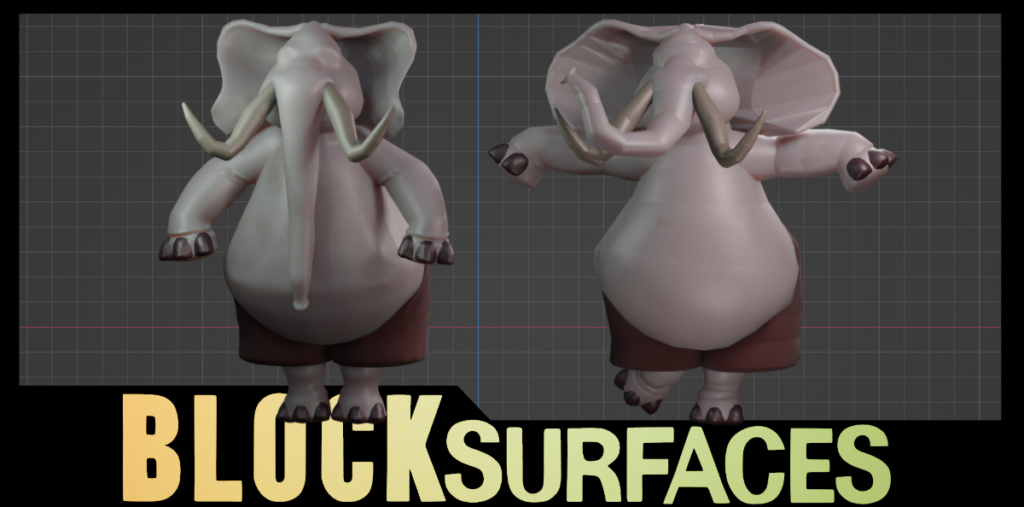
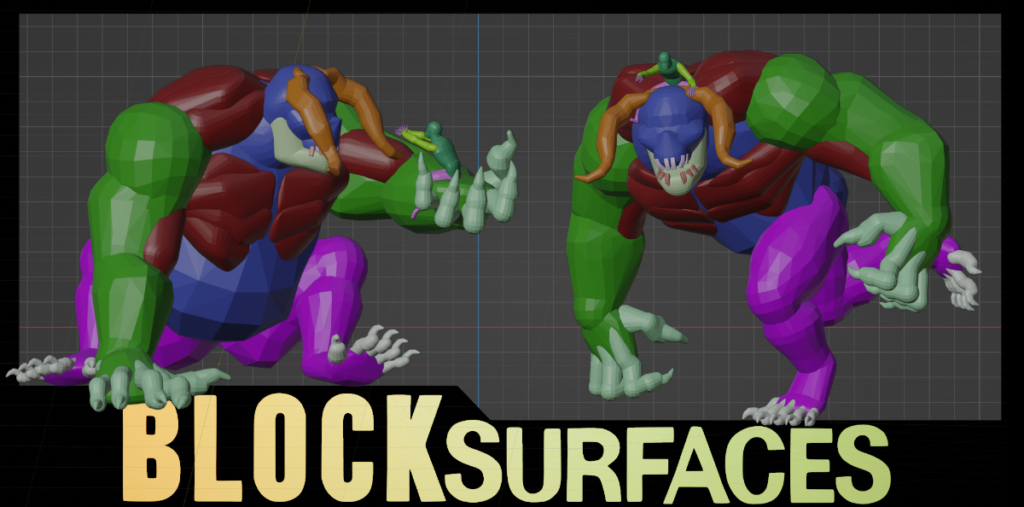
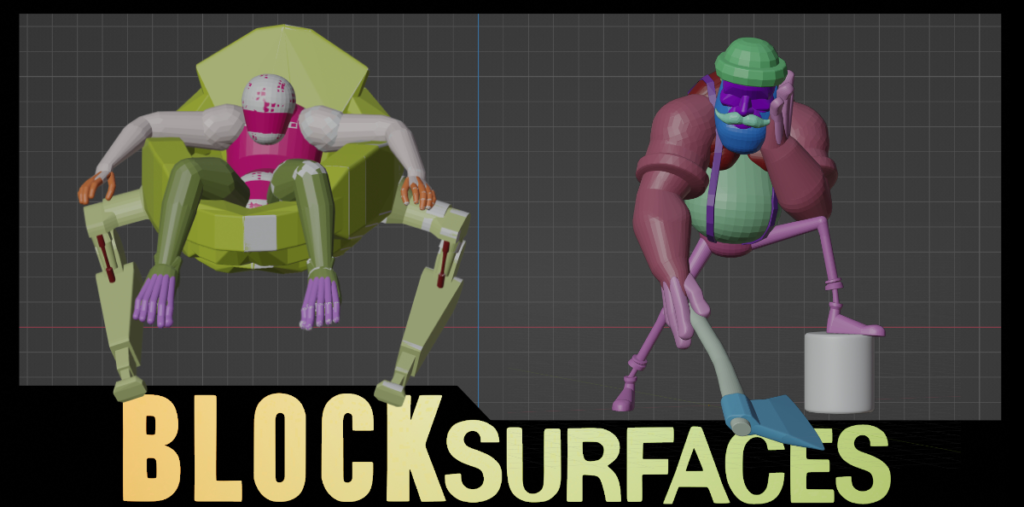
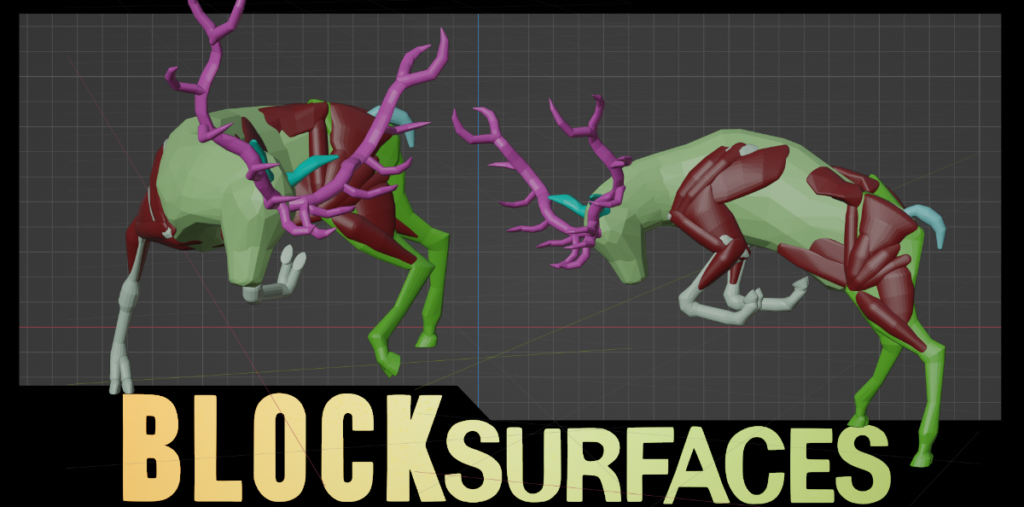
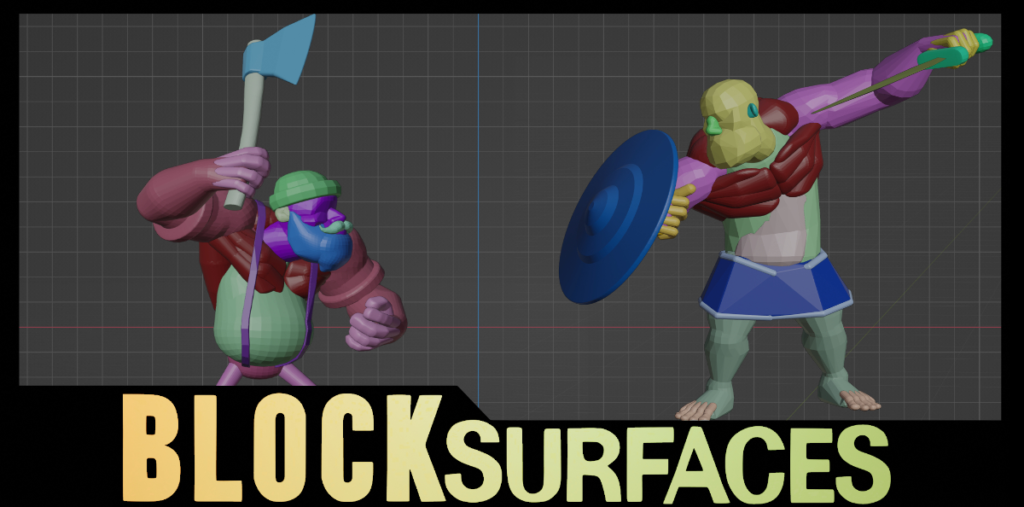
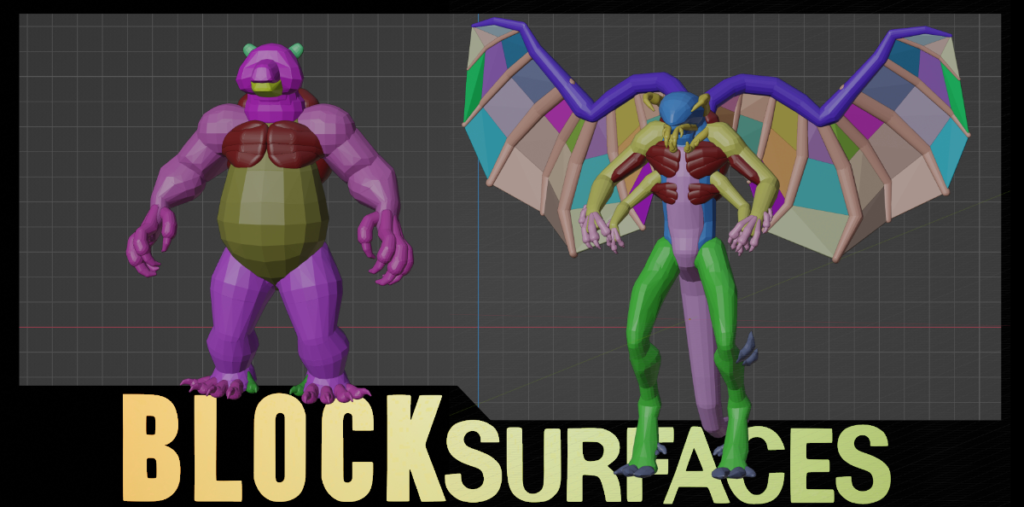
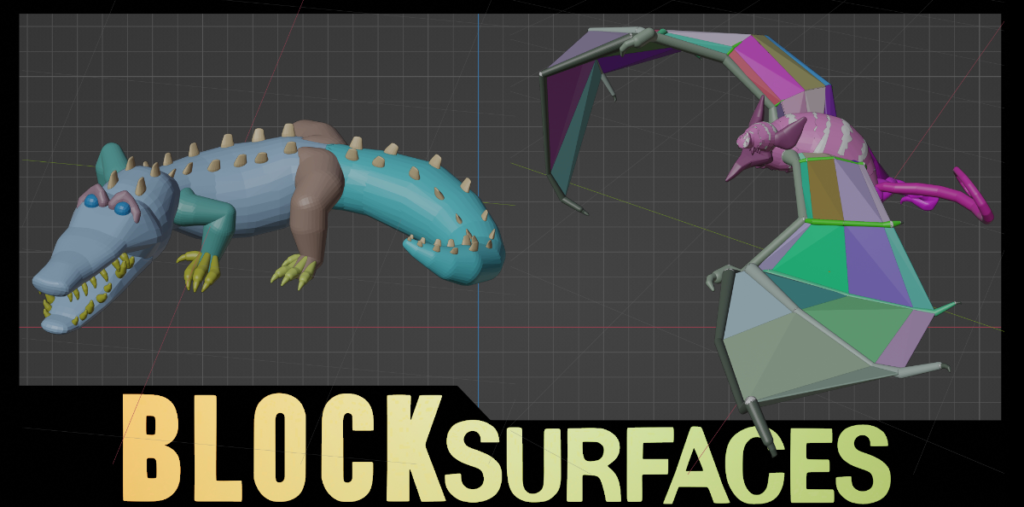
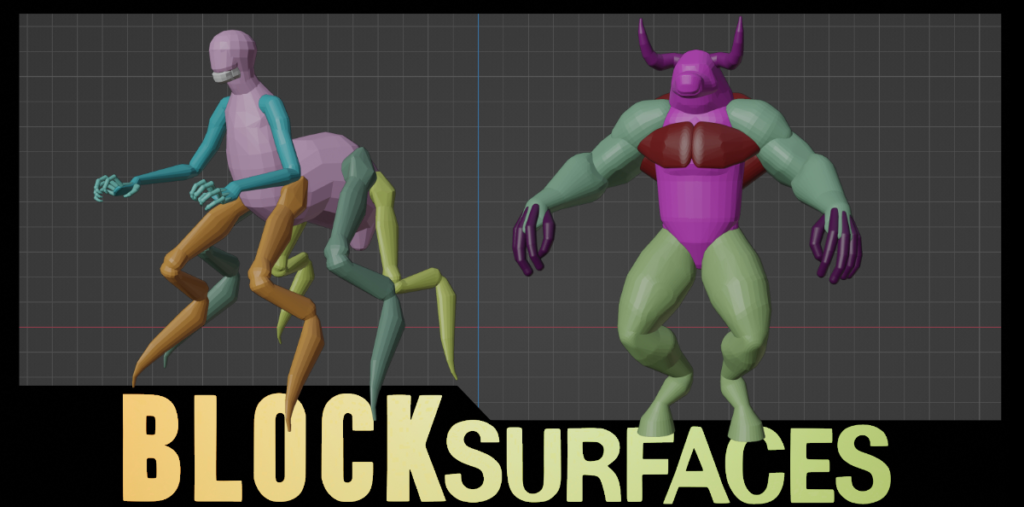
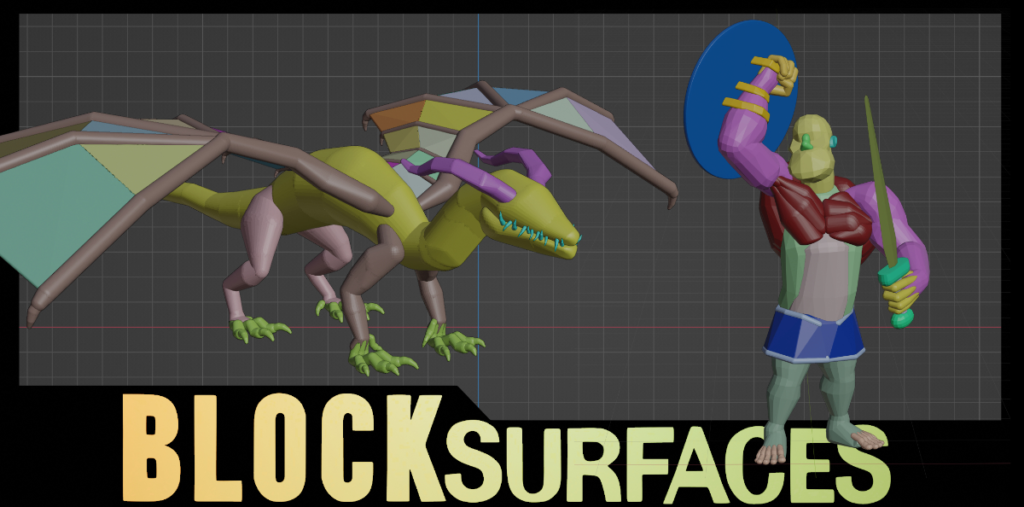
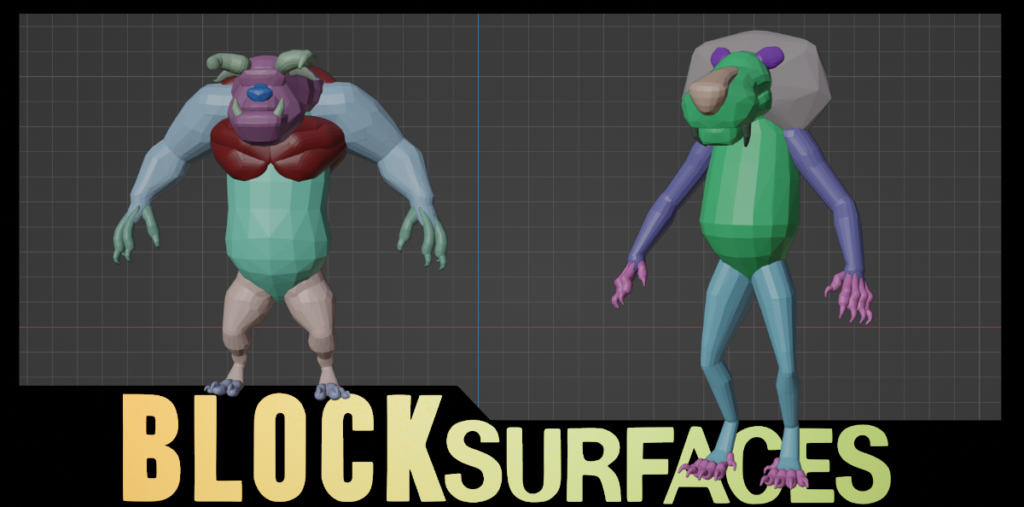
BlockSurfaces is a Blender add-on designed to speed up the most important stage of character creation: the blocking phase.
Build characters and creatures with connected forms, explore proportions and silhouettes faster, test poses without setting up a complex rig, and generate sculpt-ready meshes when your design is ready to move forward.
Whether you are creating stylized characters, creatures, hard-surface inspired forms, game art blockouts, or base shapes for sculpting, BlockSurfaces helps you stay focused on design decisions before spending hours on details.
Why BlockSurfaces?
Faster character and creature blocking
Create solid primary forms quickly before getting lost in sculpting details.
Connected forms instead of disconnected primitives
Build more readable structures for bodies, limbs, horns, tails, tentacles, armor-like shapes and stylized proportions.
Pose characters without complex rigging
Test gesture, action lines and compositions before committing to a final sculpt or retopology pass.
Sculpt-ready mesh generation
Generate the final model, or specific parts of it, and continue the workflow in Blender sculpting, retopology or ZBrush.
BlockMuscles for organic forms
Turn branches into BlockMuscles to simulate stretching, contraction and anatomical structure during the blocking stage.
Flexible shape design workflow
Move, rotate, scale, edit and sculpt forms directly from branches. Position objects along curves to create horns, tentacles, tails or repeated design elements with more control.
Who is BlockSurfaces for?
BlockSurfaces is made for character artists, creature artists, stylized character designers, game artists, 3D concept artists and Blender users who want a faster way to build strong base shapes before sculpting.
It can be useful for beginners who need a clearer blocking workflow, and also for professional artists who want to iterate silhouettes, proportions and poses faster.
Recommended workflow
- Start by blocking the main forms of the character or creature.
- Adjust silhouette, proportions and shape language.
- Duplicate and iterate limbs or forms when exploring alternatives.
- Test the pose without building a traditional rig.
- Generate a sculpt-ready mesh for Blender sculpting, retopology or a ZBrush pass.
What makes it different?
BlockSurfaces is not just a primitive-placement tool. It is designed around the early artistic stage of character creation: building readable forms, exploring structure, testing pose and preparing the model for the next production step.
Instead of jumping too early into detailed sculpting or manually adjusting disconnected objects, BlockSurfaces gives you a faster workflow for shaping, posing and preparing your character before the final sculpt.
Learning resources
BlockSurfaces is backed by over 230 videos, full tutorials and timelapses on the AitTools YouTube channel, so you can see the add-on in action and learn the workflow step by step.
Watch tutorials on the AitTools YouTube channel
Use cases
- Character blocking.
- Creature blocking.
- Stylized character creation.
- Base mesh creation.
- Sculpting preparation.
- ZBrush workflow preparation.
- Hard-surface inspired character shapes.
- Game art blockouts.
- 3D concept art.
- Shape design and silhouette exploration.
If you want to create stronger character blockouts, test ideas faster and move into sculpting with a cleaner base, BlockSurfaces can help you build the foundation of your model with more control.
More details, tutorials and feature documentation
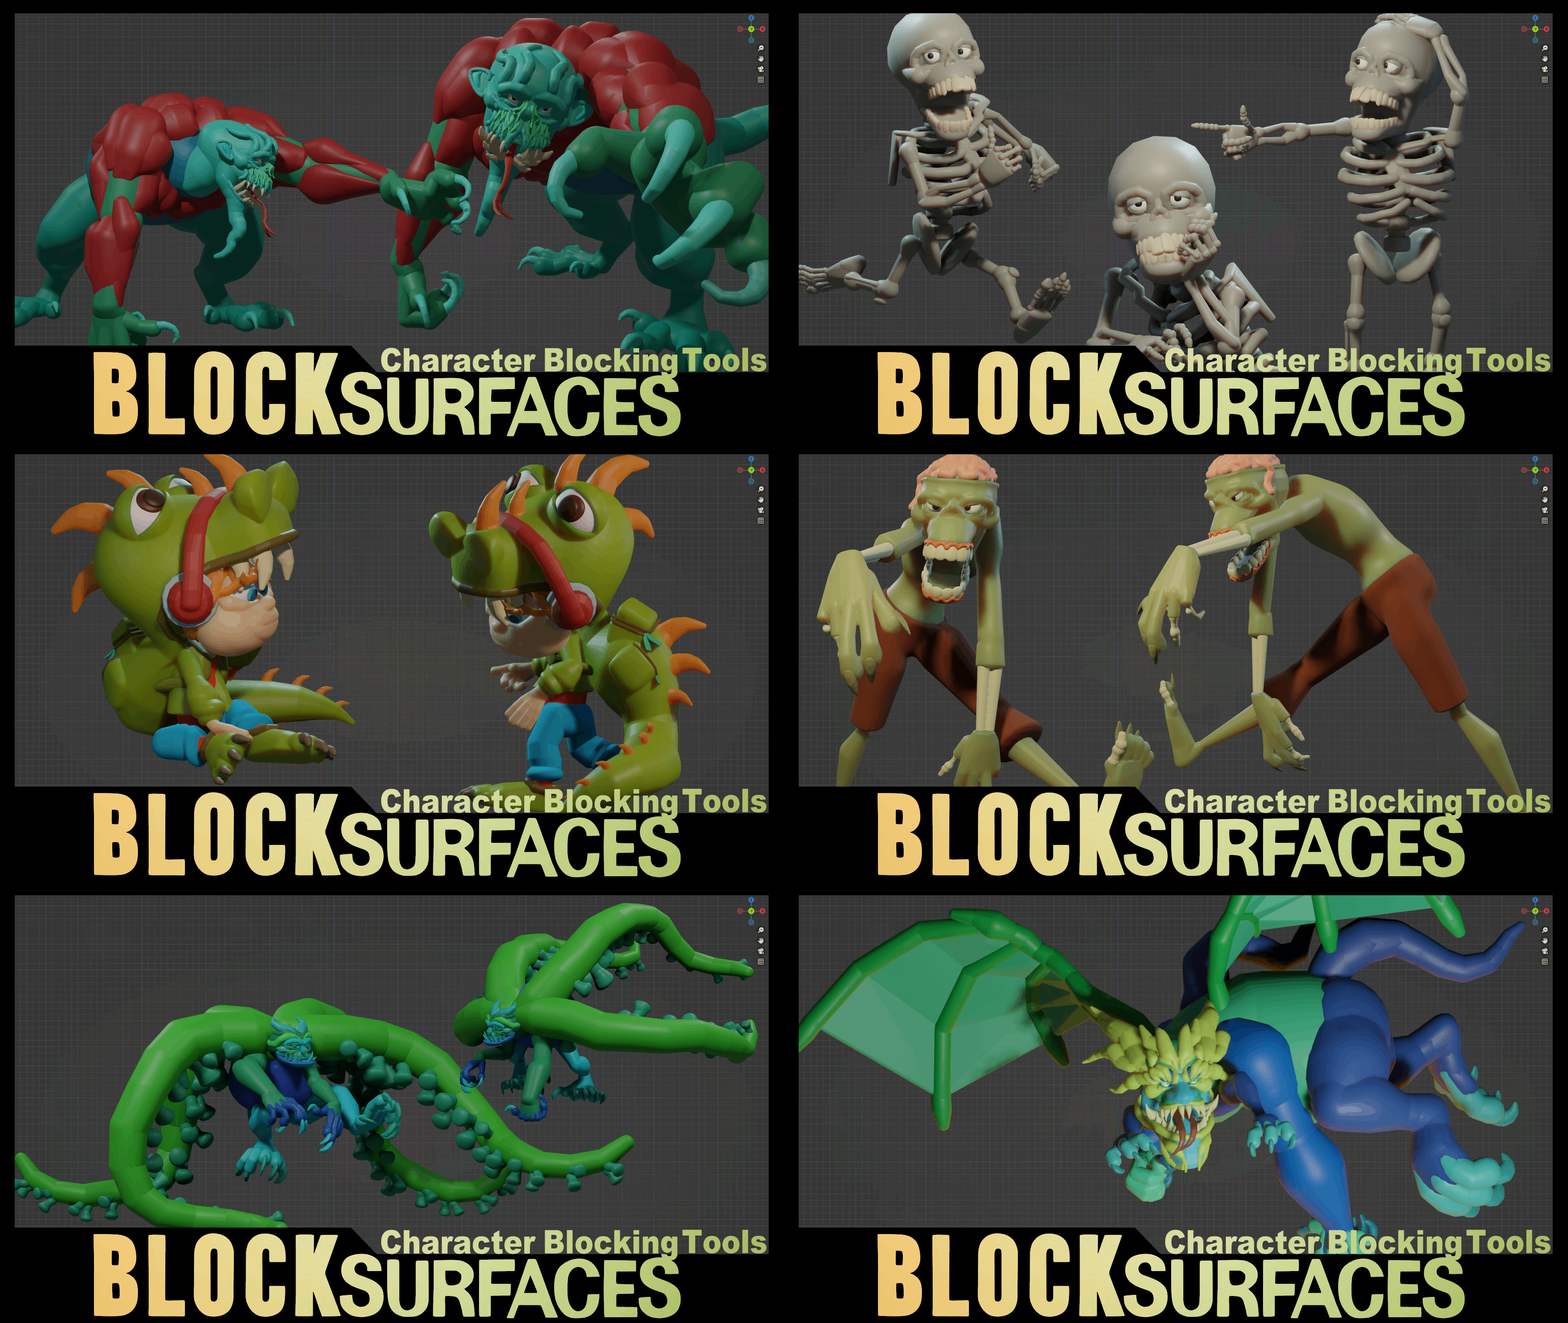
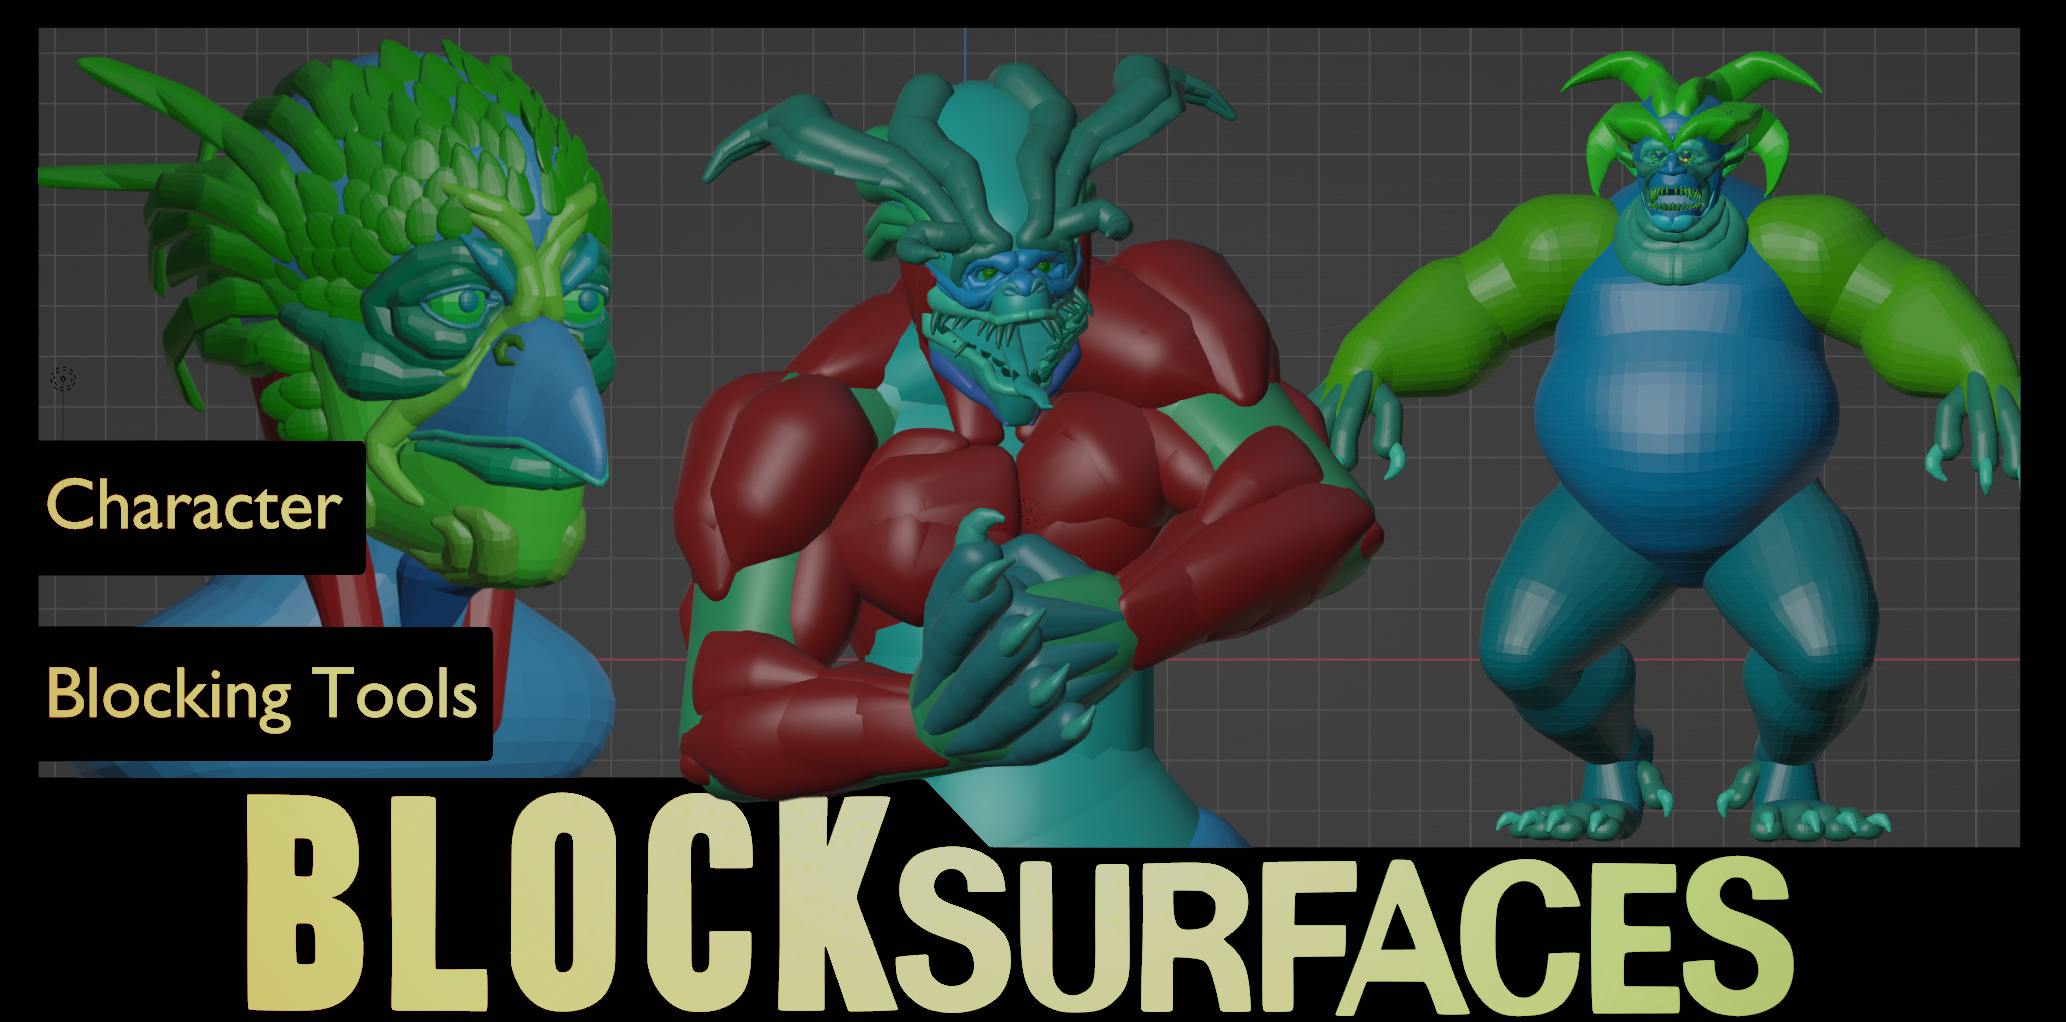
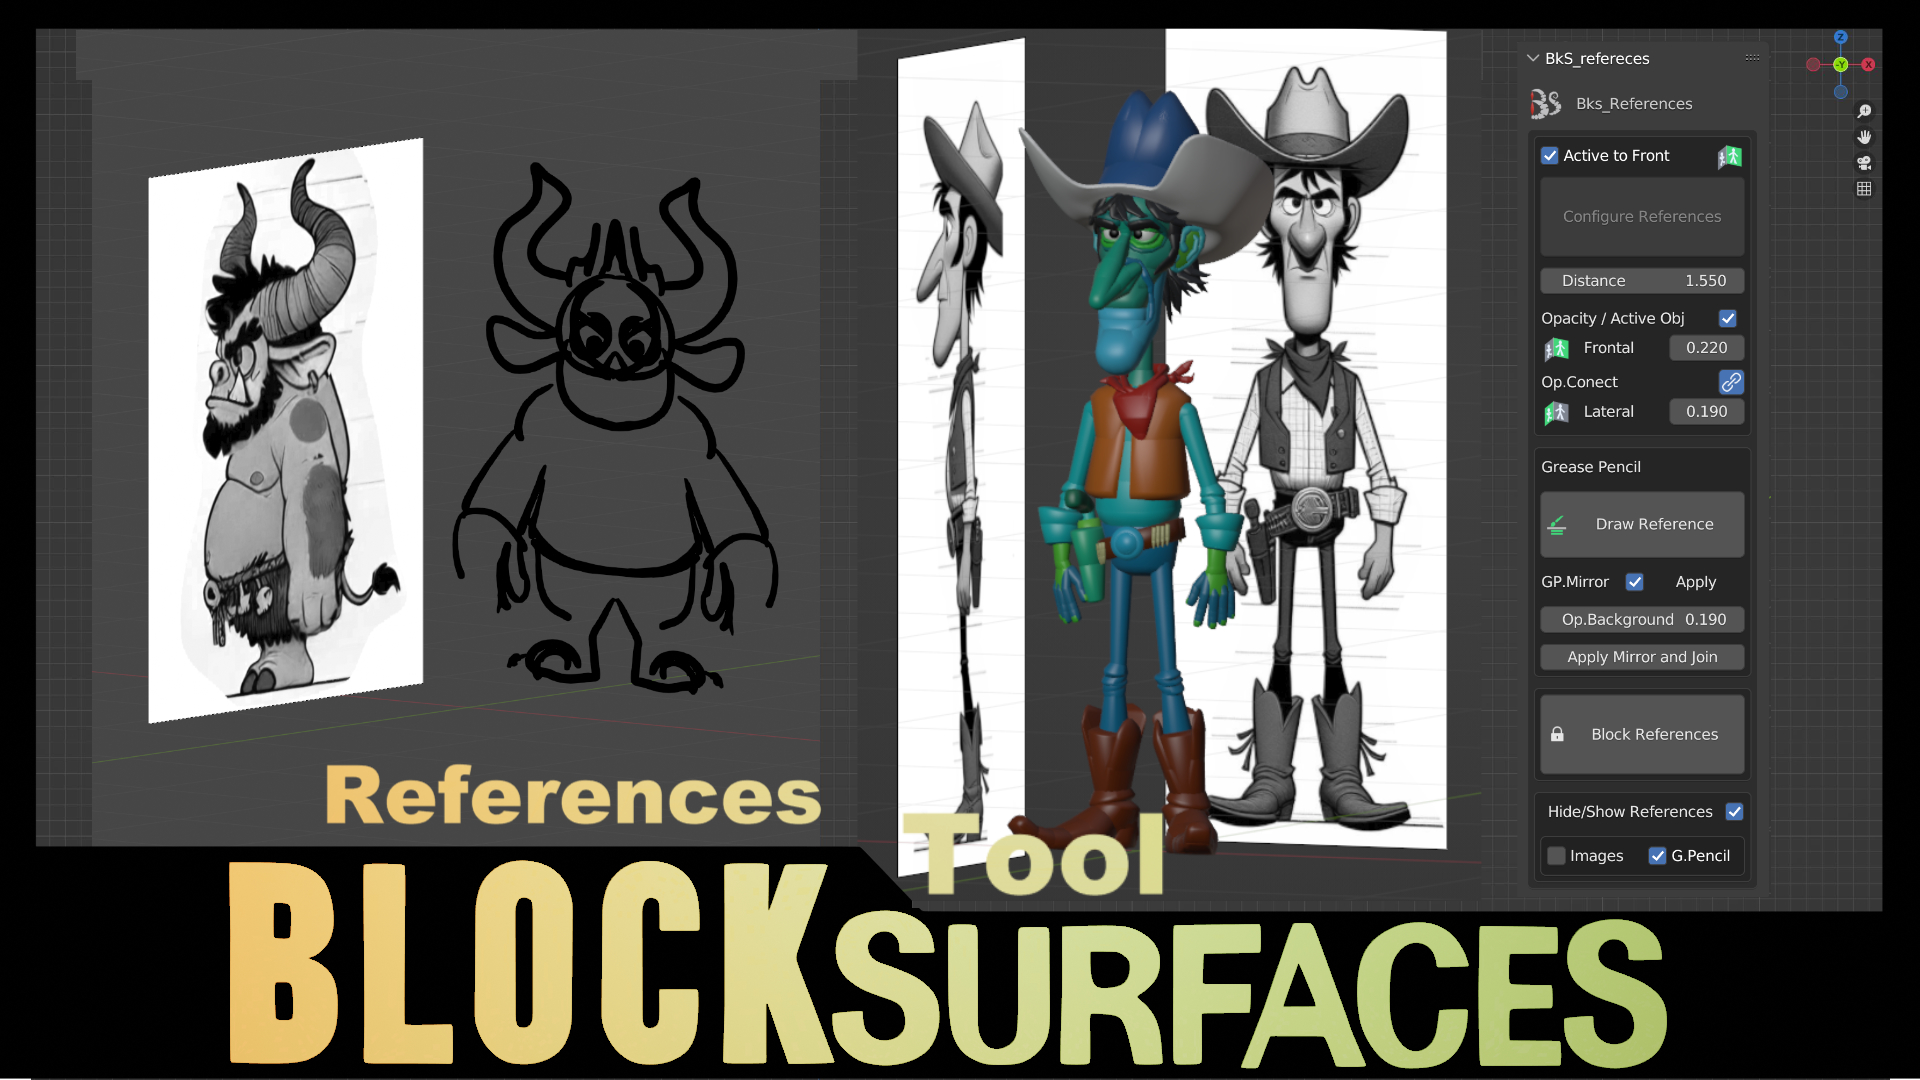
But don’t just take my word for it. Check out the YouTube channel for more than 100 videos with hours of timelapses, tutorials, and a full manual video explaining each option in each panel of the addon.
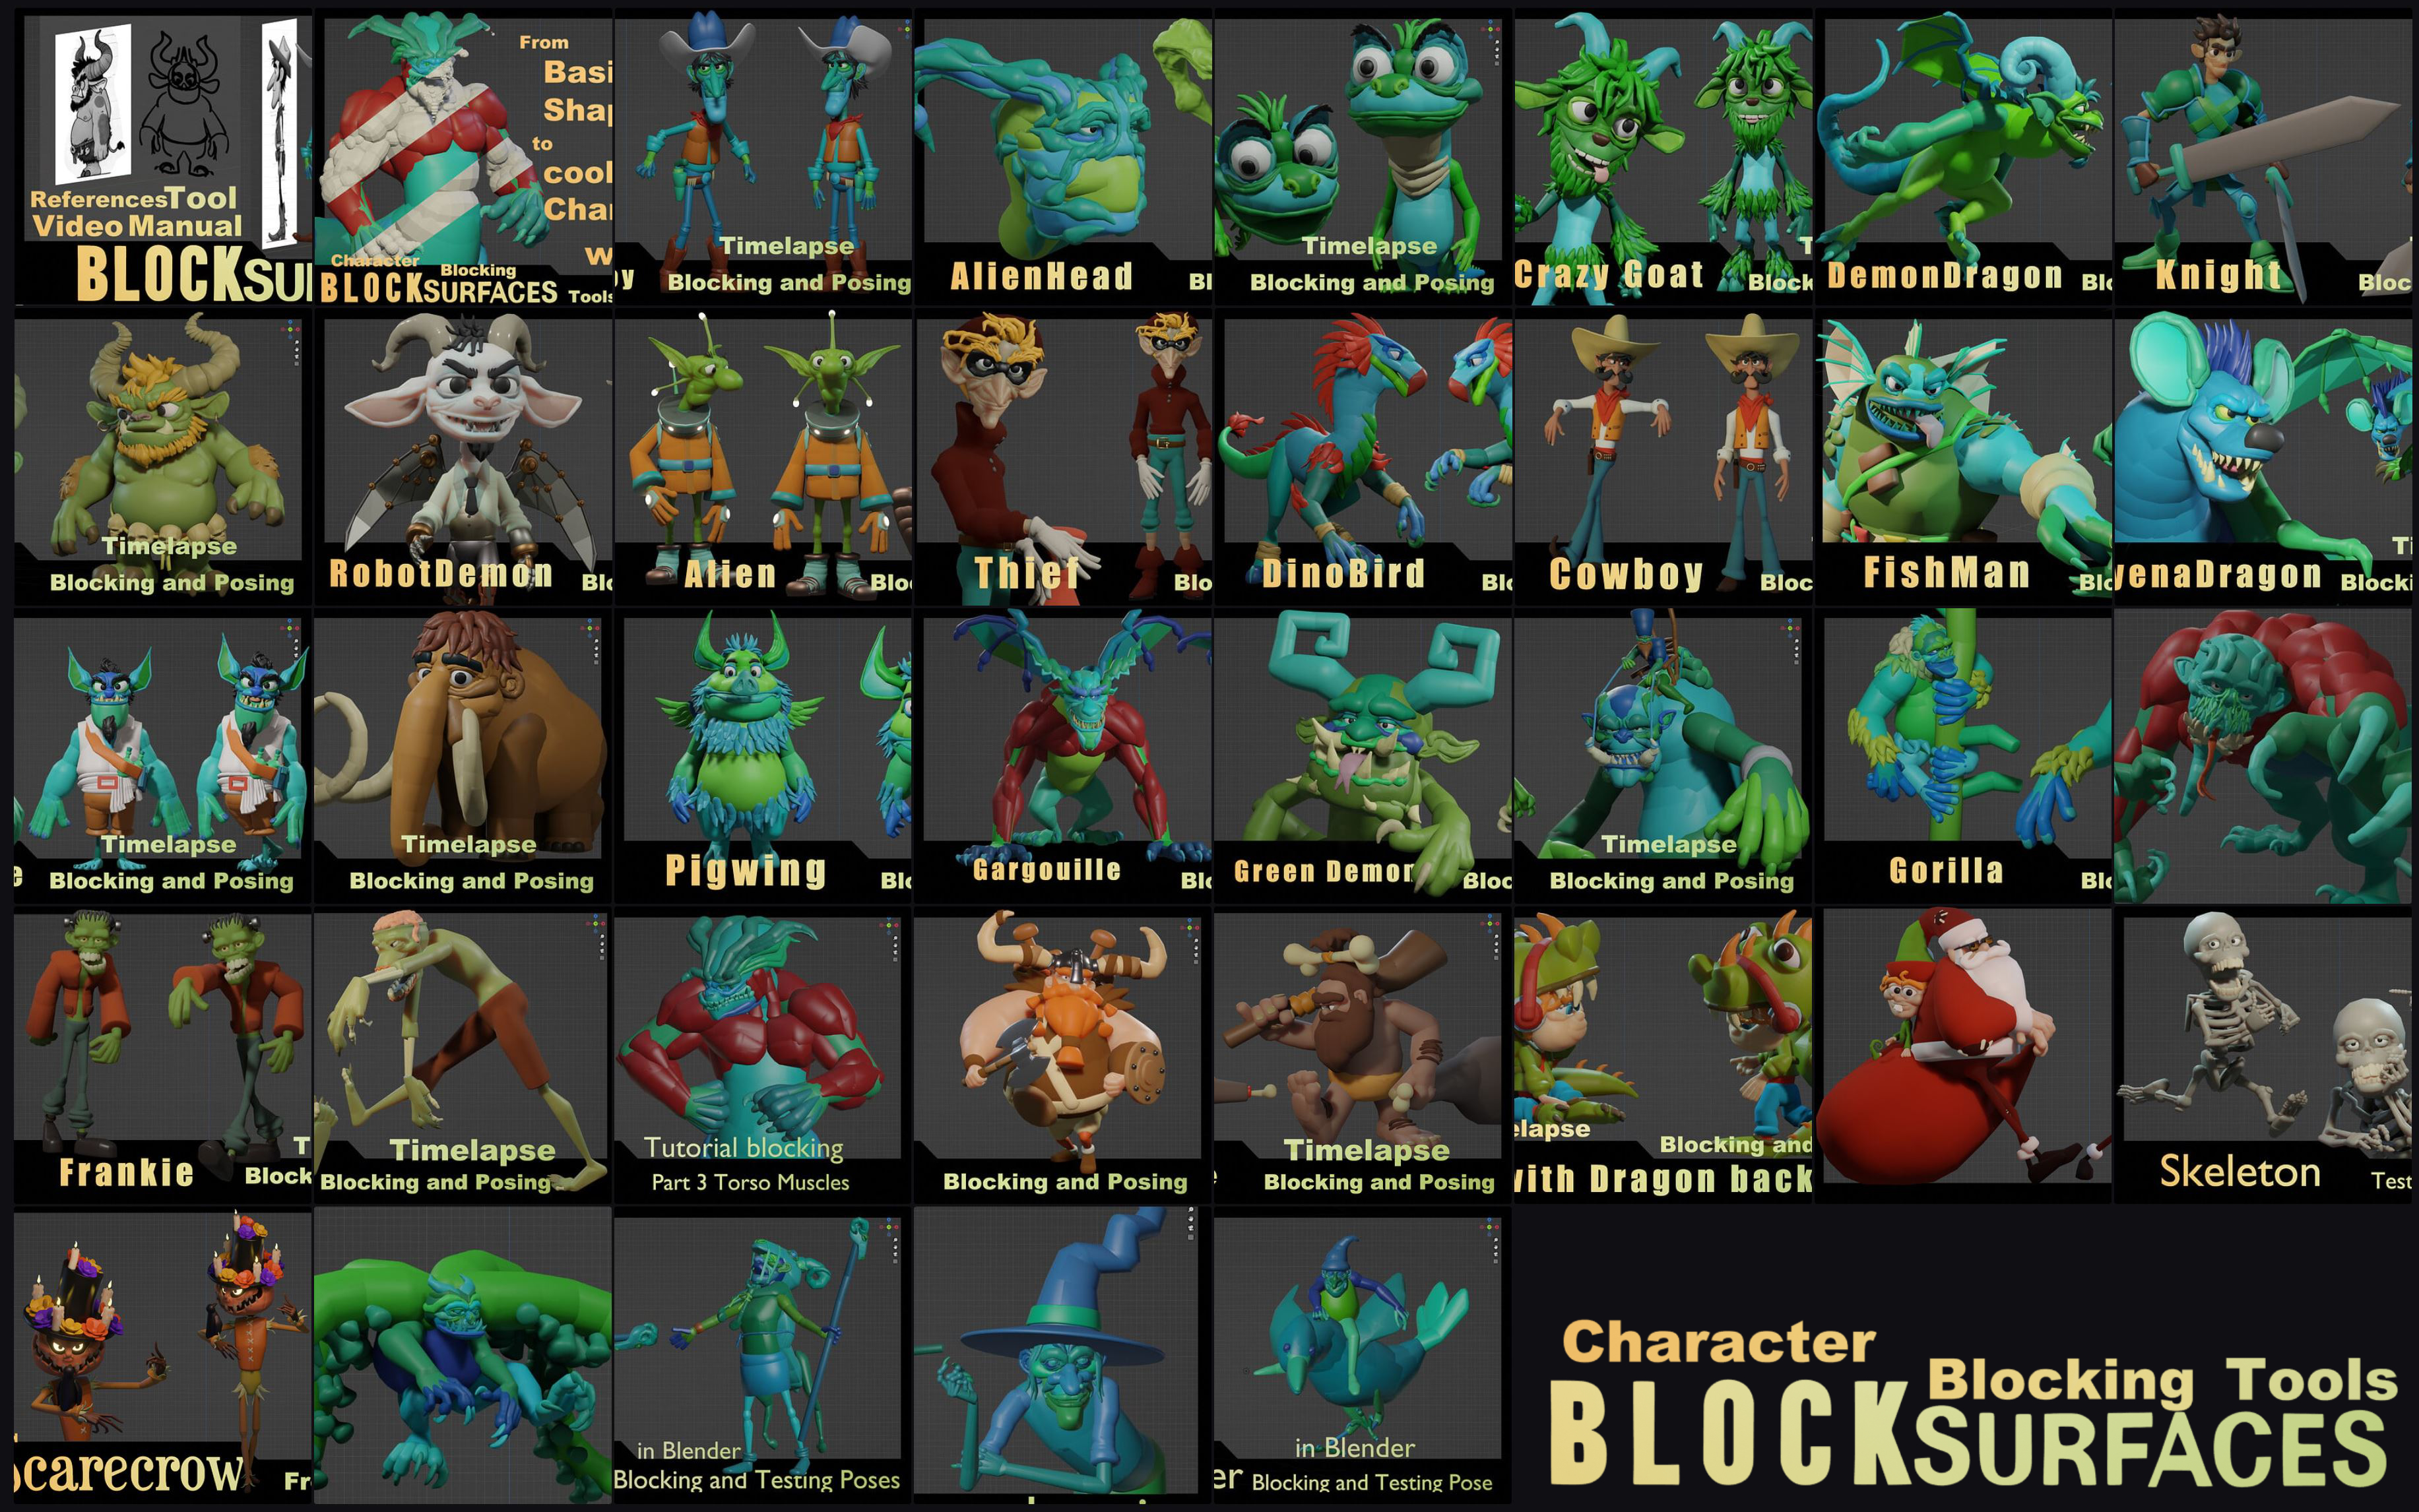
Check out these demonstration videos:
Santa and Elf timelapse
BlockSurfaces Version 1.0.025 Full Character Creation Tutorial – Overview and Step-by-Step Process in Under an Hour
Testing new version 1.0.015 Blocksurfaces : Asterix Fan Art Timelapse
Fan-Art Asterix Full Tutorial without acceleration and with voiceover. Blocksurfaces version 1.0.015
Quick demonstration video of lumberjack character workflow Ver 1.0.000
Lumberjack tutorial Ver 1.0.000
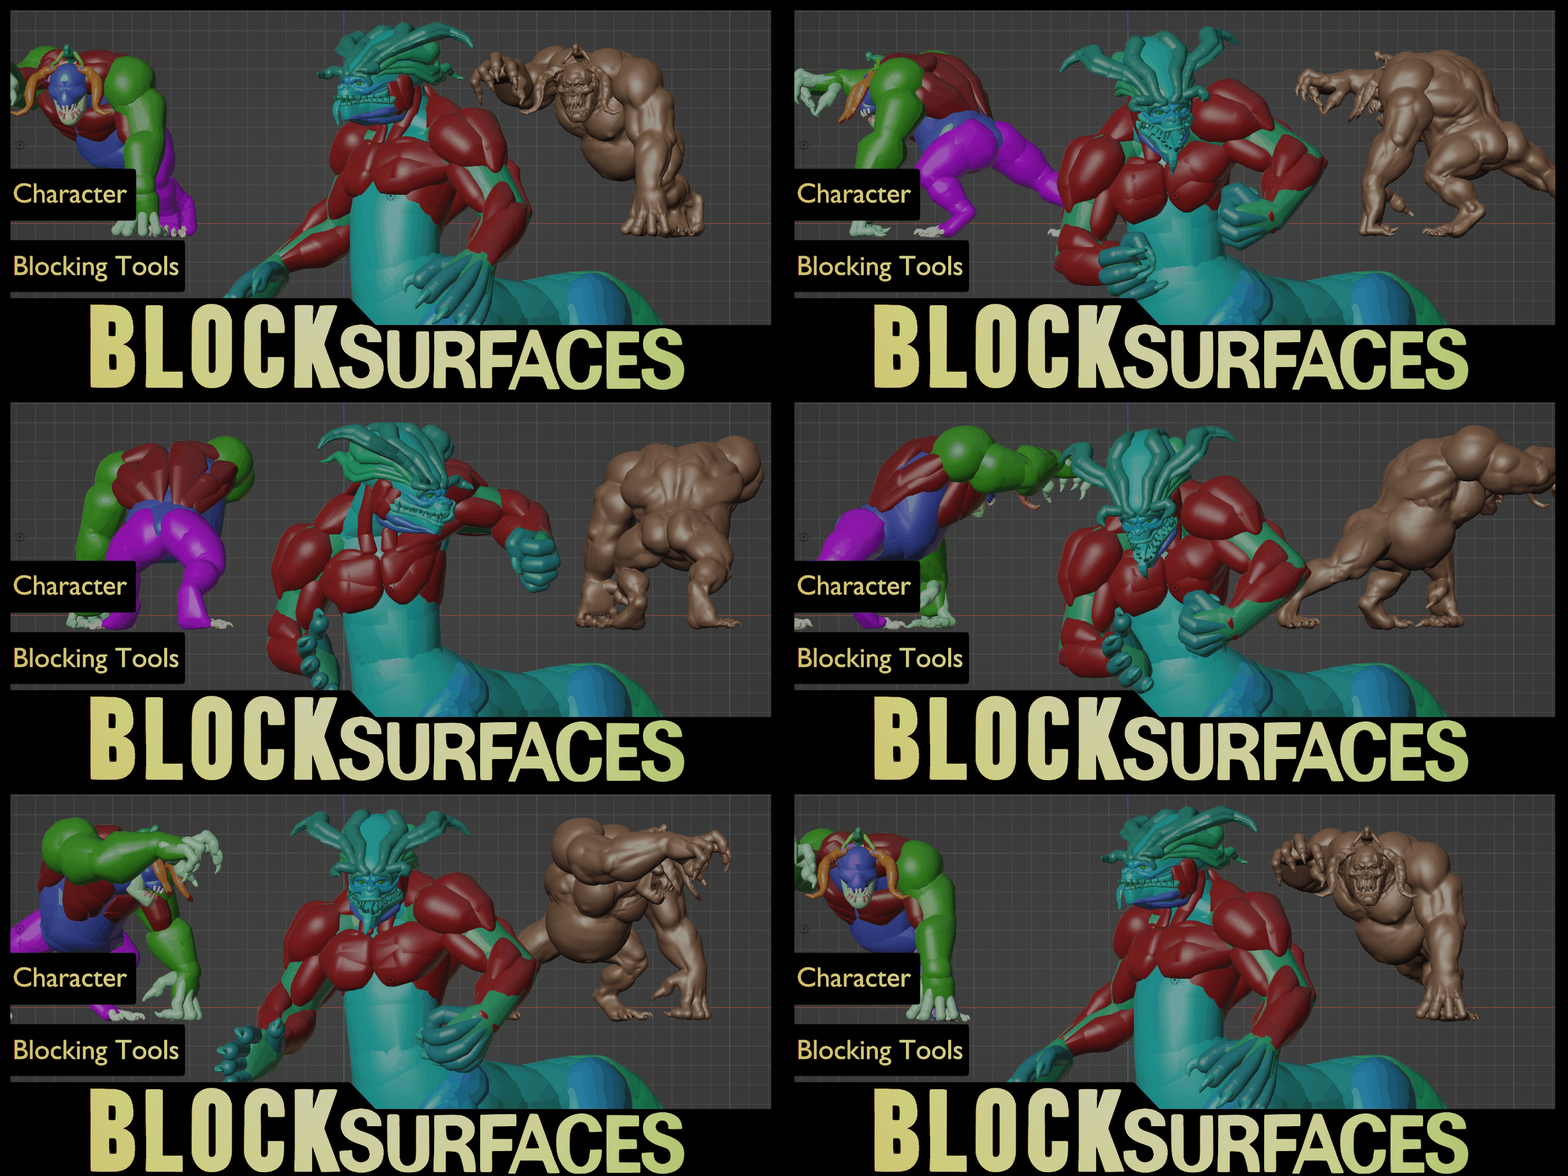
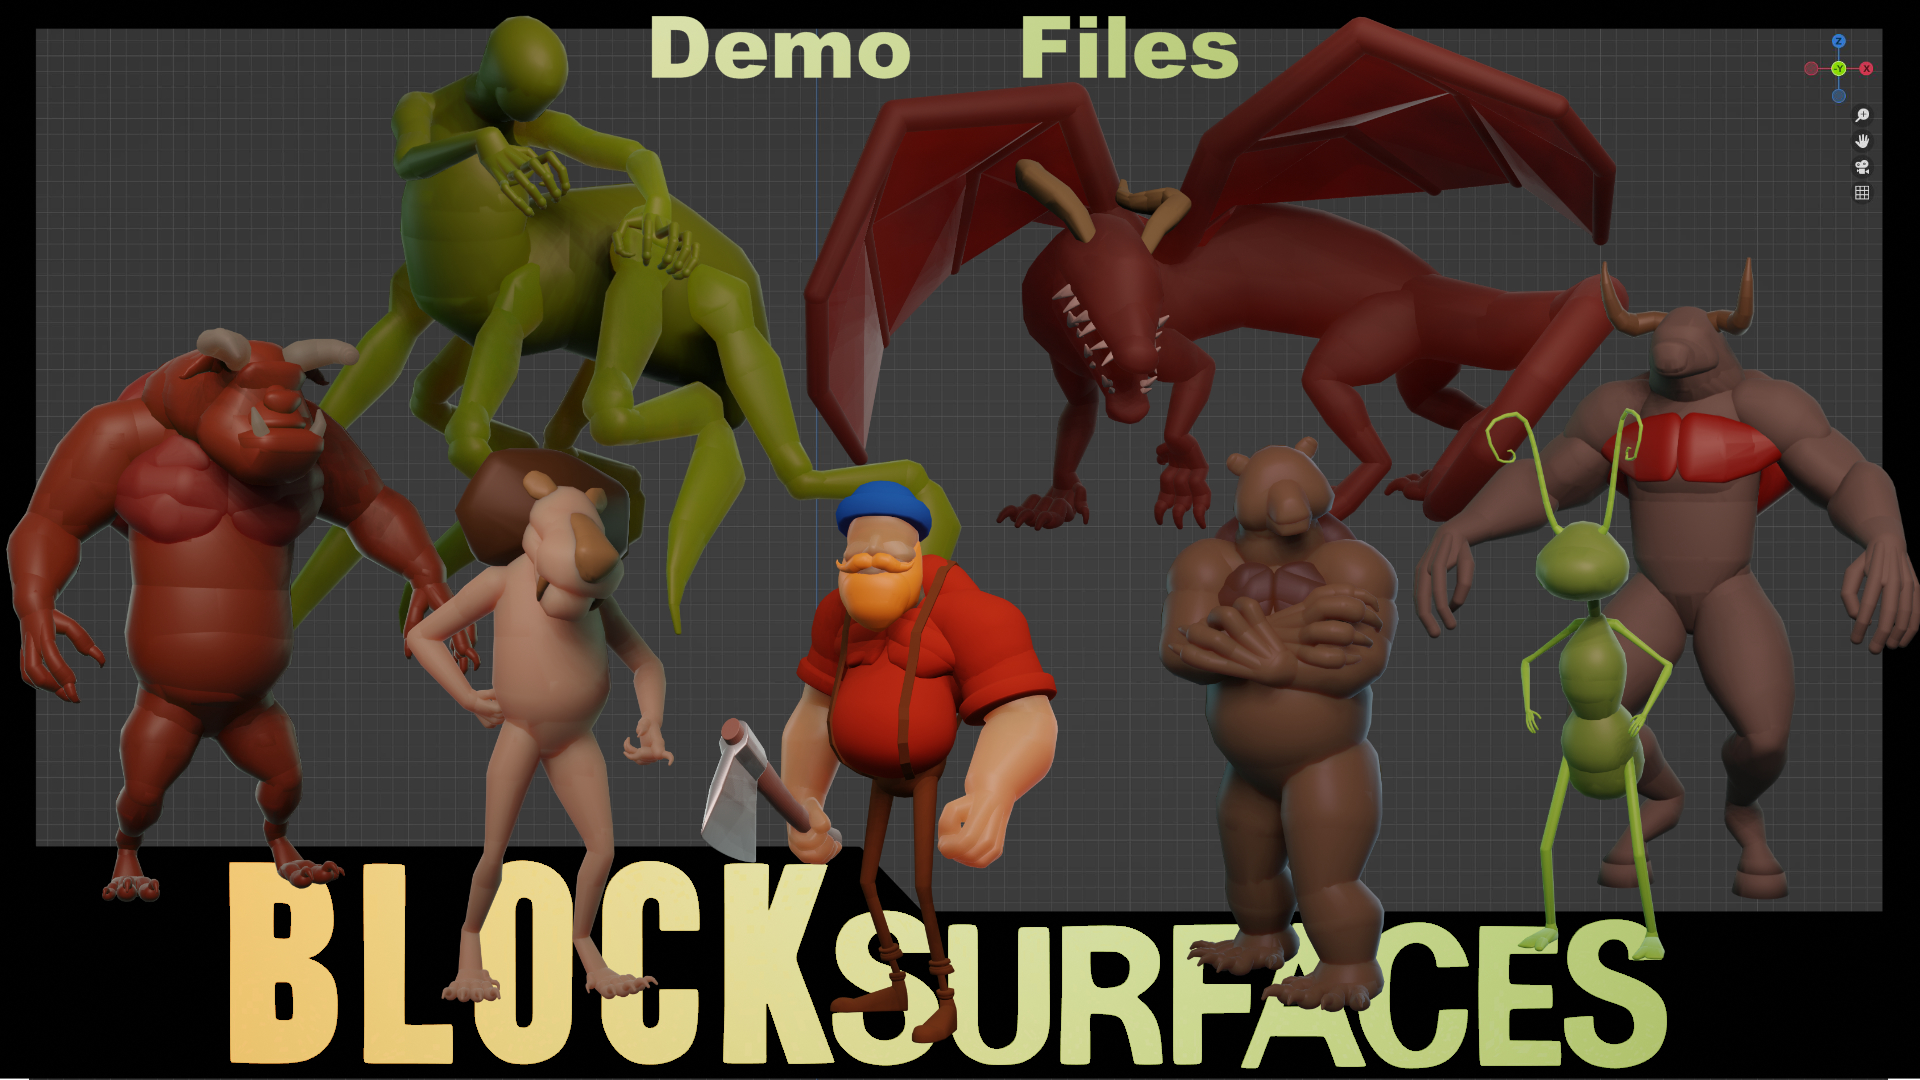
– Do the blocking in Blender and continue your model in your prefered sculpting program
The blocking process with BlockSurfaces is a quick and efficient way to create the general shape of a character model. It is used to capture the character’s proportions and pose and generate a remeshed mesh. This final mesh can be imported into your favorite sculpting program so you can continue working on the model by sculpting. You can also use the generated mesh as a base for retopology.
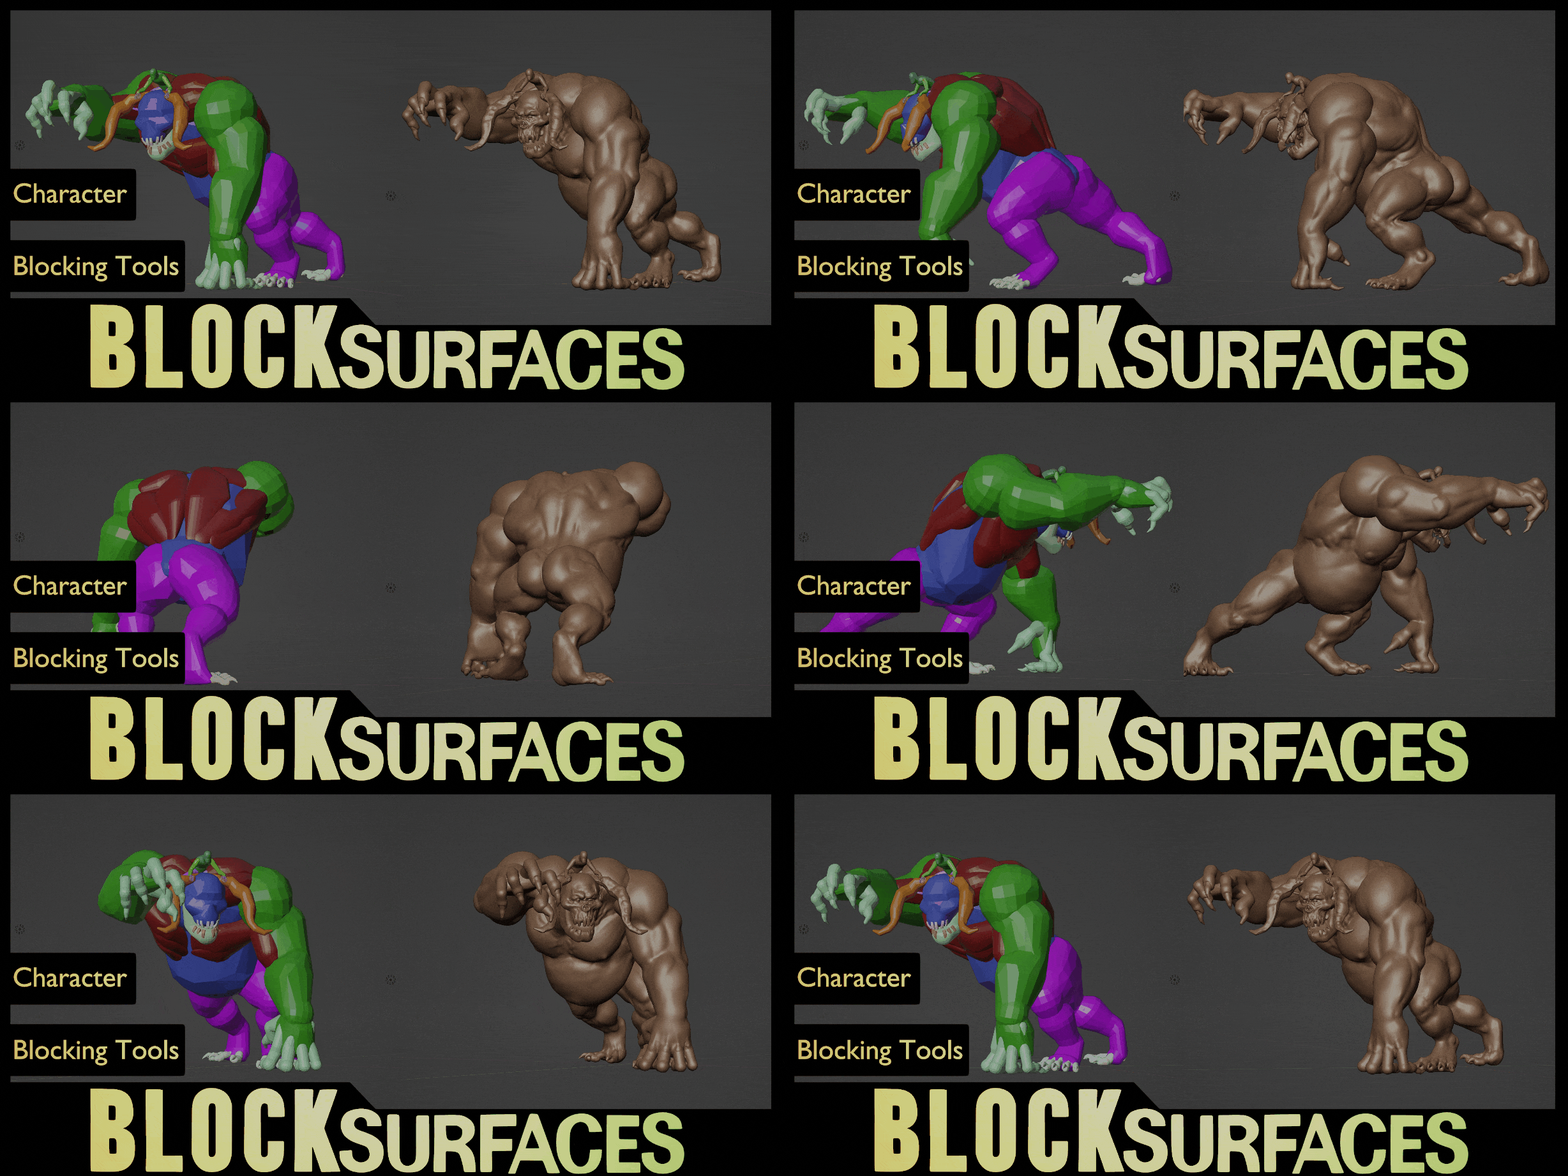
These are some of the features that make BlockSurfaces the ideal tool for any 3D artist:
– Create the main volumes with branch and basic shapes.
This helps to focus first on establishing the main volumes of the character by creating basic volumes using cubes, spheres or any other object, before adding details. It is important to work from the general to the specific, building a solid structure on which to progressively add complexity.
Creating solid base shapes in blocking and then sculpting and adding details. This way of modeling from larger to smaller is essential for an orderly workflow and obtaining solid results.
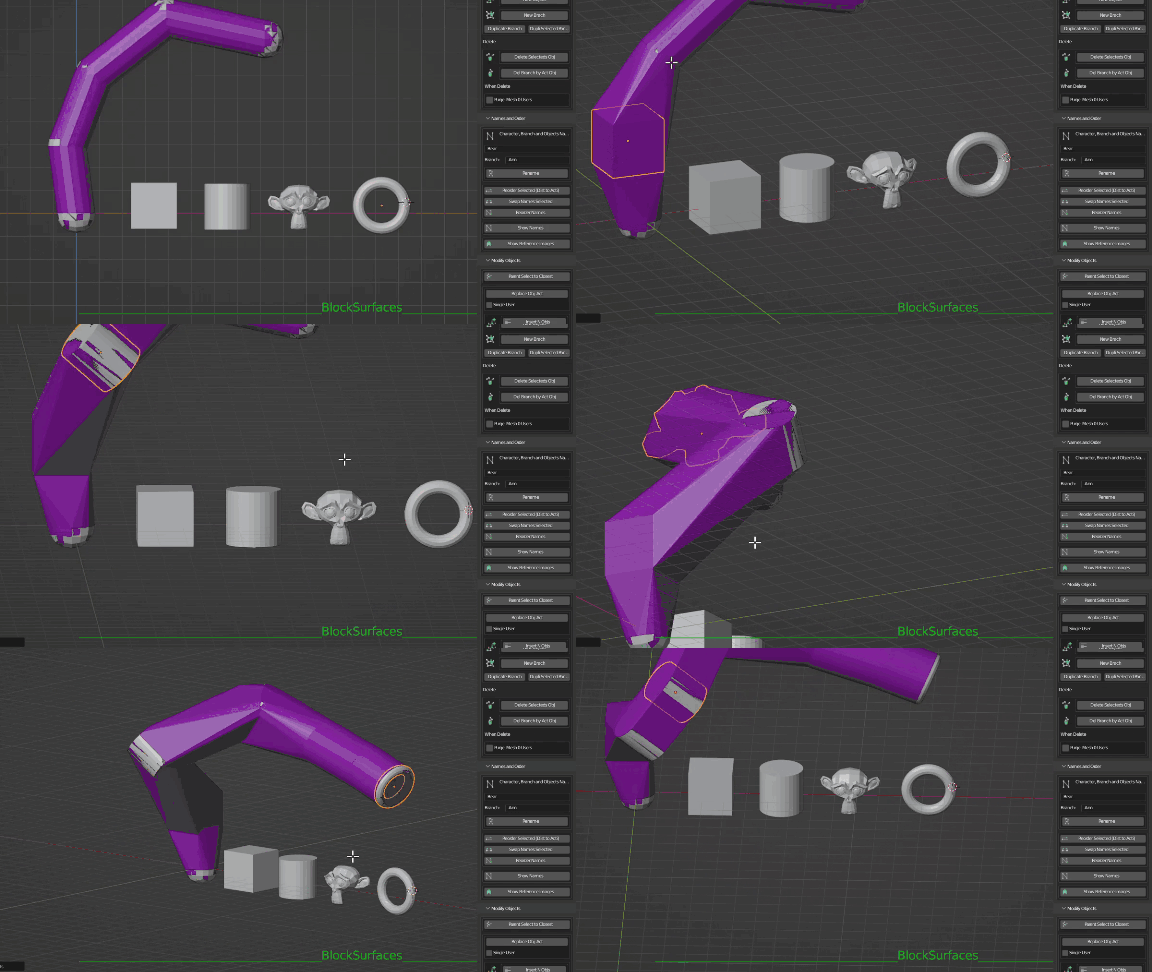
– Edit, move, rotate, scale, and even sculpt the objects of the branch.
This allows great freedom when modifying the objects that make up the branch volumes, essential to define the main forms of the character.
You can focus on the primary volumes, and the branch will generate connecting the shapes within it from one object to the next. This streamlines and speeds up the blocking process.
– Duplicate branches or parts of them.
The branch duplicating function allows you to quickly copy sections of a 3D model’s structure. For example, if you’ve already modeled one leg, you can duplicate it to swiftly create an additional leg or multiple legs, rapidly designing an original creature.
You can then make minor modifications to the copies to adapt them as needed. This speeds up the modeling process by reusing previous work instead of recreating it from scratch. It also greatly aids fast exploration of different possibilities for your character.de recrearlo desde cero.
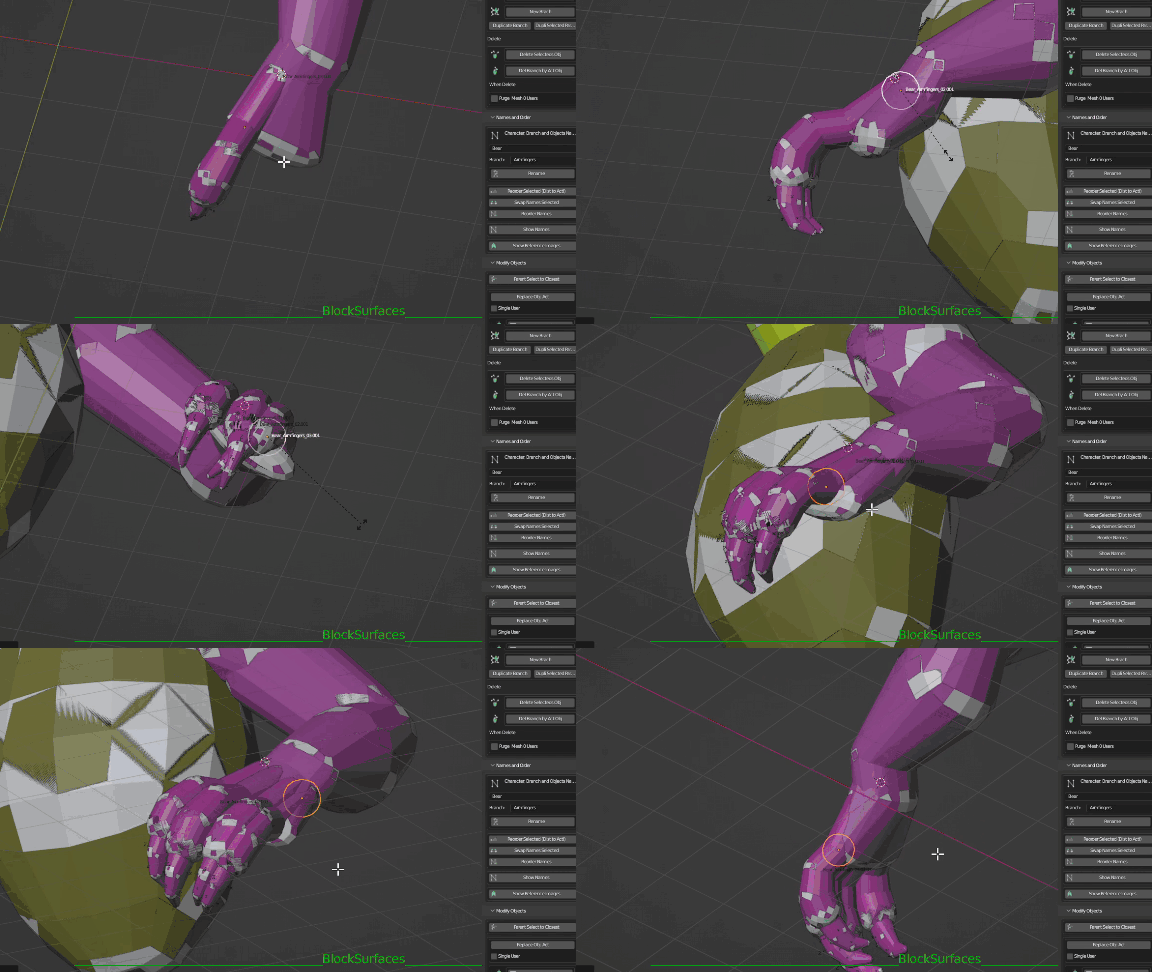
In the newest versions, you can even duplicate entire branch hierarchies like an arm with its hand and fingers.
– Replace objects in the branch with others.
The object replacing function allows you to quickly define the basic shapes of a branch. You can replace one or multiple objects and thus swiftly define the shape of the branch.
You can also use objects as single user or linked so that modifying one will modify all of them at once. This makes it easy to quickly define the overall shape of an entire branch.
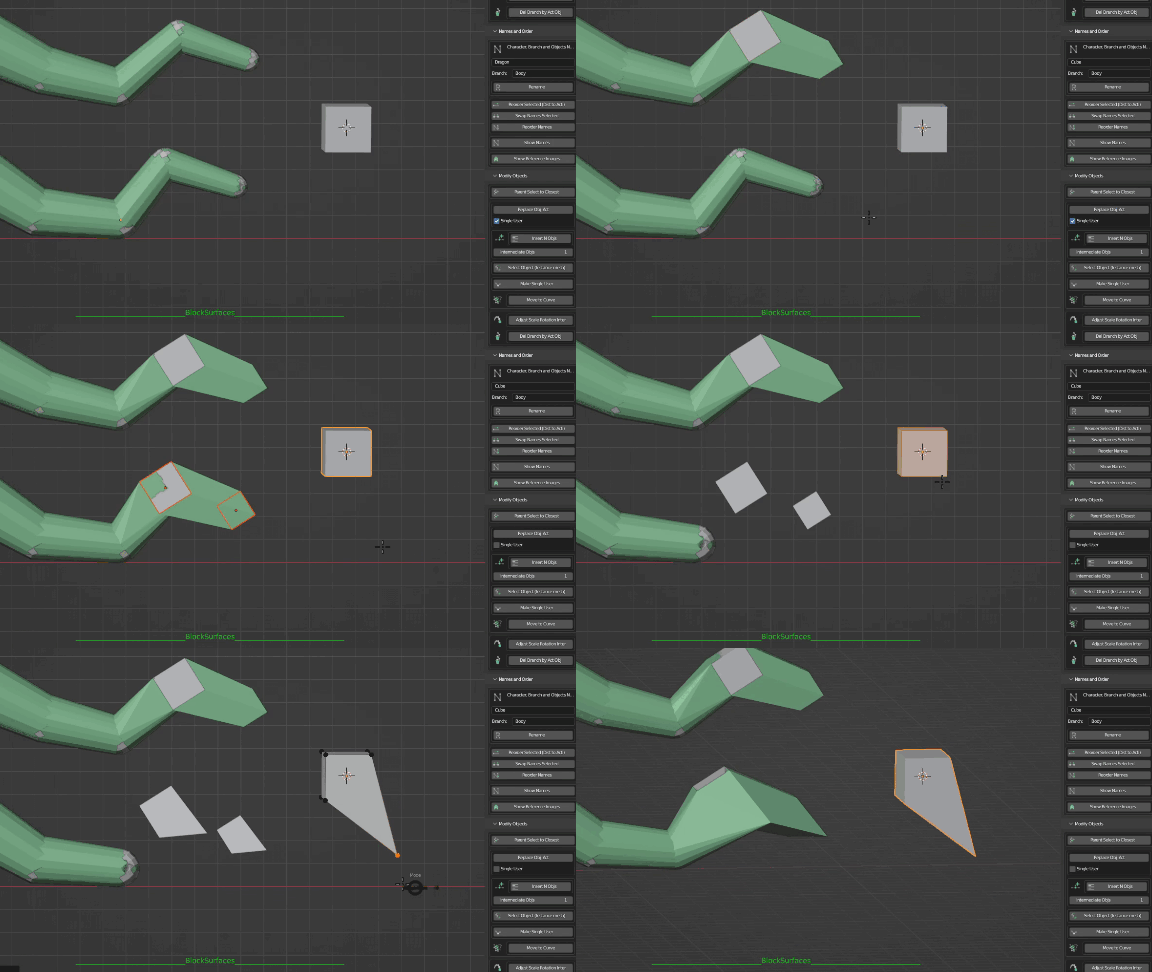
– Insert N objects between 2 selected ones.
This option allows you to add a specific number of new objects between existing objects in a branch. Very useful for adding more definition and detail to the shape of the branch.
In summary, this functionality enables quickly increasing the density of objects in specific areas of a branch for greater control over the shape.
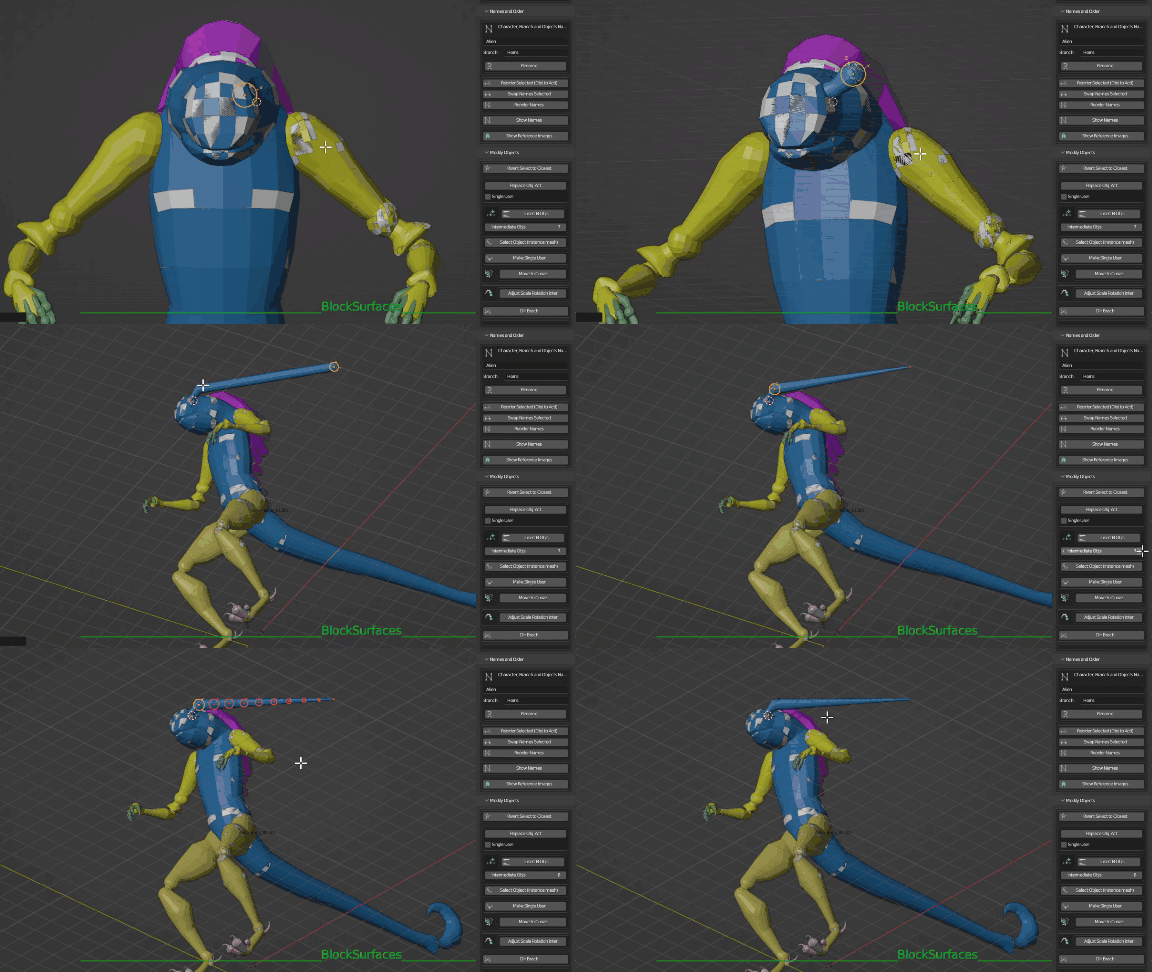
– Edit the objects of the branches independently or modify several linked ones.
We can link objects, so that editing one will automatically affect the other linked ones and the shape of the branch.
This way we can modify specific parts of the branch or its entire shape at the same time.
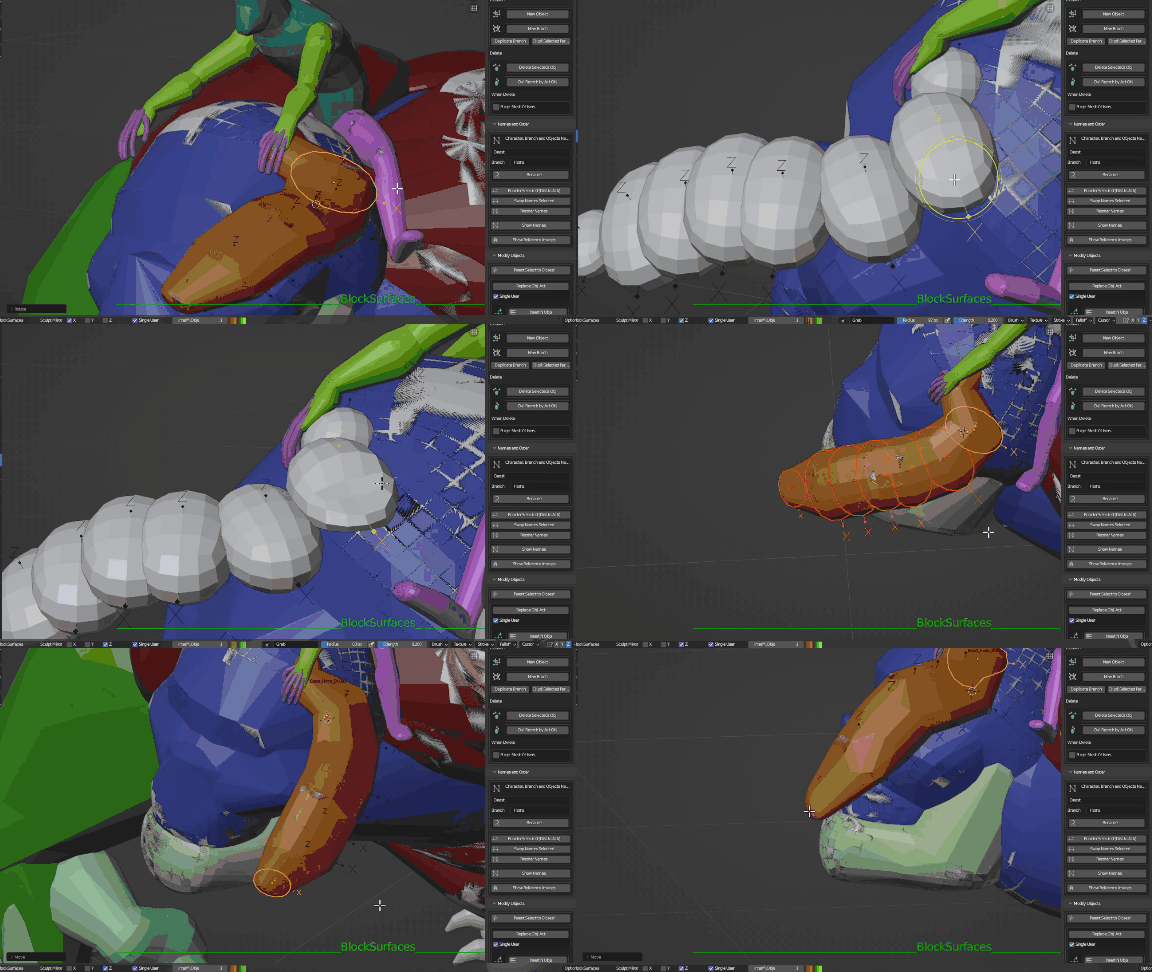
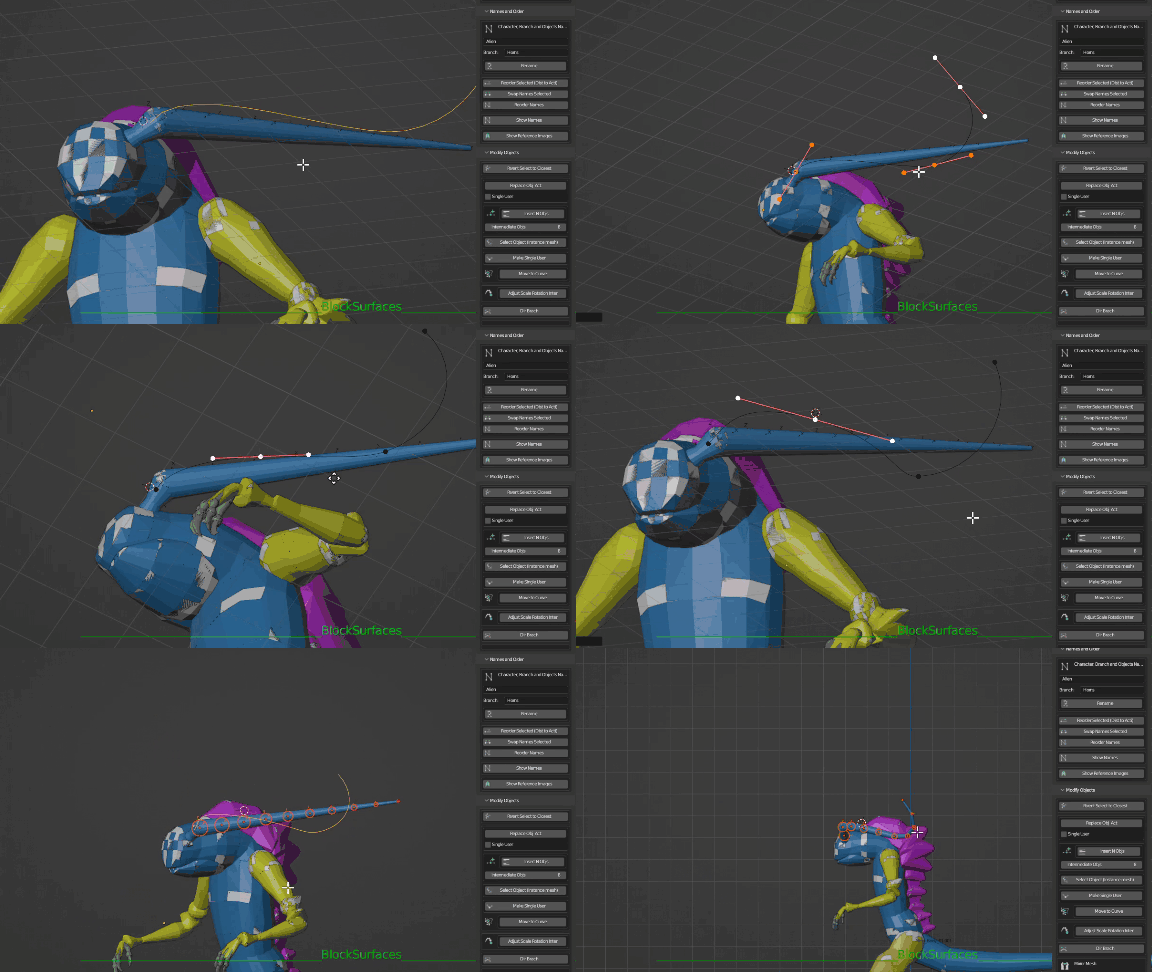
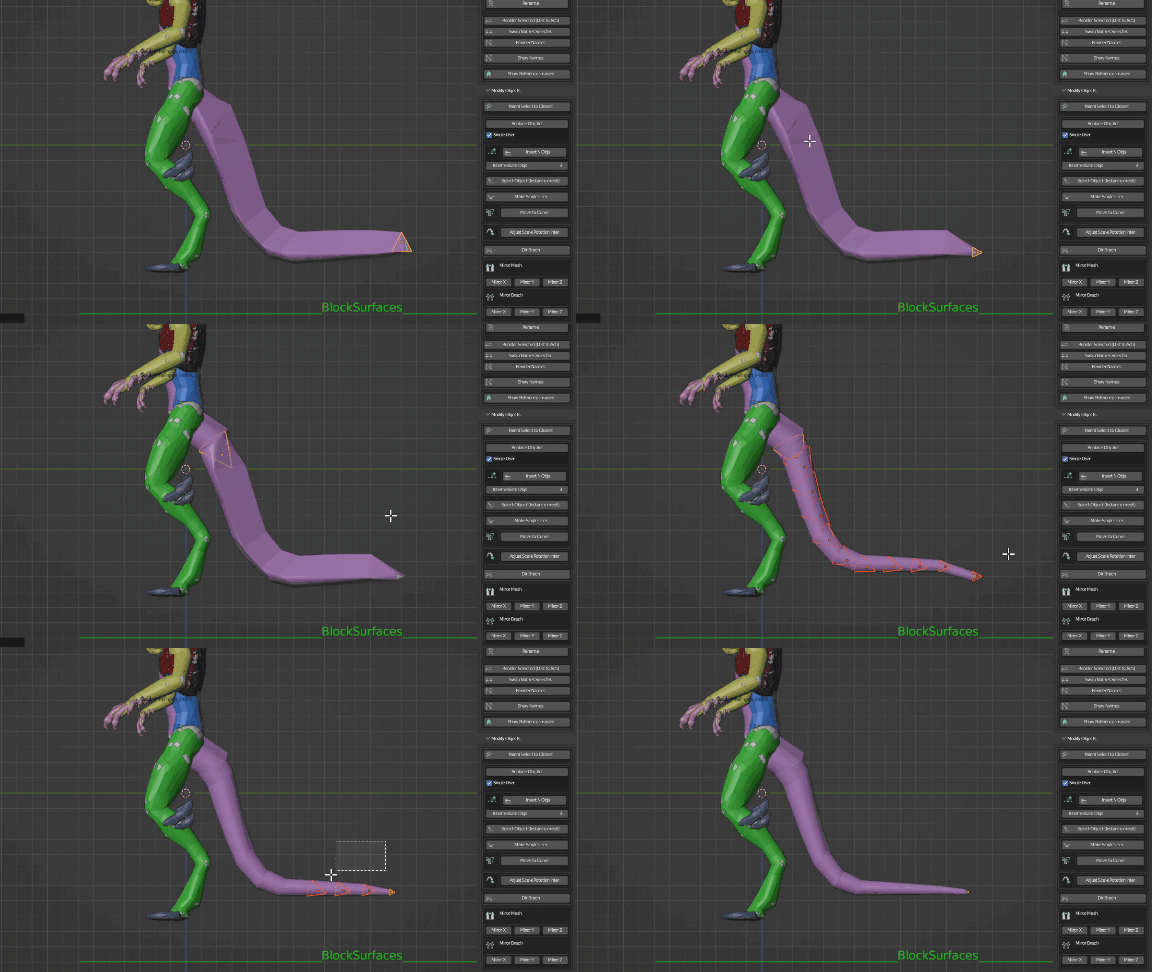
– Reposition the selected objects of the branch on a curve.
This option allows you to draw a curve and position the selected objects on it, thus allowing you to quickly change the shape of the branch by adapting it to the drawn curve.Very useful for easily and quickly creating horns, tentacles, tails or other non-linear shapes.
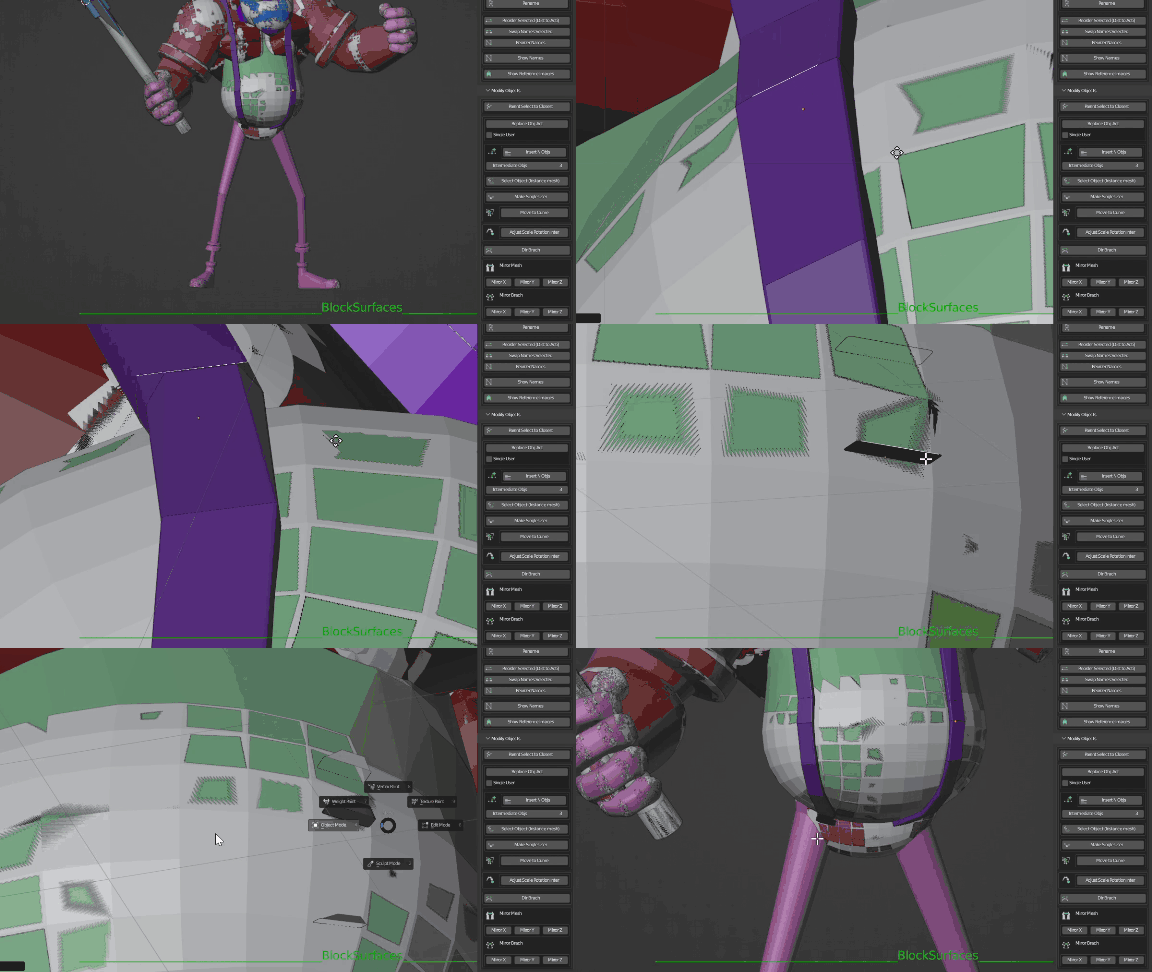
– Adjust the rotation and scale of the intermediate objects to the selected ones.
This option allows you to adjust the rotation and scale of the intermediate objects between the selected objects, making them rotate and scale uniformly. This achieves a more natural-looking shape for the branch without needing to adjust each object individually. Thanks to this, the shape of the branch can be quickly defined by only basing it on the selected objects.
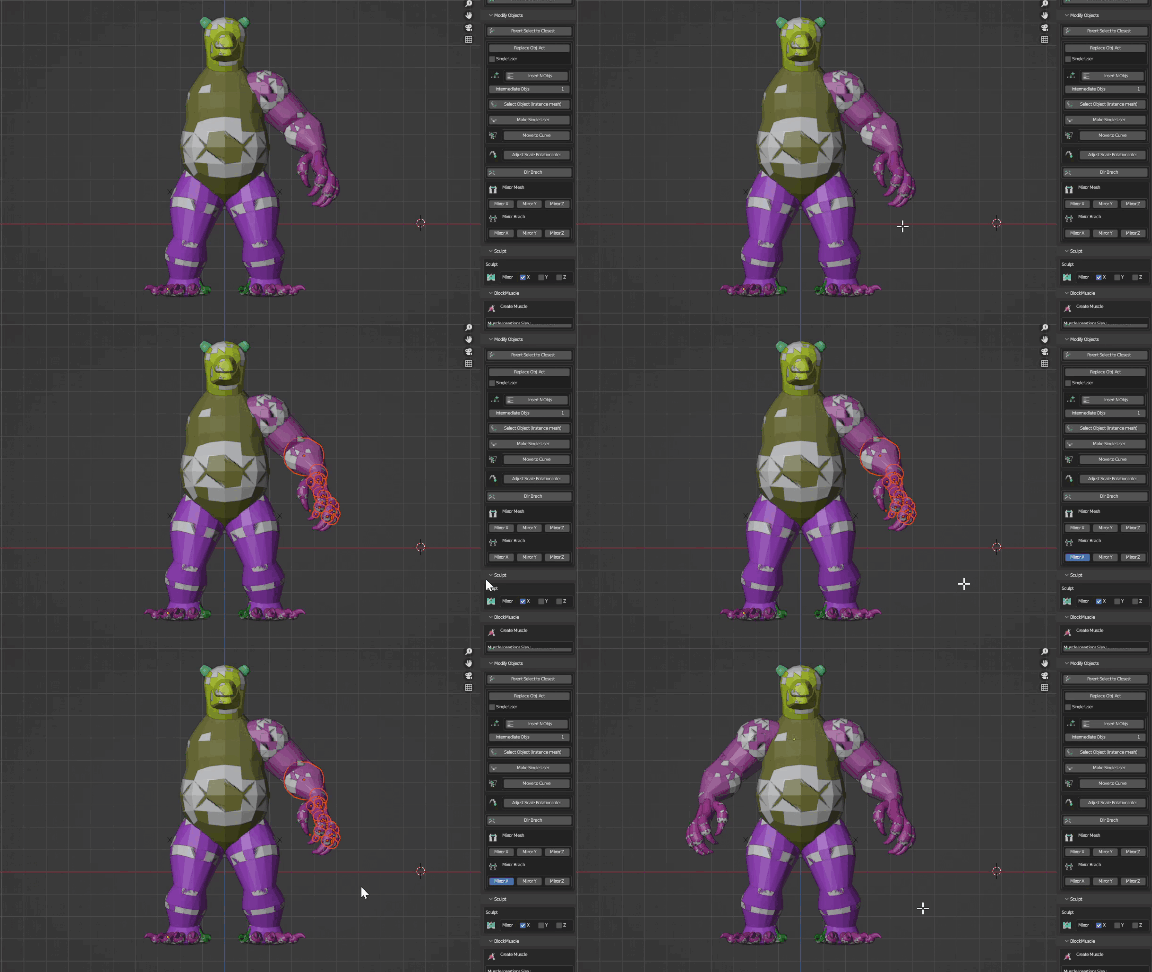
– To create a mirror branch
This option allows you to perform mirroring of the selected branches and you can do mirroring in two ways:
Mesh mirror: It will add a mirror modifier to the final generated mesh, so we will have a symmetric mirror and where the changes made on one side will be replicated on the other.
Branch mirror: It allows working asymmetrically by creating new branches on the other axis that you can modify freely, achieving asymmetry in your character or pose.
In summary, branch mirroring allows differentiated manipulation of the duplicated branches for asymmetric modeling, while mesh mirroring maintains symmetry by replicating changes between both sides.
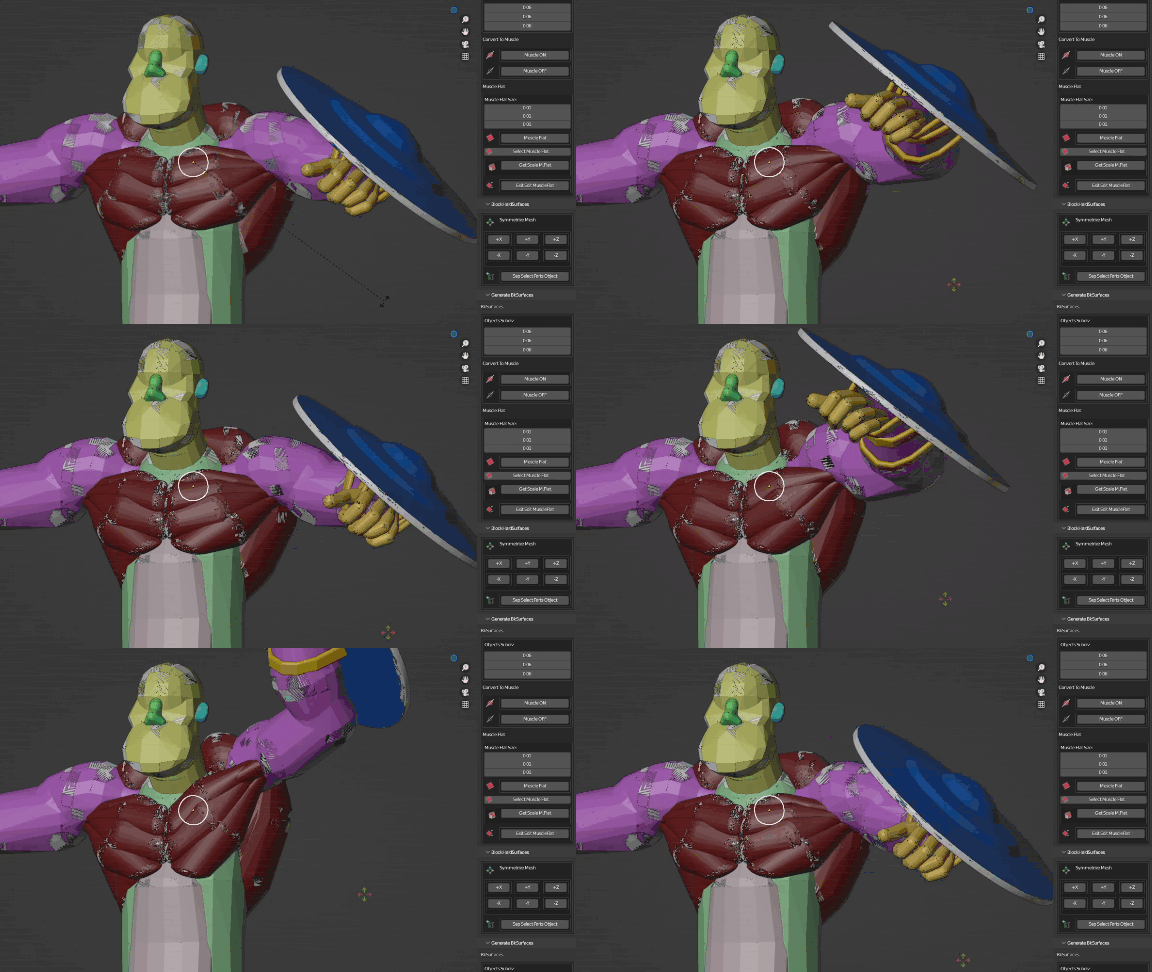
– Convert the branches into a type of branch called BlockMuscle to simulate muscle behavior.
You will be able to convert any branch into a muscle type, so that it has a behavior similar to a muscle with stretching and contraction. You will also be able to do the reverse operation, converting a muscle into a standard branch.
Relate the muscle insertions to the corresponding branches, where the insertions would be in a body, and when moving the joints the muscle will adapt.
Keep in mind that BlockMuscles is a basic muscle simulation, very useful to aid in the blocking of a posed character and with small adjustments, it can greatly help in understanding how movements could affect the muscles of your character.
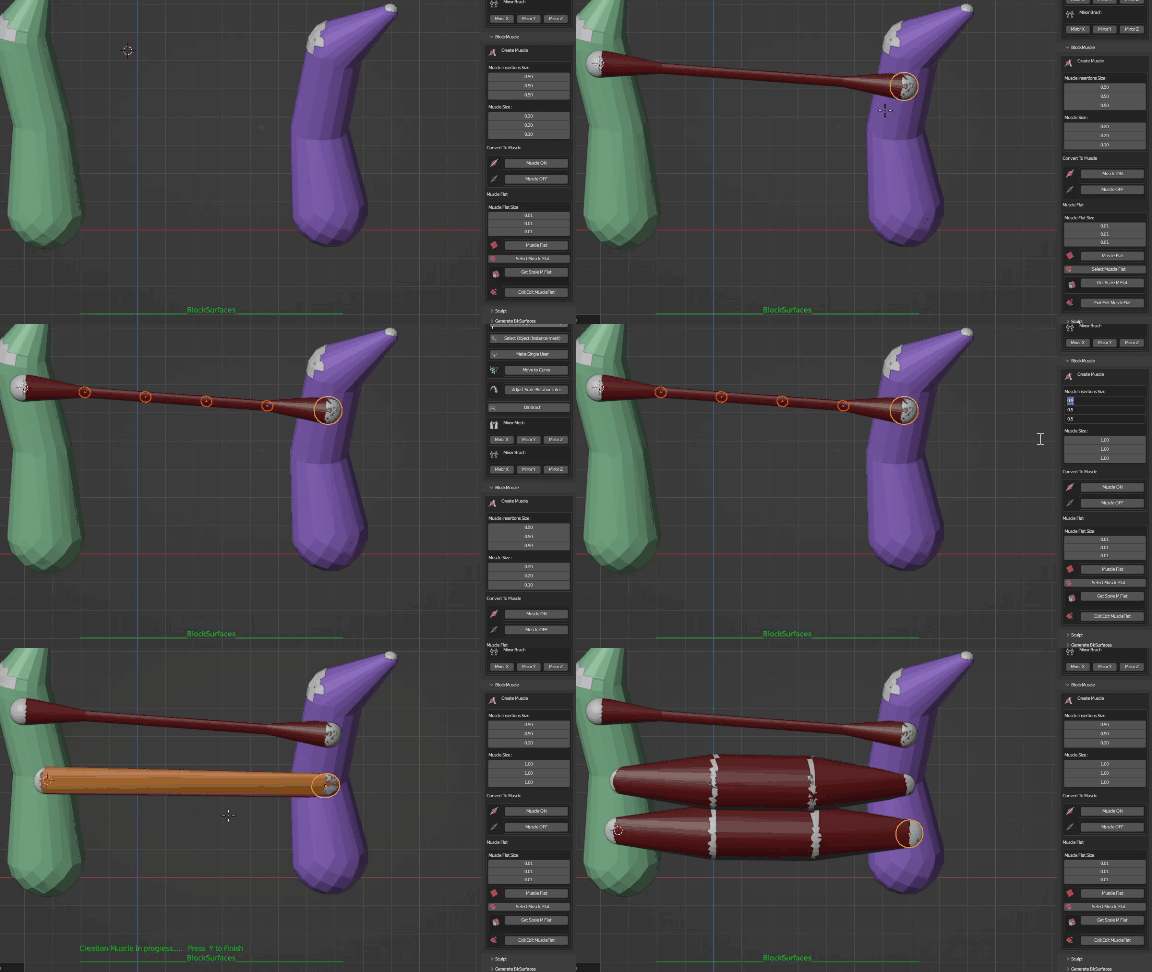
– Build muscles with a simple click for every insertion.
You have the option to create muscles with a simple click on each insertion point.
When clicking, it will create the first insertion of the muscle, and the second click will create the second insertion. With the number of intermediate objects that you have defined in the options, it will create the muscle. Then you just have to relate the branches that the insertions should follow.
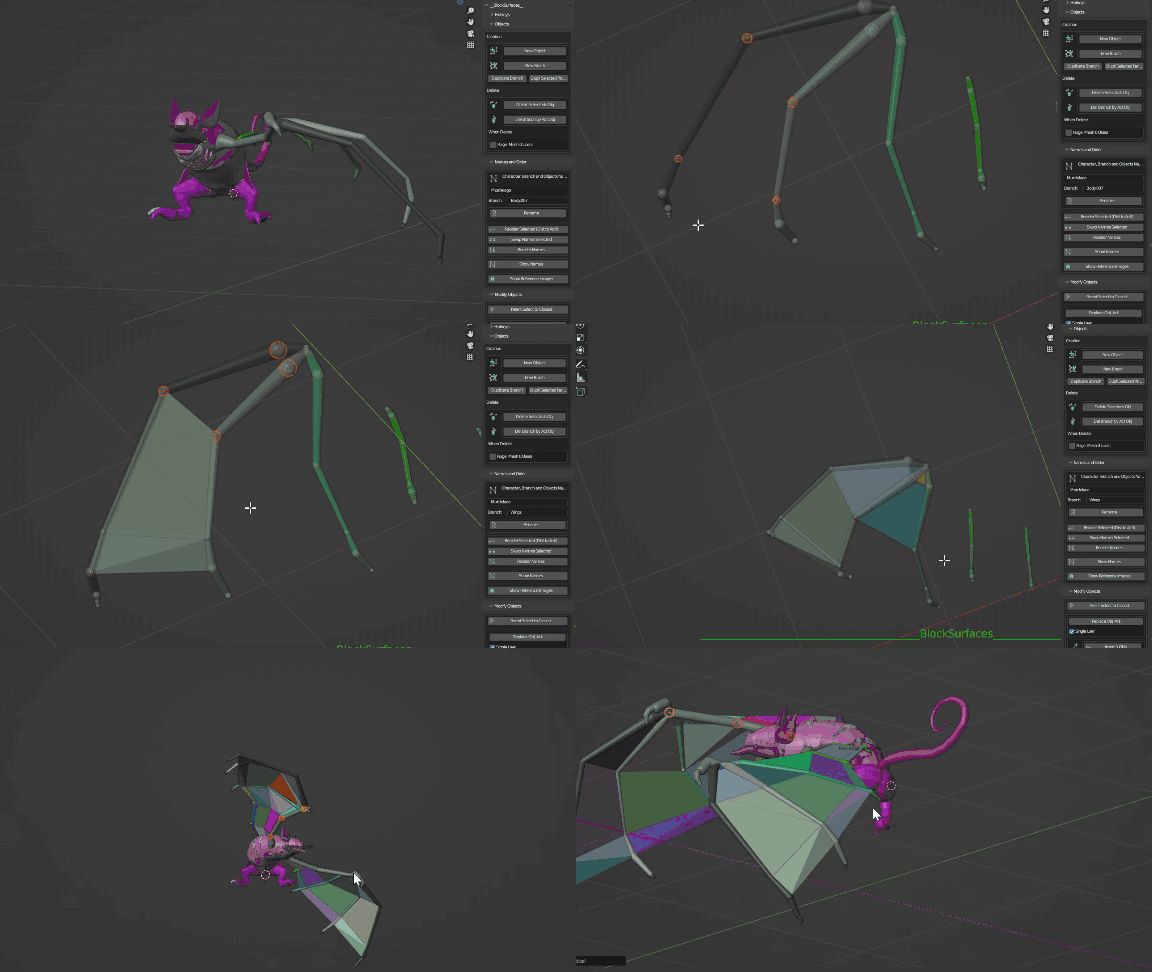
– With FlatMuscles, create flat surfaces to simulate membranes.
You will be able to simulate membranes with FlatMuscle option. It will create a surface encompassing all selected objects. This surface will be linked to the selected objects, so that you can move the objects you selected and the surface will continue to encompass those objects wherever they are.
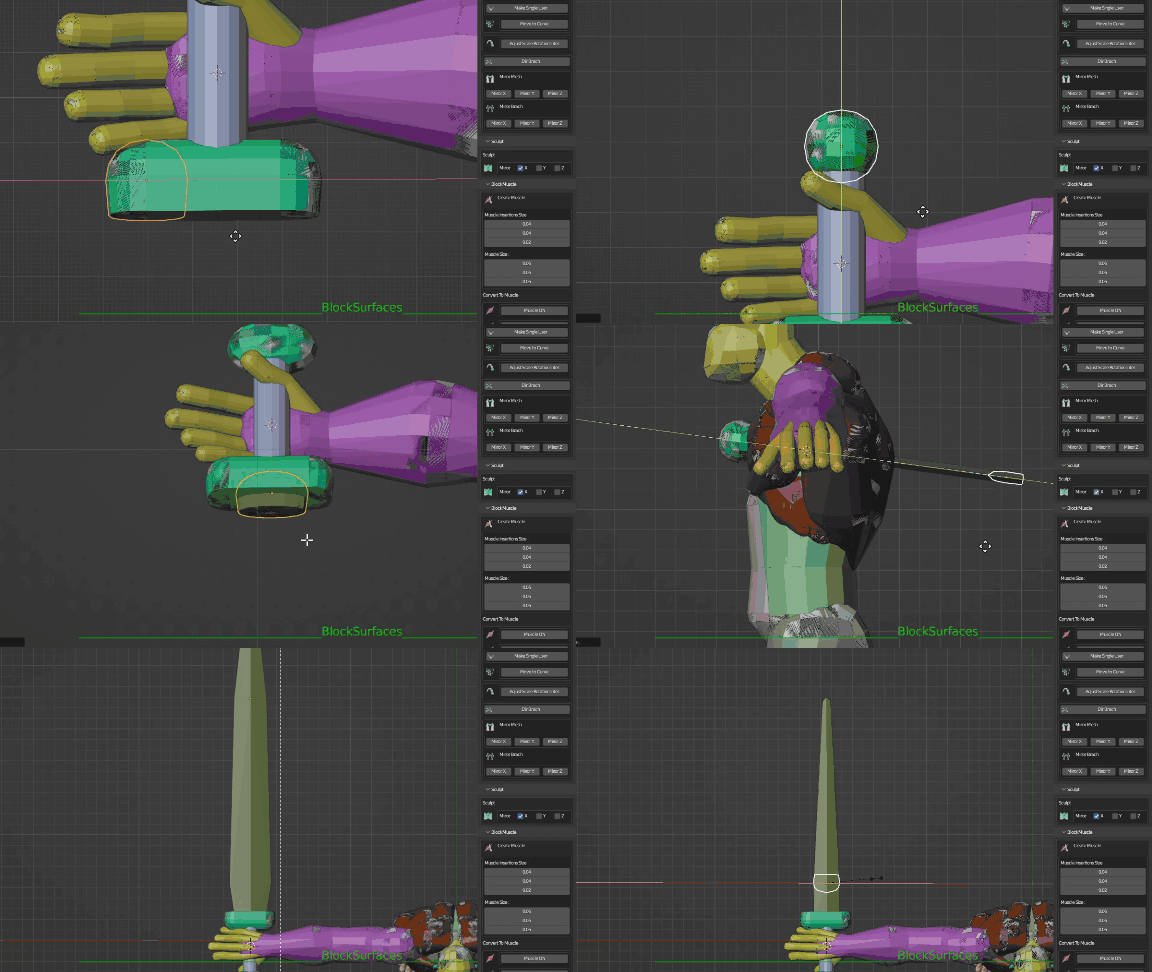
– BlockHardSurfaces currently has only two small tools and is more of a project, a set of ideas that I want to implement.
For now, hard surface blocking can be done with BlockSurfaces. I am working on new ideas to offer more possibilities and improve the hard surface blocking experience in the future
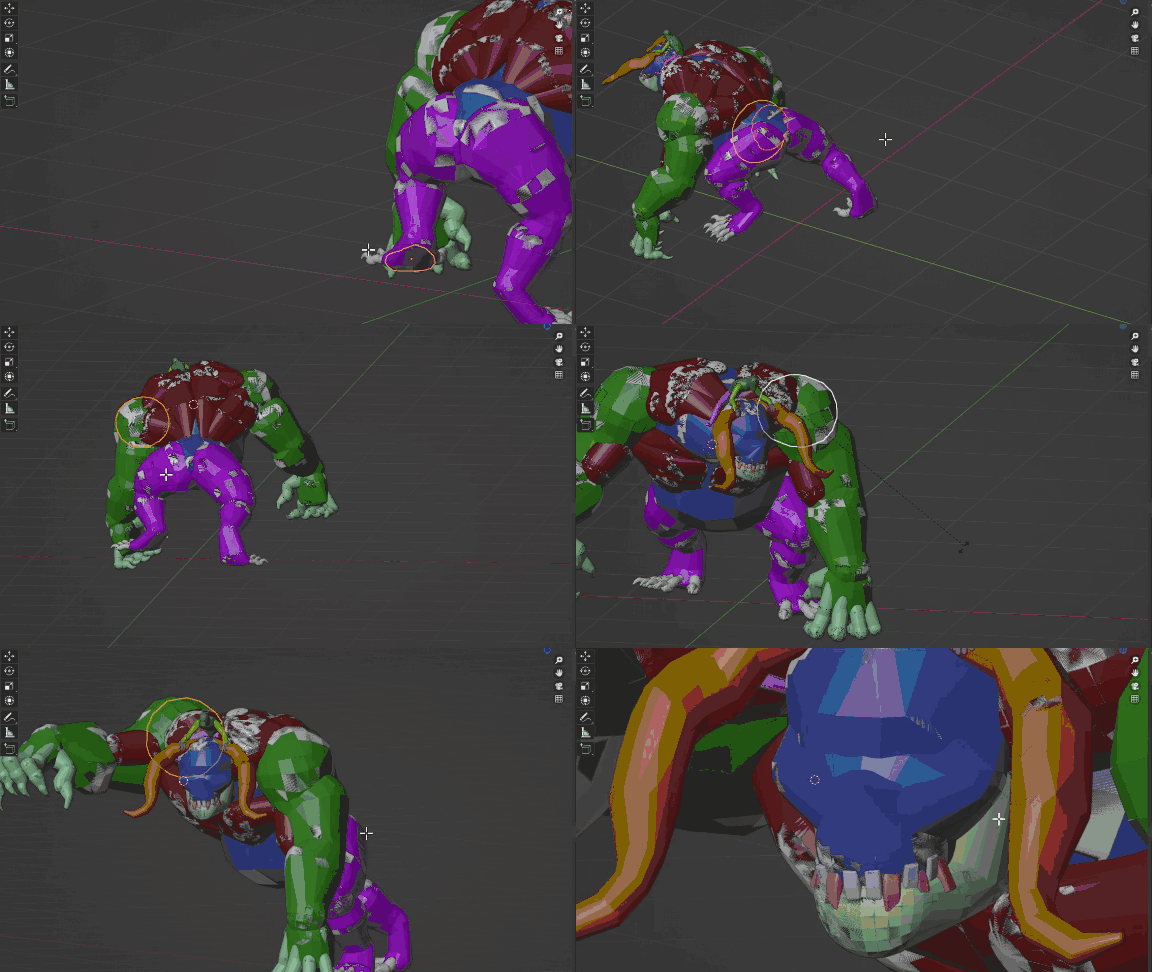
– Save time by creating hierarchies for branches with BlockSurfaces tools and you’ll be able to articulate and pose your characters with ease.
With Blocksurfaces there are several tools to acelerate the process of creating hierarchies between the branches that make up the character. It will be quick and easy to create a hierarchy that allows you to articulate and pose the character without having to resort to rigging. This way, you can easily obtain poses quickly or readjust parts of the character before the sculpting process, with the possibility that the muscle branches simulate behavior.
– Generate the complete final model or by parts ready for sculpting.
You will be able to generate the final mesh by doing a remesh of the whole model or parts of it, configuring it as best suits you to then continue the process. Also, you will be able to generate as many meshes as you want, or with as many poses as you want.
You will be able to continue the retopology, sculpting etc. work in Blender or export the mesh to your preferred program.
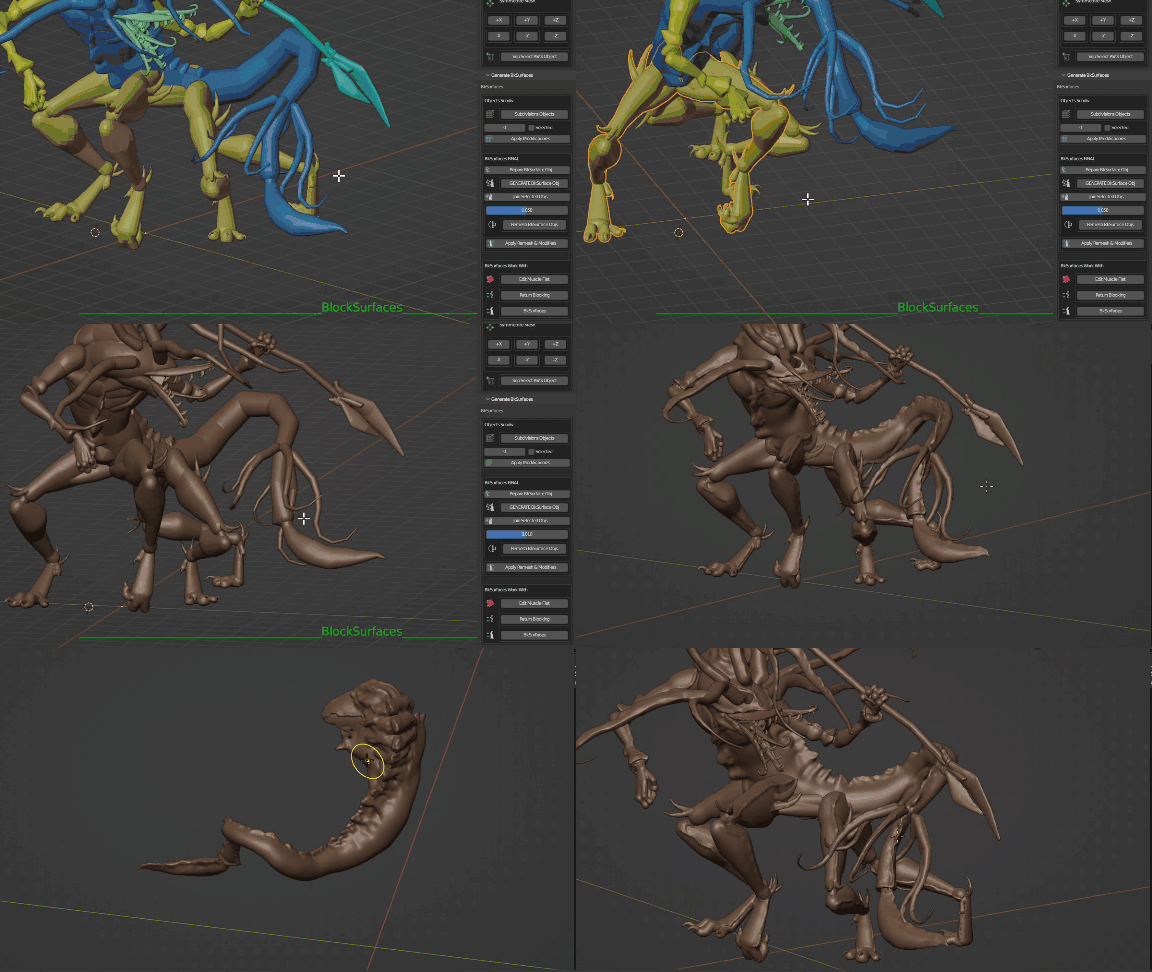
– You can switch between blocking and final mesh work modes in BlockSurfaces.
This will allow you to generate the final model with one pose, go back to the blocking, make modifications, and output another model with a different pose or perhaps other readjusted parts, so you can make all the adjustments you want, all the poses you want, and alternate between working in the different blocking modes or go to sculpting the final model.
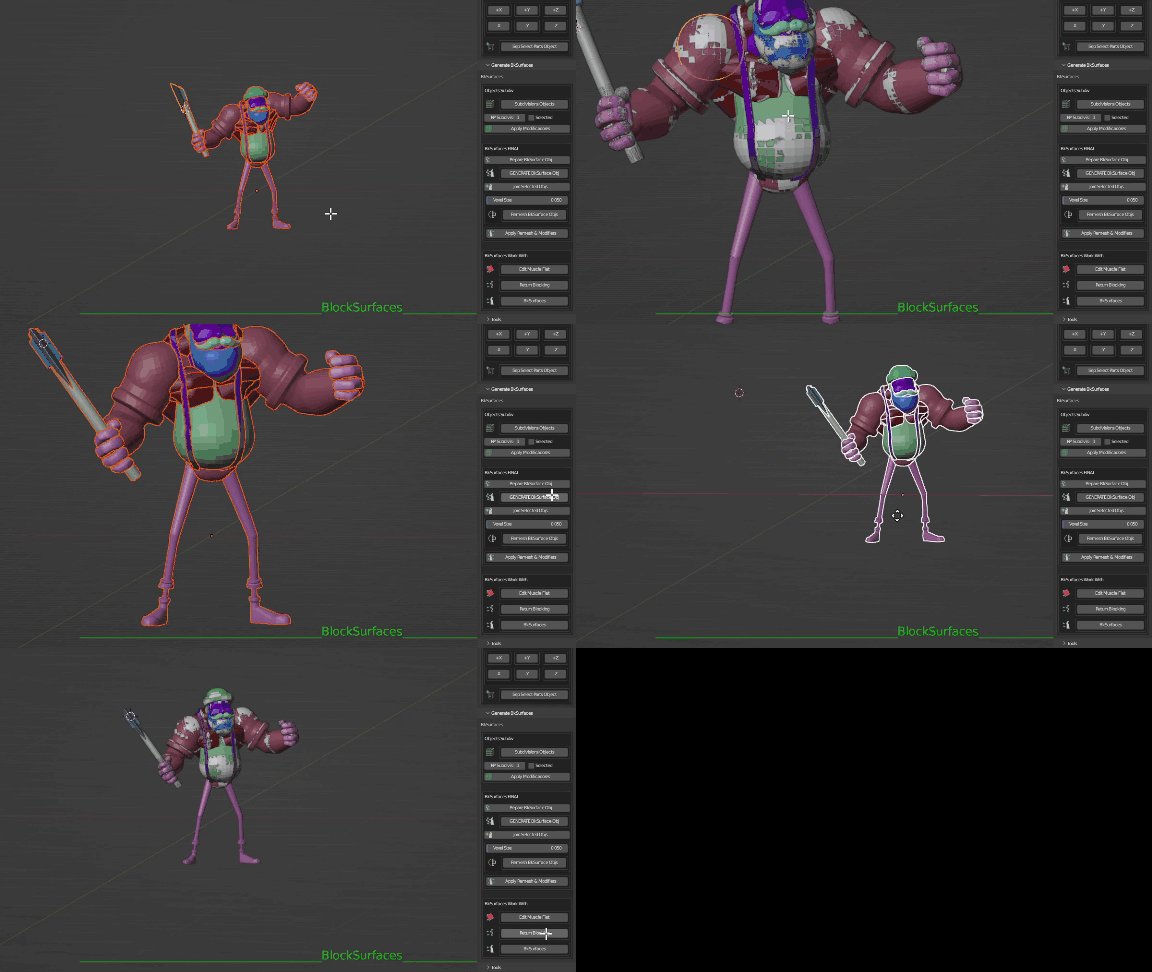
With all these features, BlockSurfaces is the perfect tool to take your work to the next level. Try BlockSurfaces now and transform your character blocking workflow forever!
Updates up to version 1.0.20: Video with the most important updates
– Duplicate branches in the desired position
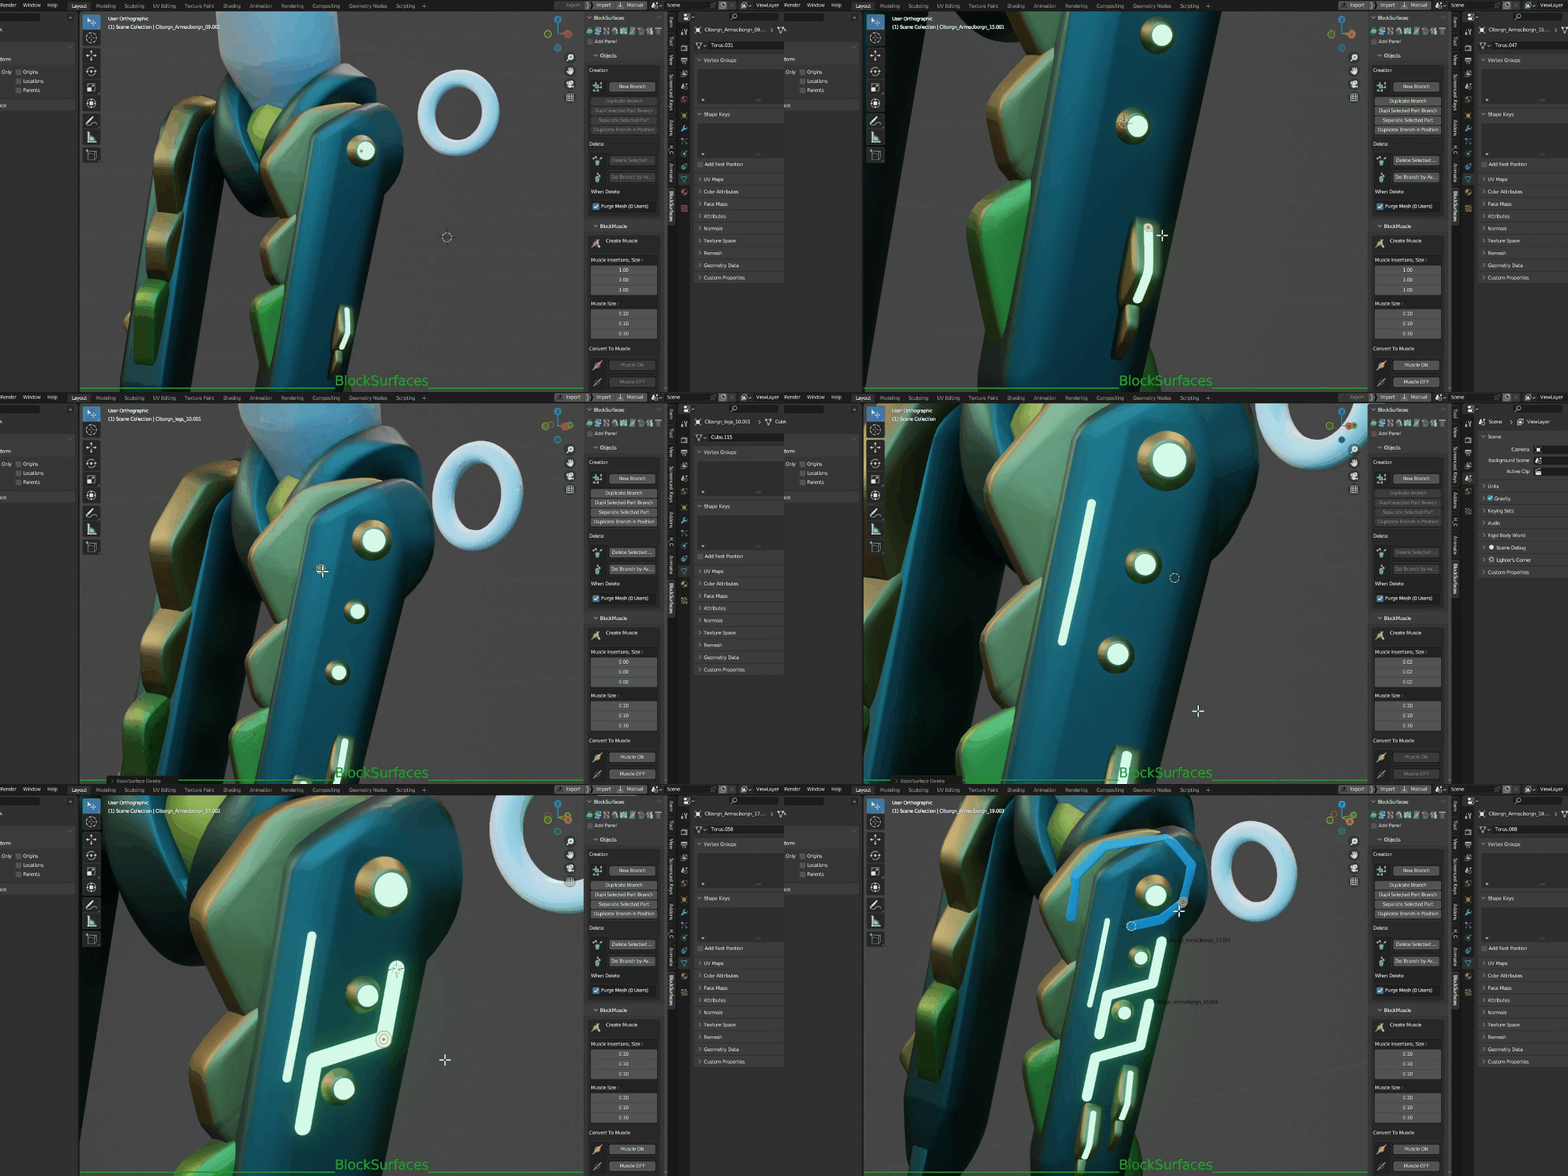
Duplicate branches in the desired position With a simple click on the keyboard shortcut, you can duplicate the selected object, creating a new branch or if you have a branch selected, it will duplicate it in the position with its sub-branches And if you don’t select anything, it will create a new branch with a sphere object for quick blocking of details on the surface.
– Duplicate branches with hierarchies
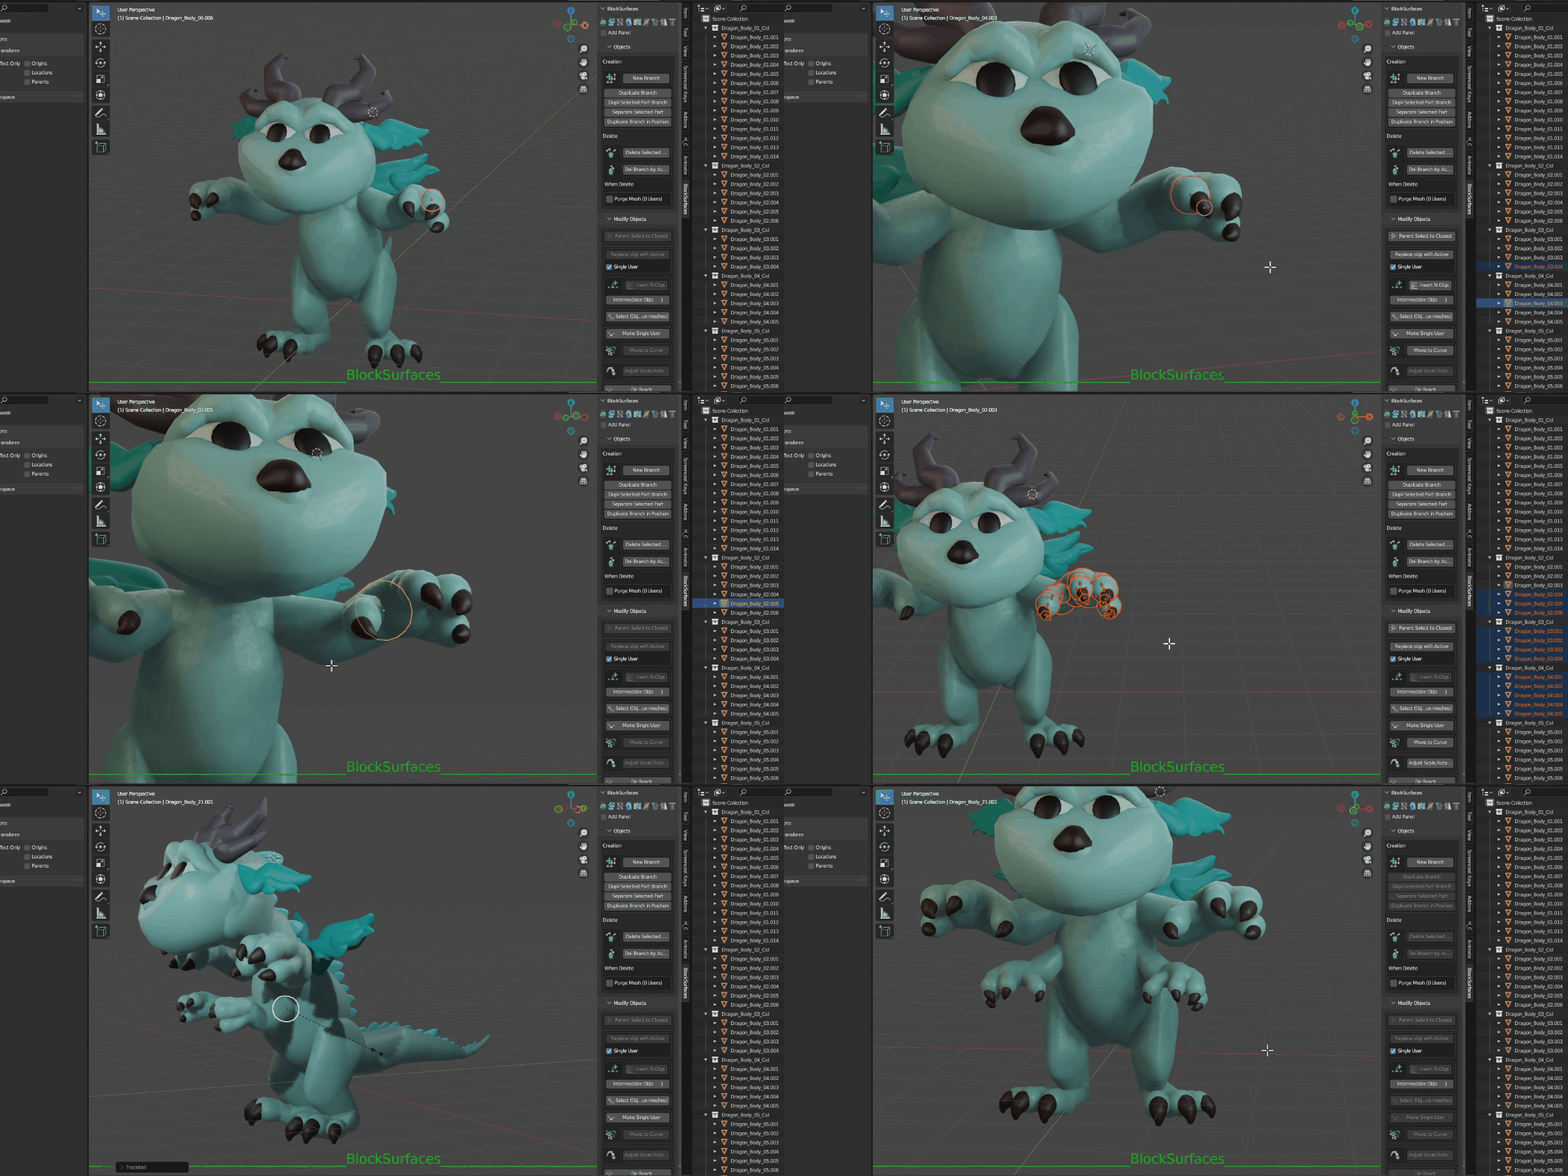
This option will allow you to duplicar branches with hierarchies, for example mirroring a full arm with its fingers, nails or other nested elements, in a way that maintains intact the hierarchical relationships between the different components when mirroring. In this way, the work can be accelerated by having the other mirrored extremity automatically configured on the corresponding axis, without the need to re-establish the hierarchies between its parts manually.
– Mirror branches while maintaining hierarchies
You will also be able to do symmetry of the branches maintaining intact the hierarchical relationships. Just like with the duplicate option, you will have the option to mirror any extremity along with its fingers or other nested elements, and maintain the hierarchies between them.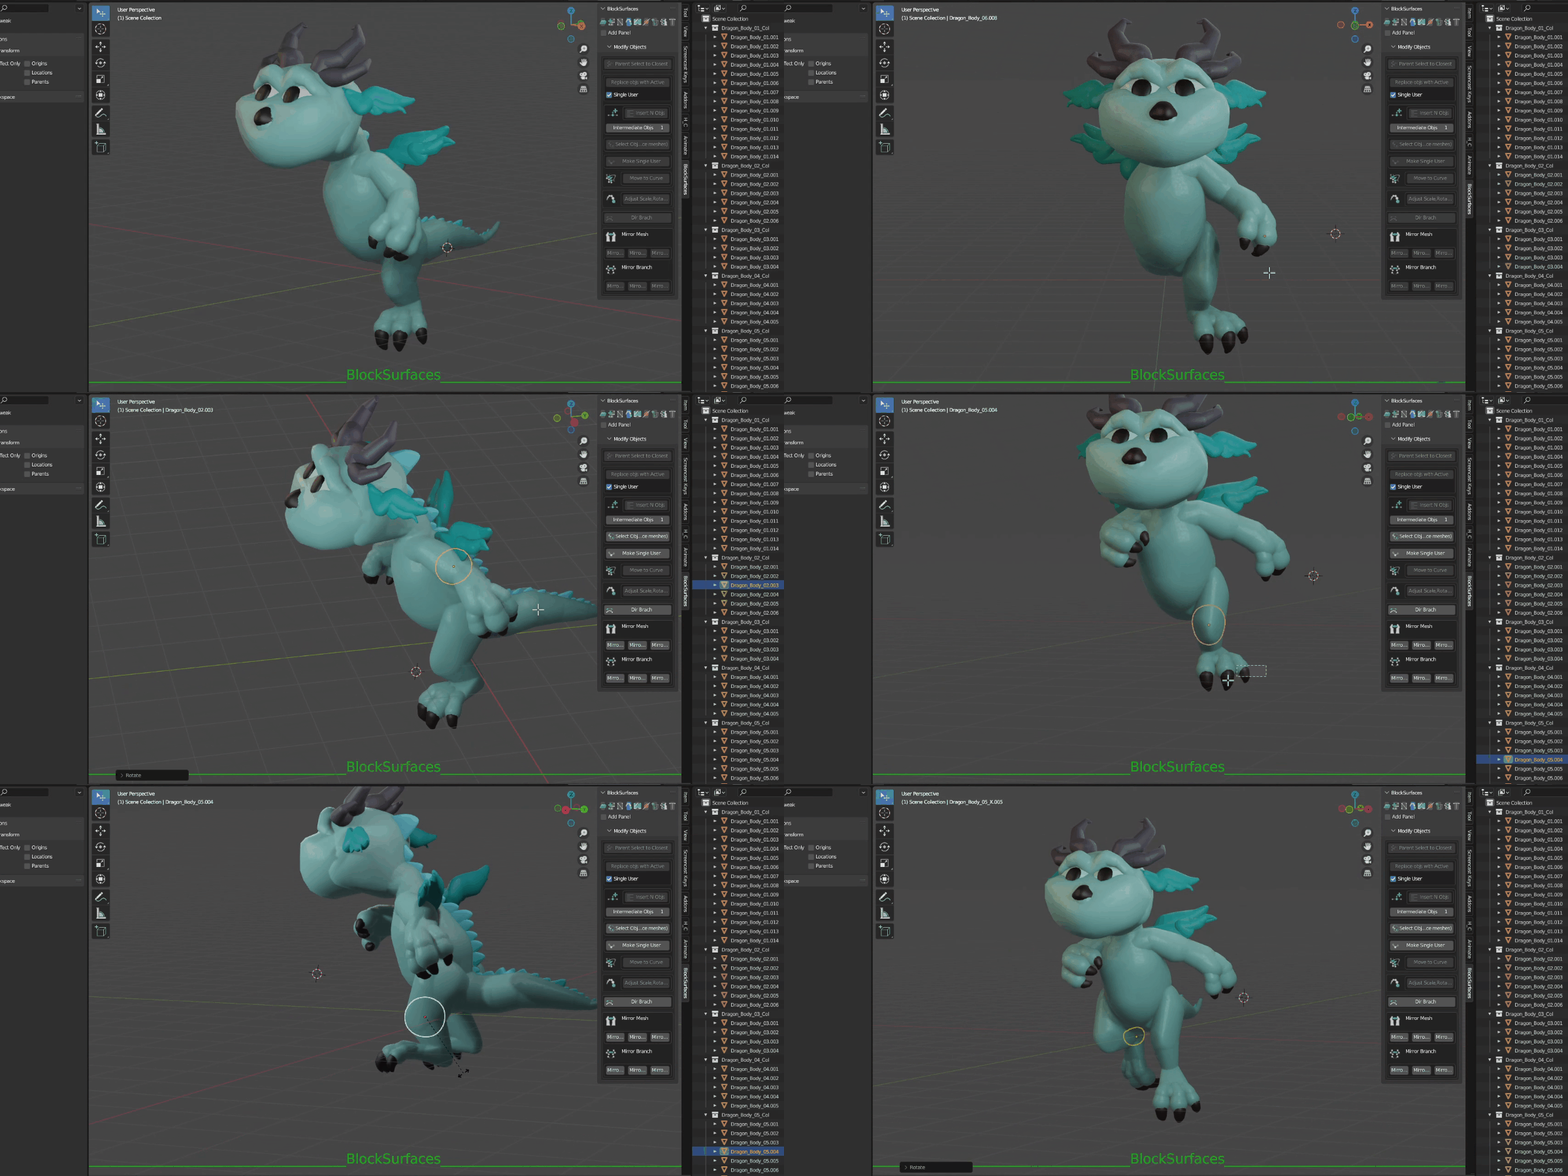
– Separate the selected objects from the branch
– Now you can select the objects with which to create a new branch, separating them from the branch they belong to and creating a new one. You can make this new branch a child of the previous branch or not, for quick configuration of the new branch.
– Pie menu for creating relationships
– Pie menu for creating relationships Now you have a pie menu that may be more comfortable for you to create relationships in different directions within the branch or with others.
– Updates up to version 1.0.015: Video with the most important updates
– Customizable keyboard shortcuts
– Now you can configure the keyboard shortcuts of the addon operators to your liking.
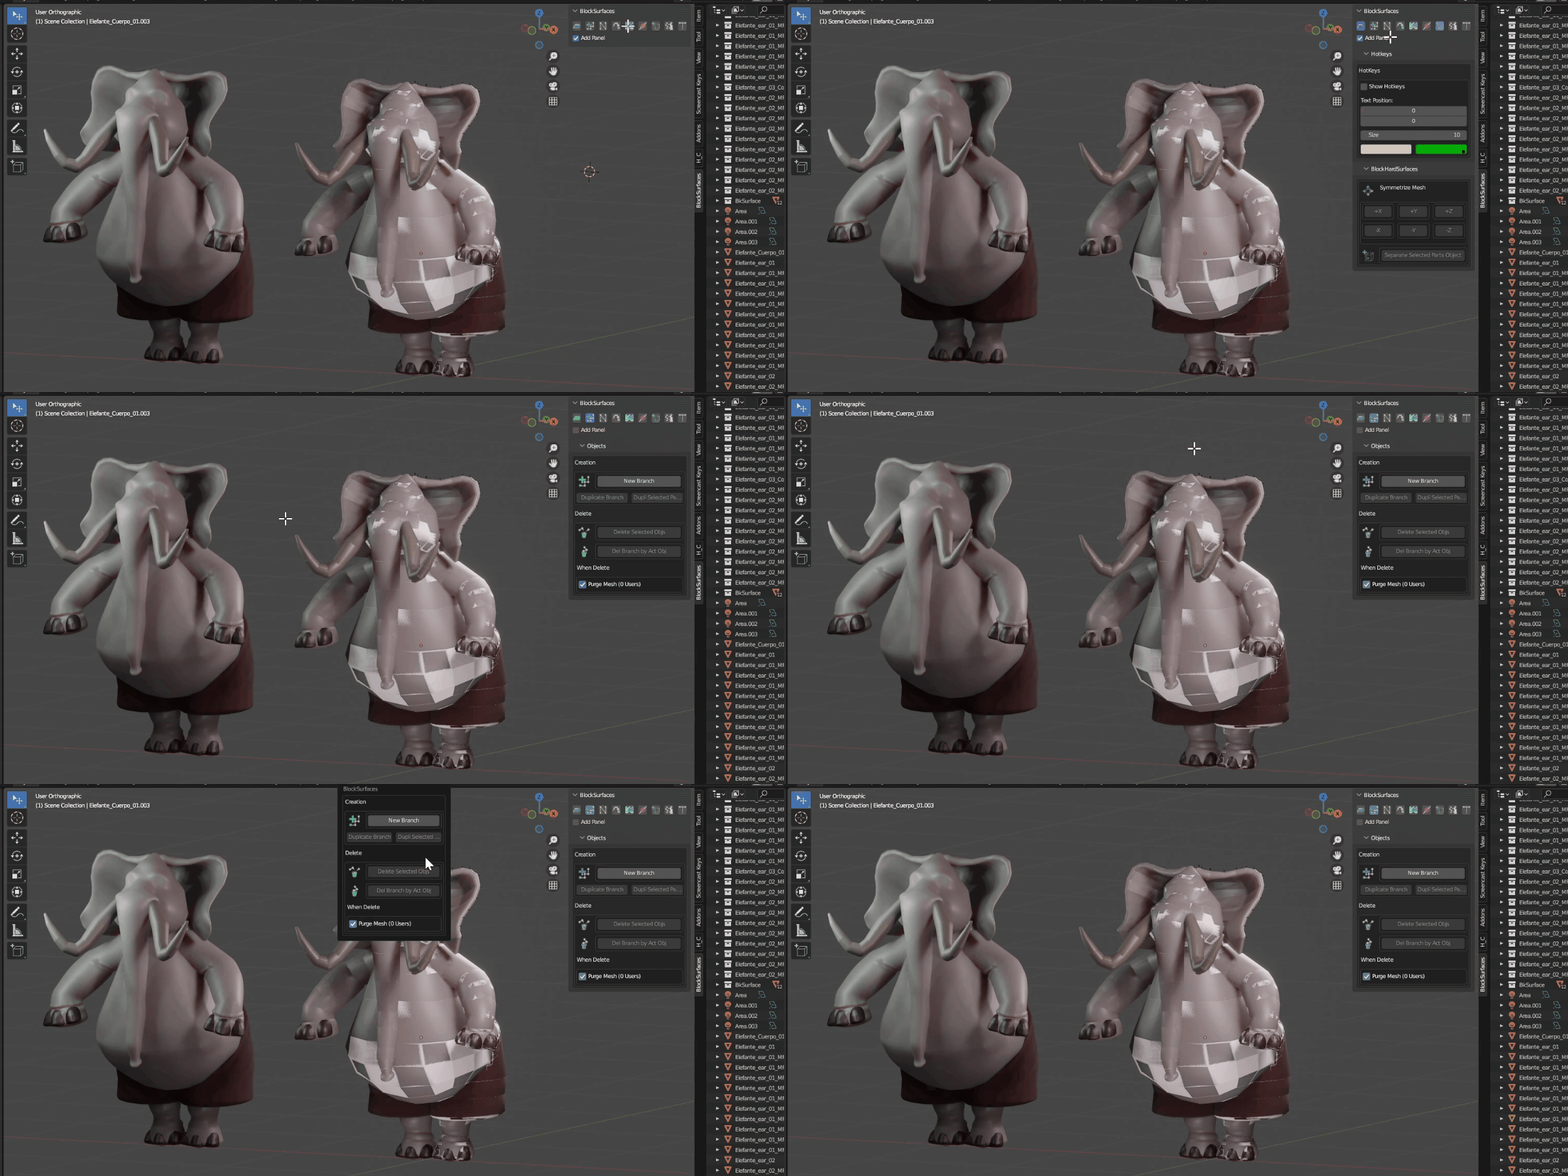
– Configurable and floating panels
– You can change the visible panels, combine them, and use them in a floating way.
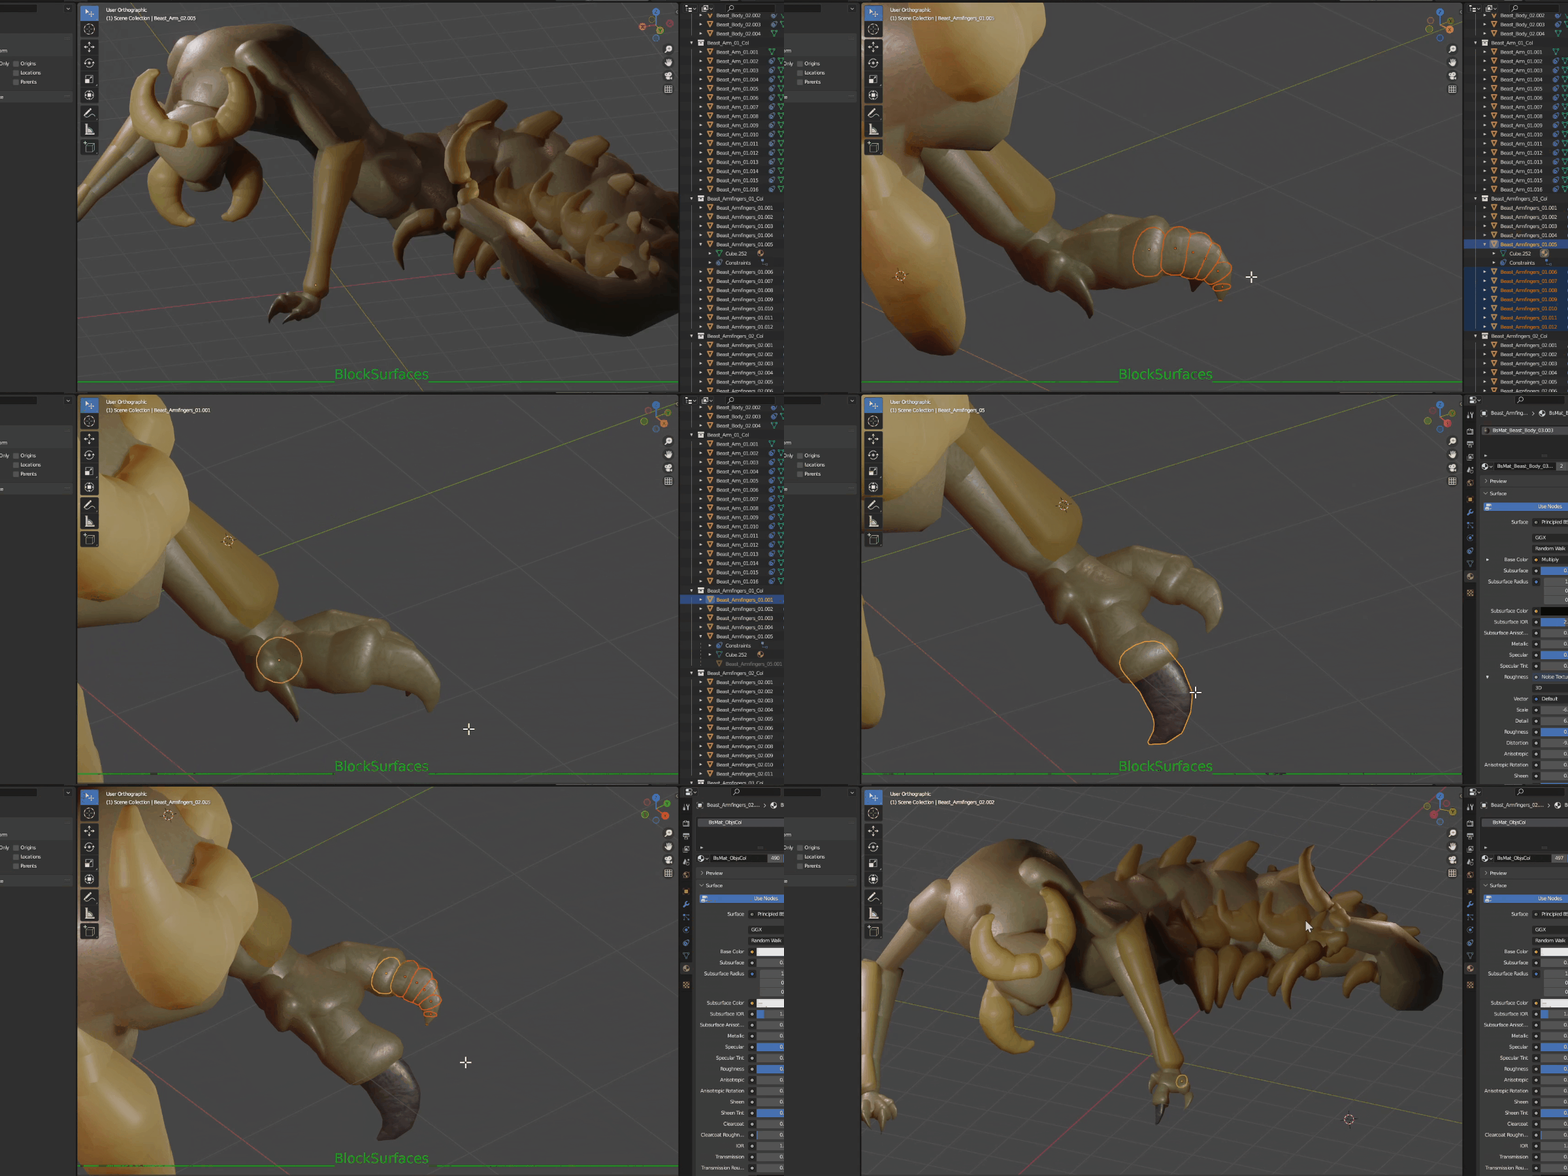
– Branches with materials
-Now you can see the generated branches with materials, copy materials between them, work in material mode or render with lights or however you want. You can work without seeing the interior objects, smooth the generated mesh and have easy access to X-Ray mode. A much more pleasant visualization work mode.
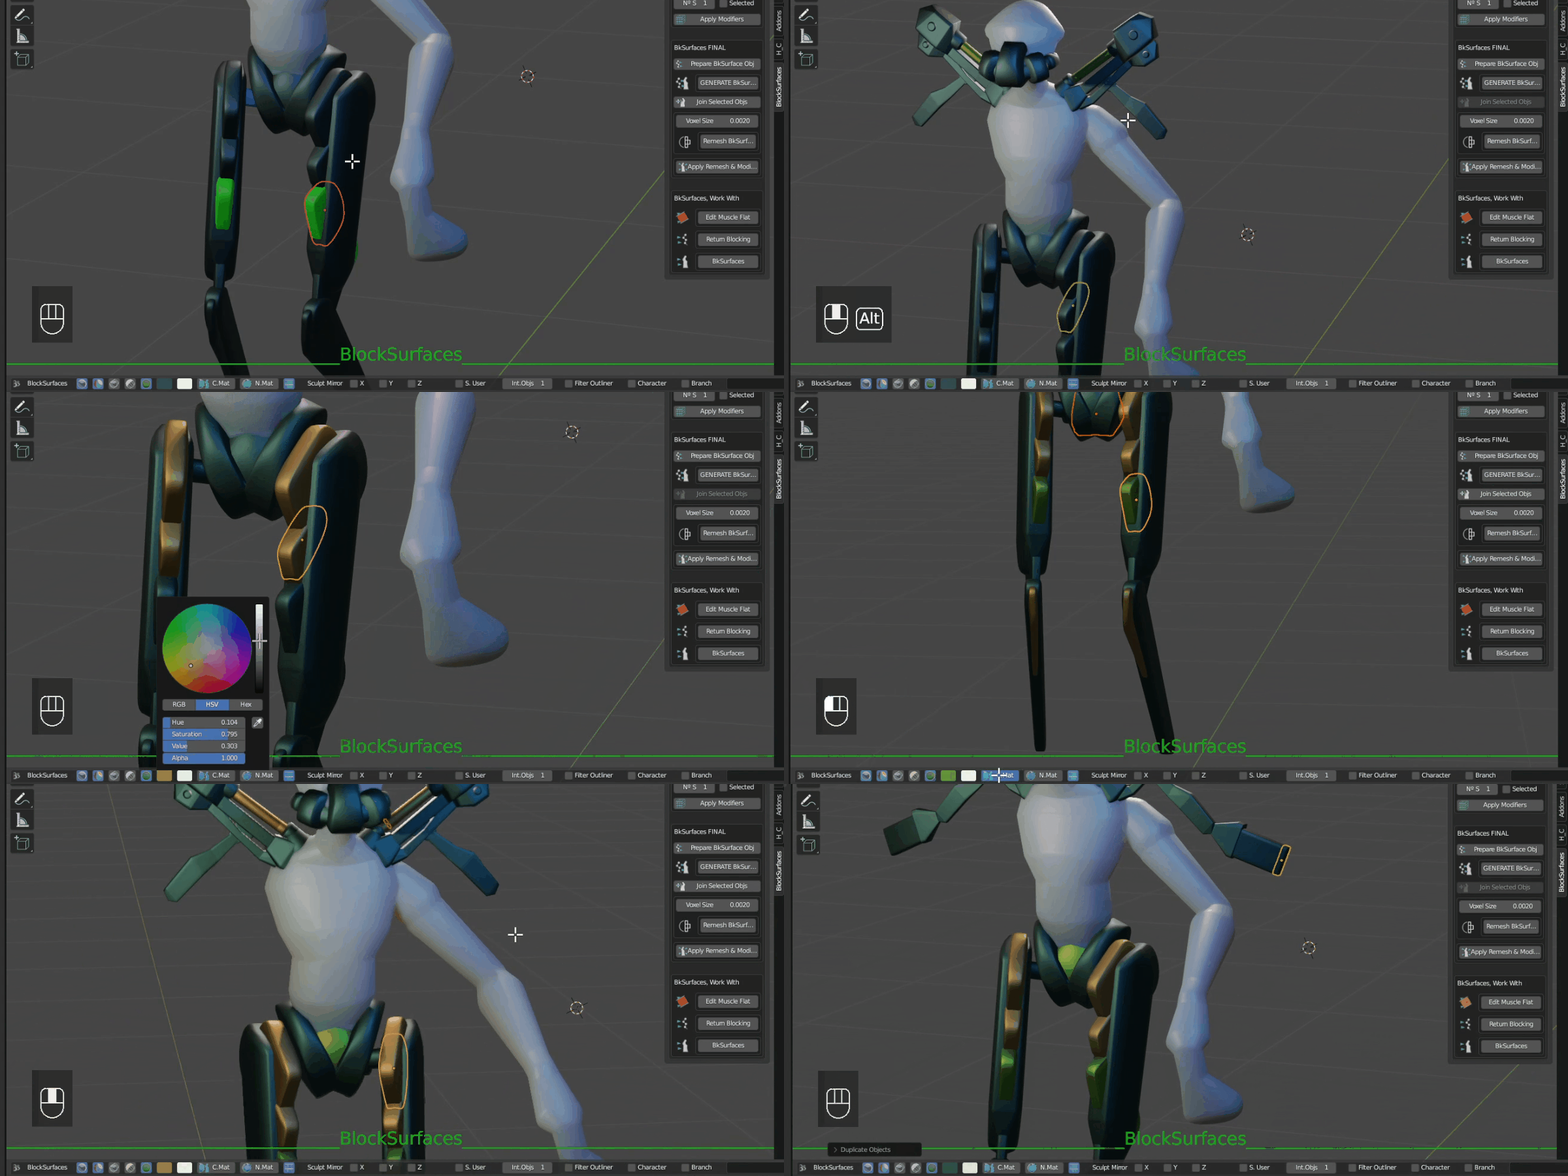
– New pie menu to switch between blocking modes, Select Muscleflat …
-You can quickly switch between the usual blocking mode or work with muscleflat or switch to the generated BkSurfaces meshes quickly.
– New pie menu to switch between blocking modes, Select Muscleflat …
-You can quickly switch between the usual blocking mode or work with muscleflat or switch to the generated BkSurfaces meshes quickly.
Supercharge your 3D creation workflow with premium selection of Blender Add-ons. Whether you are modeling intricate characters, sculpting realistic environments, or animating cinematic sequences, the right add-on can transform how you work inside Blender. Our curated collection includes powerful tools for UV unwrapping, procedural texture generation, rigging automation, rendering optimization, and more—each rigorously tested for compatibility with the latest Blender versions. Eliminate tedious manual processes and unlock advanced functionality that lets you focus on what matters most: bringing your creative vision to life. Explore our full range of professional Blender plugins today and take your 3D projects to the next level.
➡️ ➡️ For more Blender Plugins 😀 😀
Reviews
There are no reviews yet.