
lighthepler for Blender
Light Helper v0.4.1 for Blender
The Ultimate Lighting Setup Tool
Download the Light Helper v0.4.1 addon today. Therefore, you can light your scenes instantly. Because 3D rendering requires perfect illumination, you need proper tools. However, manual light placement takes many frustrating hours. Consequently, this powerful addon solves that problem completely. Furthermore, it provides a fast, visual workflow. Thus, you can create stunning lighting in seconds.
Fast Light Rig Generation
First, the core of this addon is speed. Specifically, it generates complex light rigs instantly. Furthermore, you can add three-point lighting easily. Additionally, the tool applies area lights seamlessly. Thus, you can build endless lighting variations quickly. Moreover, you can customize light intensity perfectly. Consequently, your 3D renders will look highly professional.
Advanced Light Management Features
Ultimately, complex scenes require advanced light control. Therefore, this addon includes smart management tools. Specifically, you get easy light grouping features. Furthermore, the algorithms preserve scene organization perfectly. Additionally, the tools simulate realistic color temperatures. Consequently, your lighting will look incredibly dynamic. Thus, the workflow reacts beautifully to your creative input.
Real-Time Optimization and Performance
However, heavy lighting can slow down your viewport. Therefore, the addon is perfectly optimized for performance. Specifically, it utilizes Blender’s efficient native light systems. Consequently, you can render complex scenes easily. Meanwhile, your viewport frame rate remains completely stable. Ultimately, this ensures a smooth and fast workflow.
Perfect for 3D Generalists
Additionally, this addon is ideal for 3D generalists. Furthermore, it suits product visualization artists perfectly. Moreover, game developers will love the rapid setup. Ultimately, it accelerates your entire 3D production pipeline.
System Requirements and Formats
Specifically, the addon requires Blender 3.6 or newer. Furthermore, it supports both Cycles and Eevee render engines. Additionally, you get regular free updates from the developer. Therefore, it works perfectly across all major operating systems. Moreover, you will need a standard workstation. Thus, 16GB of RAM is highly recommended. Consequently, a modern GPU ensures smooth viewport playback.
Installation and Usage Guide
First, download the zip file from your library. Next, open Blender and go to Edit Preferences. Then, select Add-ons and click Install. After that, enable the Light Helper addon. Finally, press the hotkey to generate lights. Thus, your stunning lighting setup will be ready quickly.
What is Included Inside?
Specifically, the pack contains multiple light rig presets. Furthermore, it includes smart light management algorithms. Additionally, you get several color temperature variants. Moreover, there are detailed video tutorial guides. Ultimately, you receive everything for professional lighting creation.
Final Thoughts on the Addon
Ultimately, dynamic lighting evokes profound visual realism. Therefore, this addon provides the ultimate creative foundation. Furthermore, you can build detailed product showcases. Alternatively, you can create dramatic cinematic scenes. Consequently, your lighting vision becomes a stunning reality.
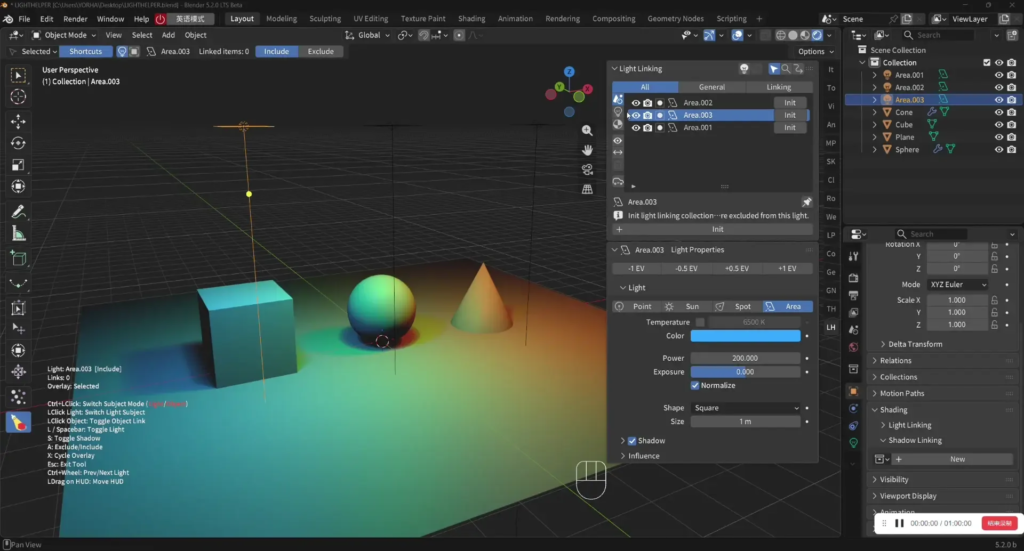
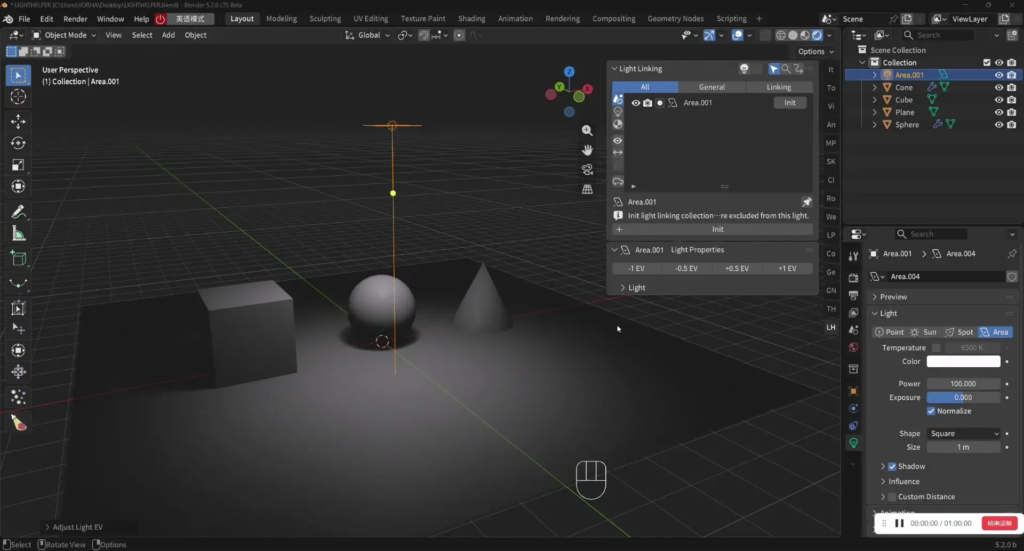
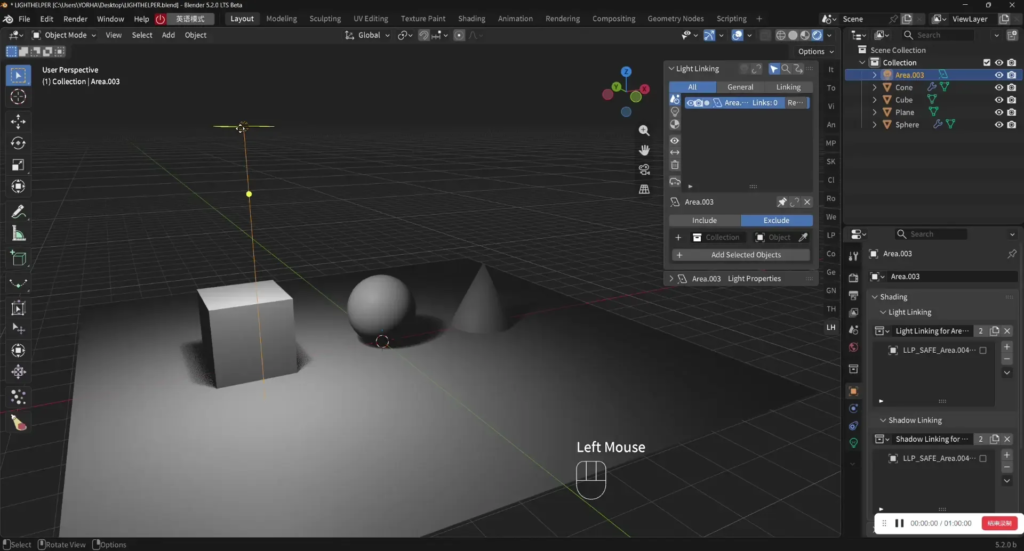
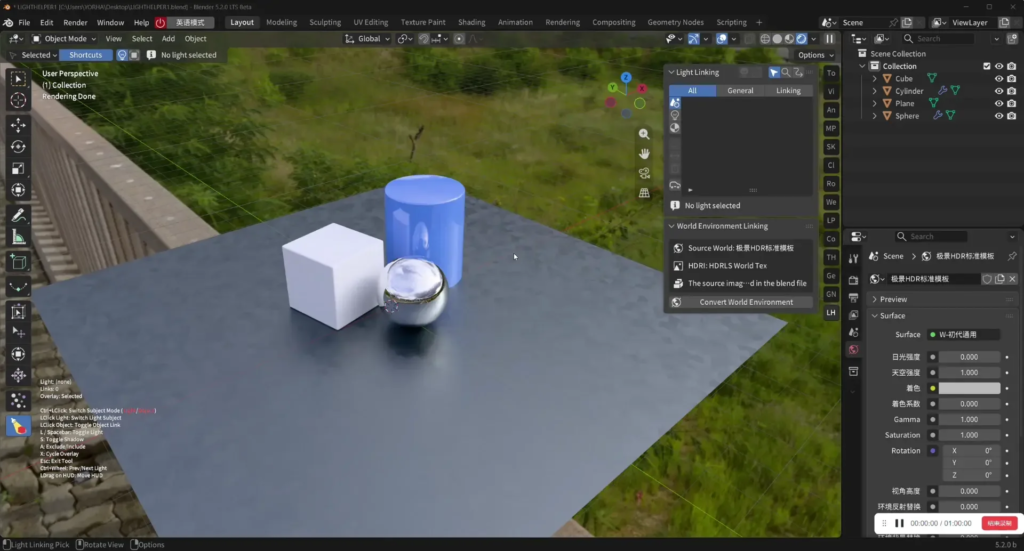
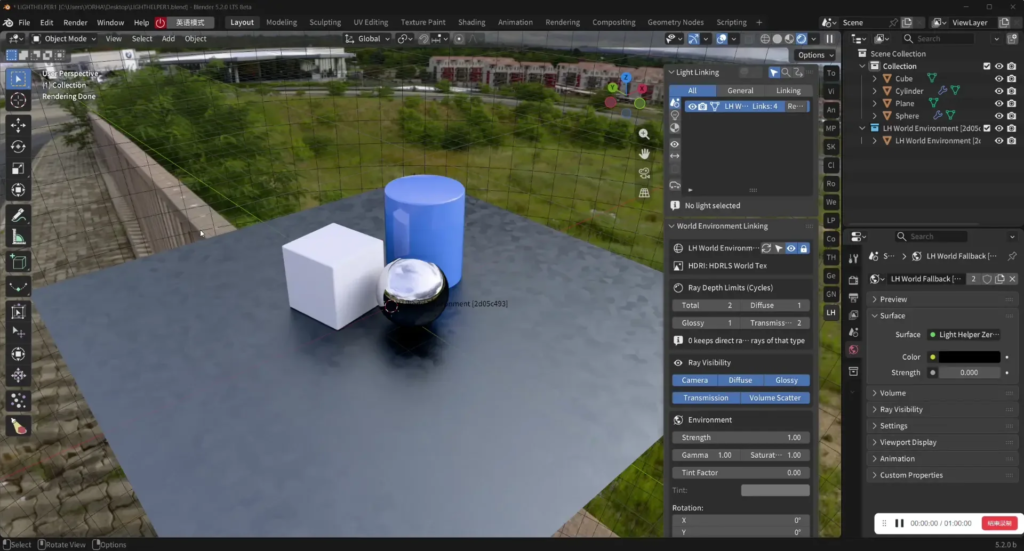
LightHelper
A more intuitive way to control which objects a light illuminates—and to manage lights directly from the objects they affect.
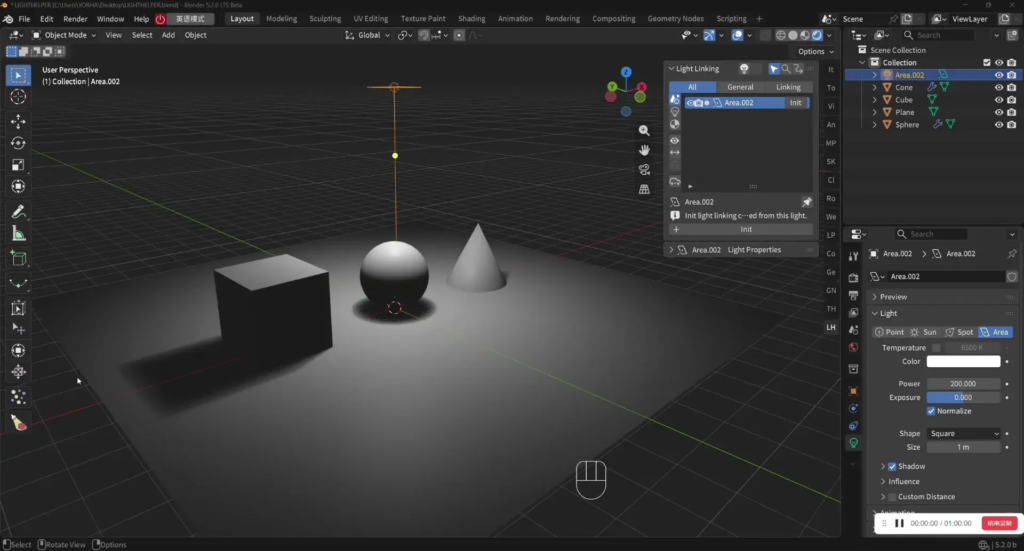
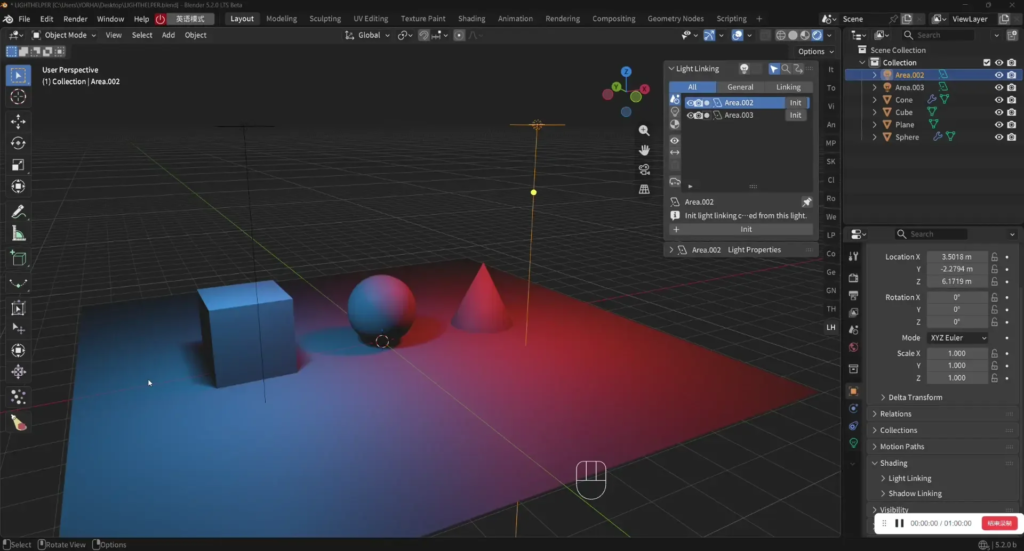
LightHelper is a Blender extension that turns Light Linking and Shadow Linking into a fast, two-way workflow. Edit a light to choose the objects it affects, or start from an object and choose the lights that include or exclude it.
Highlights
- Edit links from either a light or an object.
- Switch each light between Include and Exclude behavior.
- Control illumination and shadow links independently.
- Edit links directly in the 3D View with a dedicated interactive tool.
- Detect both Blender Light objects and objects using emissive materials.
- Solo lights, adjust energy in EV steps, filter large light lists, and pin working subjects.
- Separate shared linking data manually, or opt in to automatic duplicate handling.
- Restore Blender’s default full-lighting behavior with one action.
Compatibility
| Blender version | Cycles | Eevee |
|---|---|---|
| 4.2 | Yes | No |
| 4.3 or newer | Yes | Yes |
- Minimum supported Blender version: 4.2.
- The Light Linking controls are disabled for unsupported render engines.
- LightHelper follows Blender’s own Light Linking capabilities and renderer limitations.
Installation
- Download the ZIP from the latest release. Do not extract it.
- In Blender, open Edit → Preferences → Get Extensions (or Add-ons, depending on the Blender version).
- Open the menu in the top-right corner and choose Install from Disk.
- Select the downloaded ZIP and enable Light Helper if Blender does not enable it automatically.
- In the 3D View, press
Nand open the LH tab.
The sidebar tab is named LH by default. You can rename it in the extension preferences.
Core concepts
Include and Exclude
Every initialized light has its own linking mode:
| Mode | Result |
|---|---|
| Include | The light illuminates only the objects or collections listed in its links. |
| Exclude | The light illuminates everything except the objects or collections listed in its links. |
Use Include when a light should affect only a small, specified set of objects. Use Exclude when a light should illuminate the scene normally but skip a few objects.
Illumination and shadows
LightHelper exposes Blender’s two independent linking channels:
- Illumination channel — controls whether the object receives illumination from the light.
- Shadow channel — controls whether the object casts a shadow for that light.
The illumination and shadow buttons can be toggled separately. This makes it possible to keep illumination while disabling a shadow, or to adjust shadow linking without changing the illumination link.
Quick start
Start from a light
Use this workflow when you already know which light you want to edit.
- Select a light and activate the Light Linking tool in the left toolbar.
- Include mode — the light illuminates only the selected objects.
- Exclude mode — the light does not illuminate the selected objects.
Start from an object
Use this workflow when you already know which object you want to manage lights from.
- Select the object and open Object Linking in the
LHsidebar. - Choose the lights that should include or exclude the object.
- Each light uses its own current Include/Exclude mode.
- Toggle the illumination or shadow channel as needed.
Start from a World Environment (Cycles)
Use this workflow when you want panoramic lighting but need to exclude its effect on specific objects. (Not recommended unless necessary.)
- Switch to the Cycles render engine.
- Ensure the scene has a World with an emissive or environment texture setup.
- Click Convert (this turns the world environment into a linkable mesh sphere).
- Enter the linking workflow and select the world environment sphere (use the quick-select button if needed).
- Include or exclude objects.
- Because of how Sun lights behave, they automatically exclude the world environment sphere from illumination.
Restore default full lighting
Use Restore on a light when you want to remove its Light Linking and Shadow Linking collections completely. The light then returns to Blender’s default behavior and illuminates all eligible objects.
Removing the final light link from the object-first workflow also restores the affected light’s default full-lighting state.
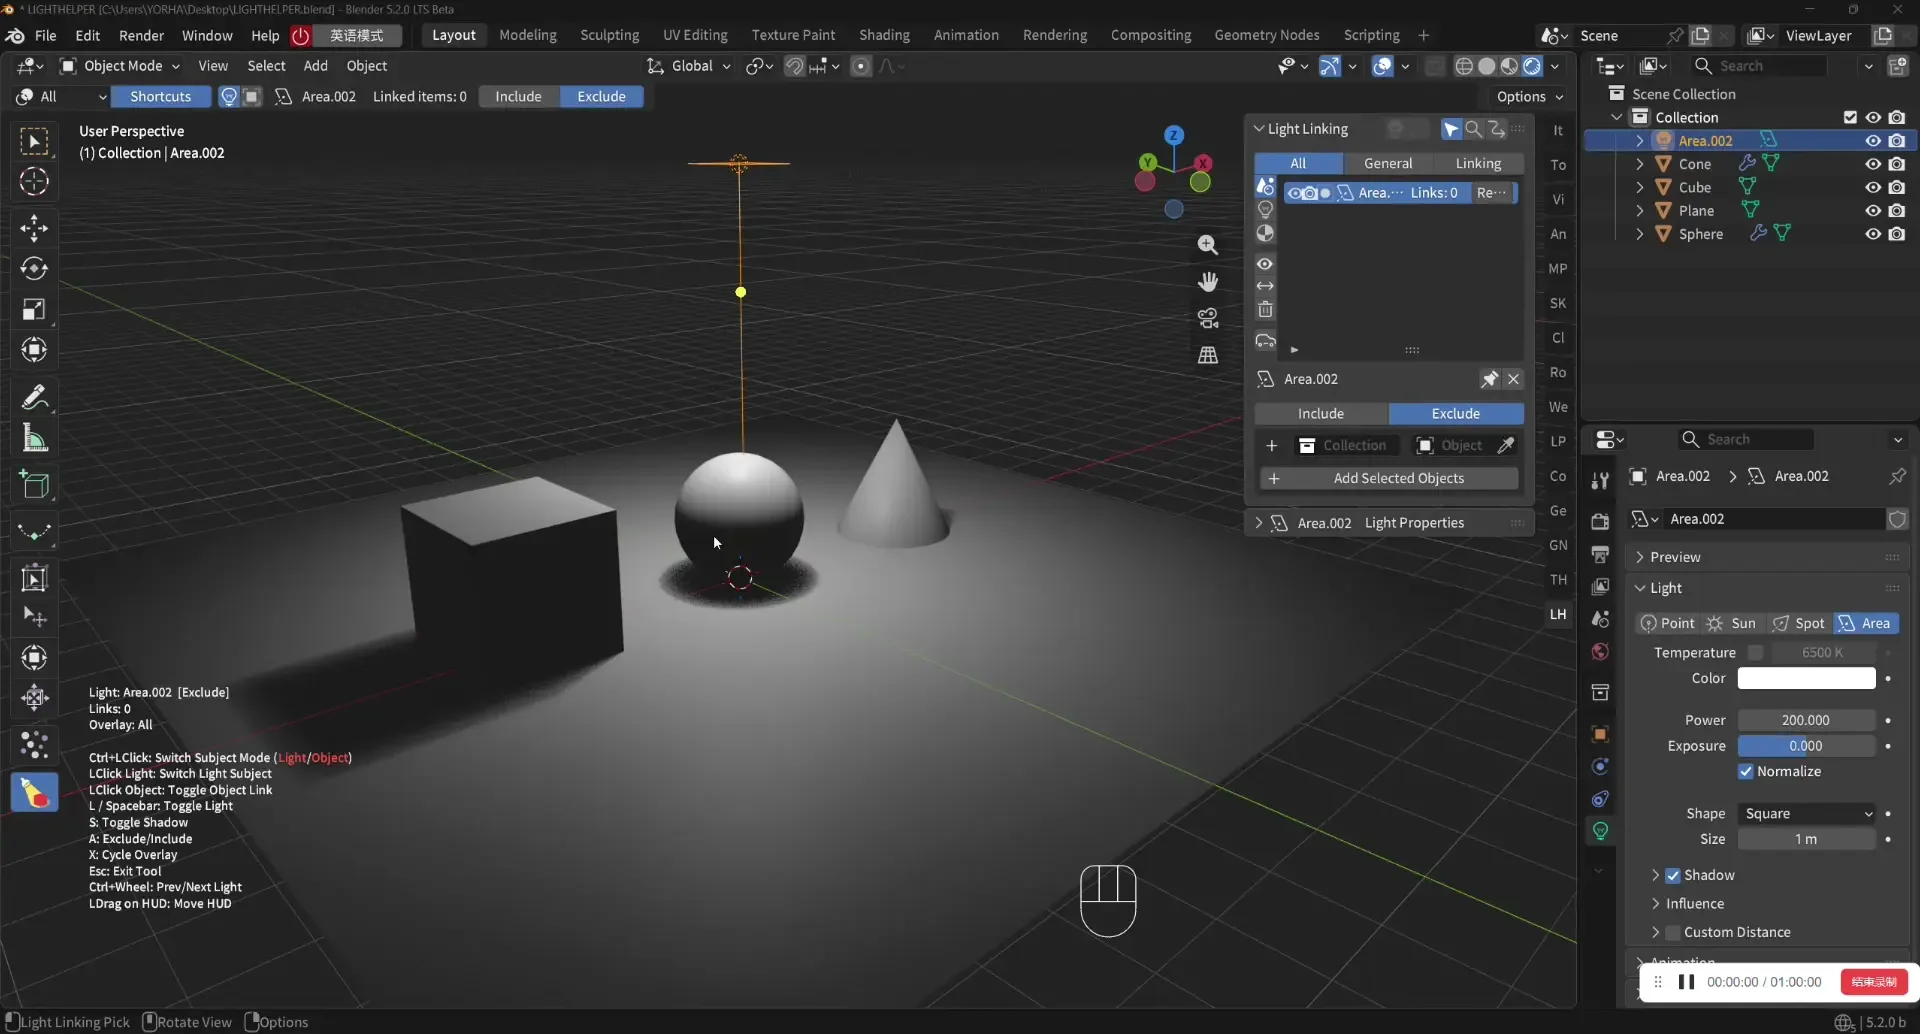
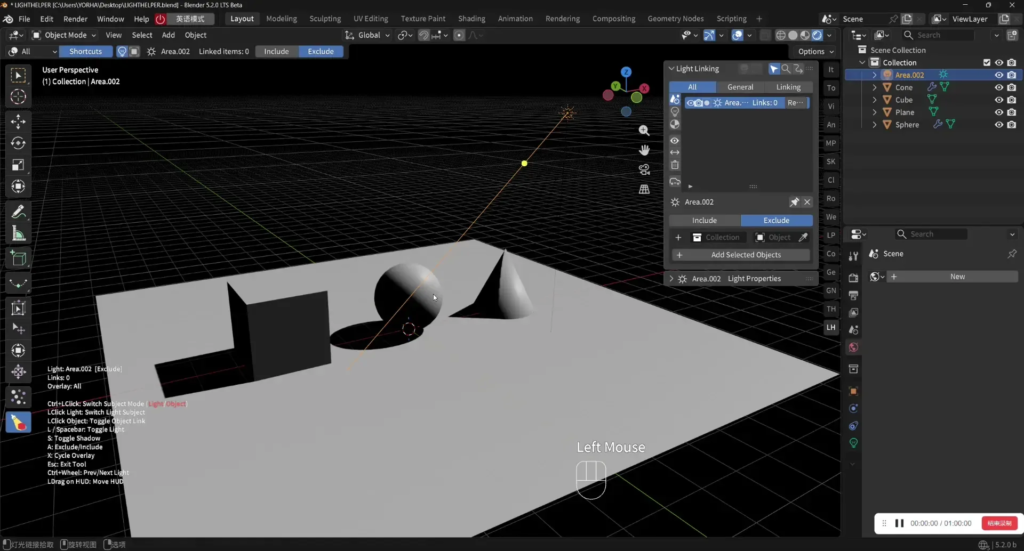
Interactive Light Linking tool
The Light Linking tool is available in the left toolbar of the 3D View while Blender is in Object Mode. It provides direct picking, a movable shortcut HUD, and link overlays.
Subject modes
| Subject mode | Left-click behavior |
|---|---|
| Light | Click a light to make it the subject; click an object to toggle that object’s link. |
| Object | Click an object to make it the subject; click a light to toggle that light’s link to the object. |
Hold Ctrl and left-click to switch the subject mode from the item under the cursor. A native Blender Light becomes the light subject; a linkable non-light object becomes the object subject.
Shortcuts
| Input | Action |
|---|---|
| Left-click | Select a new subject or toggle both link channels for the item under the cursor. |
Ctrl + left-click | Switch between Light and Object subject modes from the item under the cursor. |
L or Space | Toggle the illumination channel for the item under the cursor. In Object mode, place the cursor over a light. |
S | Toggle the shadow channel for the item under the cursor. In Object mode, place the cursor over a light. |
A | Switch the relevant light between Include and Exclude. In Object mode, place the cursor over a light. |
X | Cycle overlay display through Off, Selected, and All. |
Ctrl + mouse wheel | Move to the previous or next filtered light/object subject. |
| Left-drag on the HUD | Reposition the shortcut HUD. |
Esc | Exit to the previously active tool. |
Shadow toggle
Viewport overlays
The default Selected overlay shows links for the current subject only. All displays every visible link, while Off hides the visualization.
- Green indicates Include illumination links.
- Red indicates Exclude illumination links.
- Blue indicates shadow-only links.
- Gray indicates an item with neither active channel.
For dense scenes, LightHelper limits object outlines while continuing to draw link lines. Change Linking Tool Max Outlines in the preferences if needed.
Sidebar controls
Light Linking
The main panel lists available light sources and their linked items.
- Filter sources by All, Light, or Emission Material.
- Filter link state by All, General, or Linking.
- Search, sort, invert visibility, and hide sources that are not in the current scene.
- Initialize or restore one light, initialize all lights, and clear selected links.
- Add objects or collections and toggle their illumination/shadow membership.
- Pin a light so selection changes do not interrupt the current setup.
- Make one light—or all affected lights—use independent linking data.
Object Linking
The object-first panel shows the lights currently linked to the selected object.
- See each light’s Include/Exclude mode at a glance.
- Toggle illumination and shadow channels independently.
- Remove a light from the object while safely restoring default behavior when no links remain.
- Pin the object or show the global list of linked objects.
Light Properties
LightHelper brings the relevant Blender light settings into the same sidebar workflow. For native Light objects, the panel also provides:
-1 EV,-0.5 EV,+0.5 EV, and+1 EVenergy adjustments.- Built-in Cycles or Eevee light settings for the active renderer.
- Multi-light EV adjustment when multiple native Light objects are selected.
Each EV operation multiplies the light energy by 2^EV.
Other features
Emissive-material detection
Objects with a connected, non-zero emissive material can appear in the source list. LightHelper follows nested node groups up to the configured Emission Node Search Depth.
For complex materials, a high search depth can make list refreshes slower. Reduce the value if the interface stutters. To use an emissive source as the interactive tool’s light subject, select it from the sidebar first or left-click it while the tool is already in Light mode; Ctrl + left-click on a non-Light object selects it as an object subject.
Solo Light
Solo isolates the chosen native Light from the currently filtered light set. Press it again to restore the previous viewport, render, and local-hide states.
Shared linking data and duplicates
Duplicated lights can share Blender linking collections. Use Make Single-User for one light or Make All Single-User when each duplicate needs independent links.
Auto Fix Shared Linking is optional and disabled by default. When enabled, it separates shared linking collections only for explicitly detected duplicates and does not run while a file is opening.
View movement
Choose how selecting a light or linked object affects the viewport:
- None — select without moving the view.
- Maintaining Zoom — move directly while preserving the current zoom.
- Animation — animate the view transition.
Preferences
| Setting | Purpose |
|---|---|
| Panel Name | Rename the default LH sidebar tab. |
| Emission Node Search Depth | Set how deeply nested material node groups are searched for emission. |
| List Filter Type | Show all sources, native lights only, or emissive-material sources only. |
| Link Filter Type | Show all sources, unlinked sources, or linked sources. |
| View Movement Type | Choose whether selection moves or animates the viewport. |
| Auto Fix Shared Linking | Opt in to separating shared linking data for detected duplicate lights. |
| Linking Tool Max Outlines | Limit viewport outlines in dense scenes; link lines remain visible. |
| Shortcut Tip Scale / HUD X / HUD Y | Resize or position the interactive tool HUD. |
| Reset Linking HUD | Restore the default HUD size and position. |
| Clean Up Legacy Data | Remove only legacy data explicitly managed by older LightHelper versions. |
Known limitations
When an emissive material is used as a light source, indirect-light exclusion may not behave reliably in Eevee. This is a limitation of Blender’s current Light Linking implementation rather than a LightHelper setting. Use native Blender Light objects when predictable exclusion is required.
FAQ
The LH tab is missing
- Press
Nwhile the mouse is over the 3D View. - Confirm that Light Helper is enabled in Preferences.
- Check whether Panel Name was changed in the extension preferences.
The Light Linking tool is unavailable
- Switch Blender to Object Mode.
- In Blender 4.2, use Cycles. Blender 4.3 or newer also supports Eevee.
- Confirm that the current render engine supports Blender Light Linking.
A duplicated light changes another light’s links
The lights are probably sharing linking collections. Use Make Single-User, or enable Auto Fix Shared Linking if you want LightHelper to handle detected duplicates automatically.
An emissive object does not appear in the source list
- Confirm that the material uses nodes and has a connected, non-zero emission path.
- Switch the source filter to All or Emission Material.
- Increase Emission Node Search Depth if the emission is inside deeply nested node groups.
A light does not return to normal full lighting
Use Restore for that light. Restore removes the receiver and blocker collections instead of leaving an initialized but intentionally restricted link setup.
The viewport overlay is too busy or slow
Press X to use Selected or Off, or lower Linking Tool Max Outlines in the preferences.
Supercharge your 3D creation workflow with premium selection of Blender Add-ons. Whether you are modeling intricate characters, sculpting realistic environments, or animating cinematic sequences, the right add-on can transform how you work inside Blender. Our curated collection includes powerful tools for UV unwrapping, procedural texture generation, rigging automation, rendering optimization, and more—each rigorously tested for compatibility with the latest Blender versions. Eliminate tedious manual processes and unlock advanced functionality that lets you focus on what matters most: bringing your creative vision to life. Explore our full range of professional Blender plugins today and take your 3D projects to the next level.
➡️ ➡️ For more Blender Plugins 😀 😀
Reviews
There are no reviews yet.