
QOL RippleShift for Blender
QOL RippleShift v1.0.1 for Blender
The Ultimate Interactive Keyframe Offset and Animation Editing Tool
Download QOL RippleShift v1.0.1 today. Consequently, you can shift entire sequences of keyframes forward or backward with a single intuitive action, dramatically simplifying your animation editing workflow. Because animation refinement often requires inserting pauses, extending timing, or restructuring sequences, having access to efficient timeline manipulation tools is absolutely essential. Nevertheless, editing multiple keyframes across various objects, tracks, and f-curves frequently involves laborious manual adjustments and countless scrolling operations. Fortunately, RippleShift addresses these frustrations directly. Moreover, it introduces a video-editing-style ripple workflow to Blender’s animation system. In short, you can insert pauses, adjust timing, and restructure animations in a fraction of the usual time.
Instant Keyframe Shifting with Visual Feedback
The core of this addon lies in its intuitive one-click operation and real-time adjustability. For instance, you simply position your playhead at the desired insertion point, right-click in the Timeline, Dope Sheet, or Graph Editor, and select “Ripple Shift keys” from the context menu. By default, the tool shifts all keyframes after the playhead by 25 frames . Furthermore, after applying the initial shift, you can press F9 to bring up the adjustment panel, where the “Shift Amount” slider allows you to interactively drag the keyframes to their exact new positions . Since this eliminates the need to manually select and drag individual frames, your animation editing becomes significantly faster and more fluid. Consequently, you can focus on creative timing decisions rather than technical manipulation.
Flexible Selection Controls and Intelligent Direction Handling
Professional animation workflows demand precision and selectivity. Therefore, RippleShift includes multiple filtering options to ensure the tool affects only the intended keyframes. For example, “Selected Objects Only” restricts the ripple effect to animated channels belonging only to the objects you have selected, leaving all other elements untouched . Similarly, “Selected Channels Only” offers even finer control when working in the Graph Editor, allowing you to mix and match f-curves from different objects and affect only those specifically chosen . Additionally, the Direction dropdown provides three distinct modes: “AUTO,” which automatically determines direction based on whether the shift is positive or negative; “FUTURE,” which exclusively affects keyframes that originated after the playhead position; and “PAST,” for those prior to the playhead . Consequently, you maintain complete creative authority while benefiting from intelligent default behavior.
Smart Pause Insertion for Dynamic Animation
Sometimes, your animation simply needs a brief moment of stillness. Accordingly, the “Add Holds” feature automatically inserts keyframes that match the current frame value at the gap created by the ripple shift . This effectively pauses the animation at that moment, allowing you to create dramatic beats, holds, and accents without manually duplicating keyframes. Meanwhile, the tool shifts keyframes even if they are outside the visible viewport, ensuring the entire timeline remains accurate regardless of zoom level or scrolling position . Thus, your animation timing becomes more dynamic and expressive with minimal effort.
Perfect for Character Animators and Motion Designers
This addon is particularly well-suited for character animators who frequently need to adjust timing in dialogue sequences or action beats. Similarly, motion graphics artists creating dynamic title sequences will appreciate the ability to restructure animated elements rapidly. Additionally, anyone working with complex, multi-layered animations across multiple objects will benefit from the targeted selection controls. Ultimately, whether you are polishing a performance, adjusting a cinematic sequence, or simply reorganizing your timeline, RippleShift accelerates your entire animation workflow.
System Requirements and Compatibility
The addon supports Blender versions 3.0 through 5.1 . Furthermore, version 1.0.1 is available as a Blender 4.2 EXTENSION format addon . It works across all major operating systems including Windows, macOS, and Linux. You will need a standard workstation with at least 8GB of RAM, though system requirements are minimal given the tool’s lightweight nature.
Installation and Usage Guide
To install, first download the zip file from your library. Next, open Blender and navigate to Edit Preferences. Then, select Add-ons and click Install. For Blender 4.1 and above, use the “Install from Disk” option from the dropdown menu. After that, locate and select the downloaded zip file, then enable the QOL RippleShift addon. Finally, position your playhead at the desired insertion point, right-click in the Timeline, Dope Sheet, or Graph Editor, select “Ripple Shift keys,” adjust the Shift Amount slider, and optionally apply the Add Holds function . Thus, your adjusted animation will be ready instantly.
What is Included Inside?
The pack contains the complete RippleShift addon with all features from v1.0.1. Furthermore, it includes the interactive keyframe shifting system, selection filters for objects and channels, and the Add Holds pause insertion function. Additionally, you receive the Direction dropdown for precise control over which keyframes are affected. Ultimately, you receive everything needed for professional keyframe editing.
Final Thoughts on the Addon
Intuitive keyframe ripple editing evokes profound creative freedom. Therefore, this addon provides the ultimate animation timing foundation. You can restructure complex sequences with unparalleled ease. Alternatively, you can insert dynamic pauses and holds with one click. Consequently, your animation editing vision becomes a stunning reality.
Have you ever been animating and found that you need to make space earlier in the sequence to make space for a range of new edits? Don’t you wish you could just move the playhead to that frame and just shift every single key for all animations from there ?
Ripple Shift does just that.
When editing huge amounts of curves and keys it can get tedious to select and edit multiple frames, especially as you have to scroll left and right to select the ones “offscreen”. This breaks the flow and means you oftnen have to navigate back to where you were.
Ripple Shift allows you to move ALL keys. Visible or not.
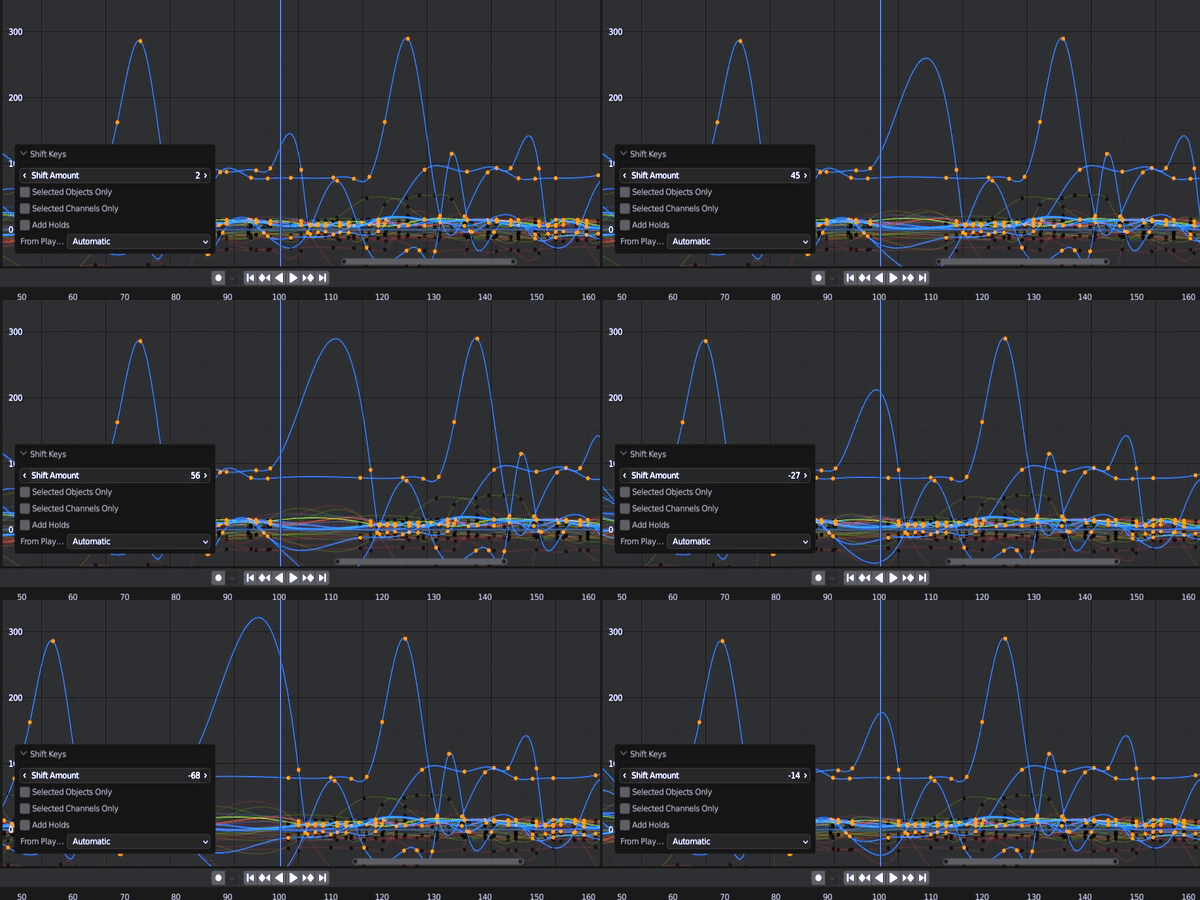
It’s a surprisingly intuitive workflow (it’s what we do with video editing anyway).
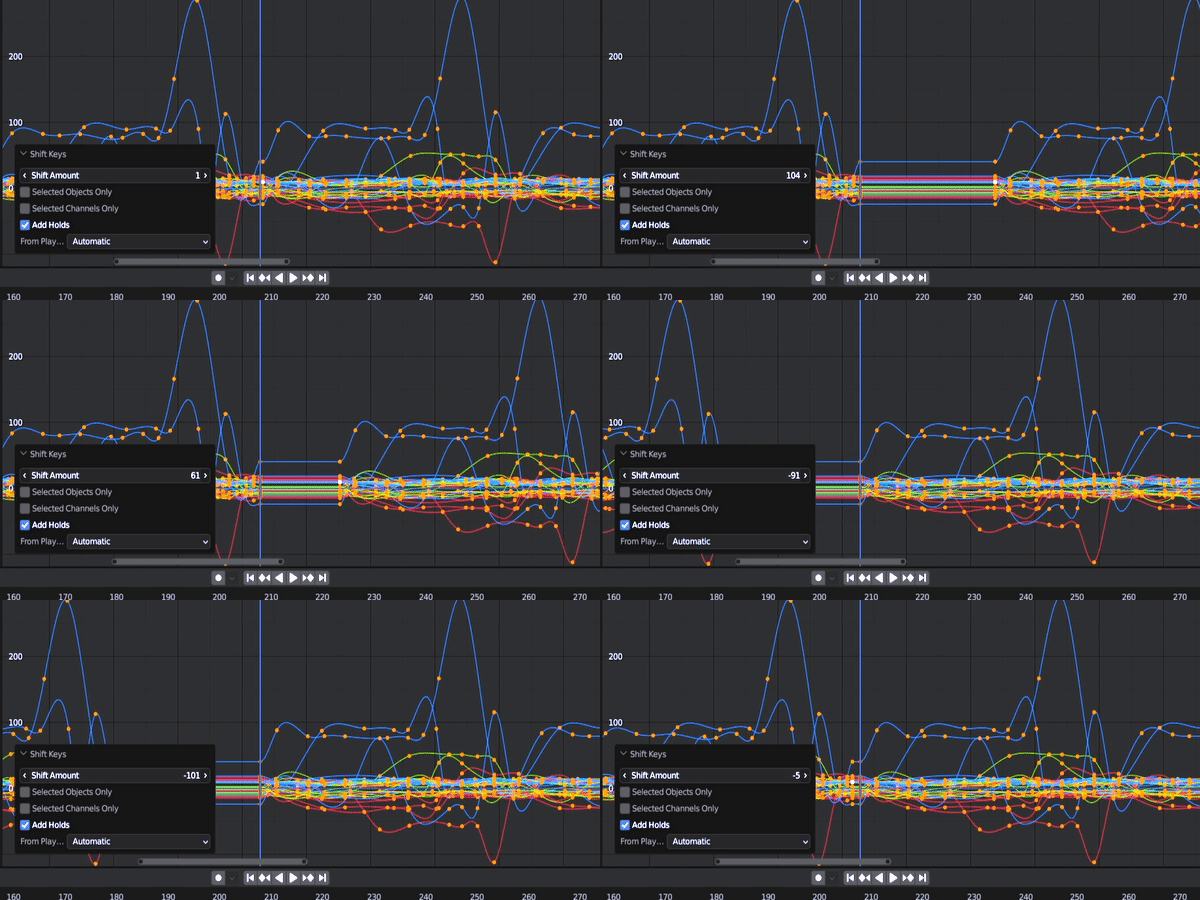
Sometimes you just want to add a pause, or slow things down, but realise that will require moving all keys for every object in order to make space.
Easy! Just click the “Add Holds” checkbox:
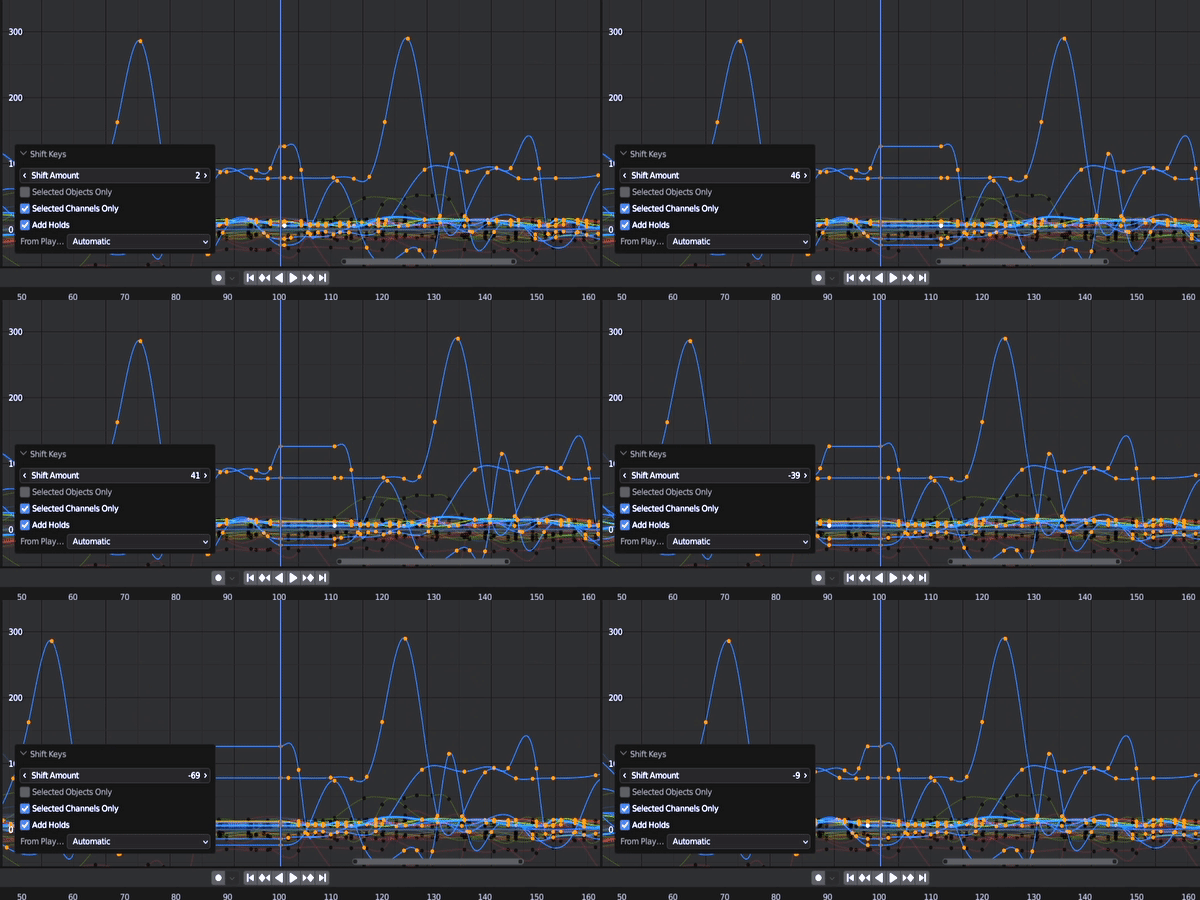
And don’t worry, you can even restrict it to either the objects selected, or even just the fcurves you have selected. It’s very flexible.
To use
Starting RippleShift
First move to the frame where you want to add a pause/stretch.
Either in the Timeline, or the Dope Sheet, or the Graph editor all you have to do is right click for the context menu and select Ripple Shift keys.
By default it shifts everything after the playhead by 25frames.
Adjustments
Then, simply Press F9 (or the post operation window at the bottom left). This will give to the options to change the settings on the fly, and to slide/adjust as you wish.
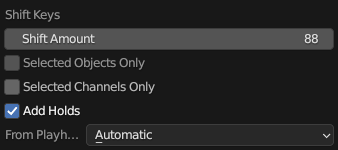
SHIFT Amount:
Drag-sliding the “Shift amount” allows you to move all the frames interactively. Alternatively of course you can type in specific offsets.
Selected Objects only:
Leaves all the other objects untouched, and only affects the animated channels of selected objects.
Selected Channels only:
If you’re in the graph editor, you can select all the Fcurves you want to be affected (even mixing and matching between objects)
Add Holds:
Automatically inserts keyframes matching the current keyframe to effectively pause the animation in the gap.
AUTO / PAST / FUTURE:
This dropdown allows you to limit or control the direction.
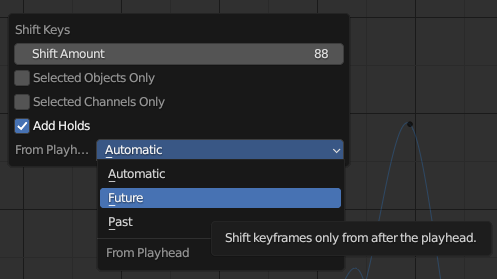
On “Default” it switches direction based on the shift amount (positive or negative). Sometimes however, you may want to pull “Future” frames backwards etc, so the “Future” option only affects keys that originated after the playhead position. “Past” does the same for frame prior to the playhead.
That’s IT! I hope you find a use for the addon – It’s saved me a ton of frustration whenever I’ve used it myself, so I hope many others will too.
Supercharge your 3D creation workflow with premium selection of Blender Add-ons. Whether you are modeling intricate characters, sculpting realistic environments, or animating cinematic sequences, the right add-on can transform how you work inside Blender. Our curated collection includes powerful tools for UV unwrapping, procedural texture generation, rigging automation, rendering optimization, and more—each rigorously tested for compatibility with the latest Blender versions. Eliminate tedious manual processes and unlock advanced functionality that lets you focus on what matters most: bringing your creative vision to life. Explore our full range of professional Blender plugins today and take your 3D projects to the next level.
➡️ ➡️ For more Blender Plugins 😀 😀
Reviews
There are no reviews yet.